Waking the Native Bride: Propagating the Charming Pavetta australiensis
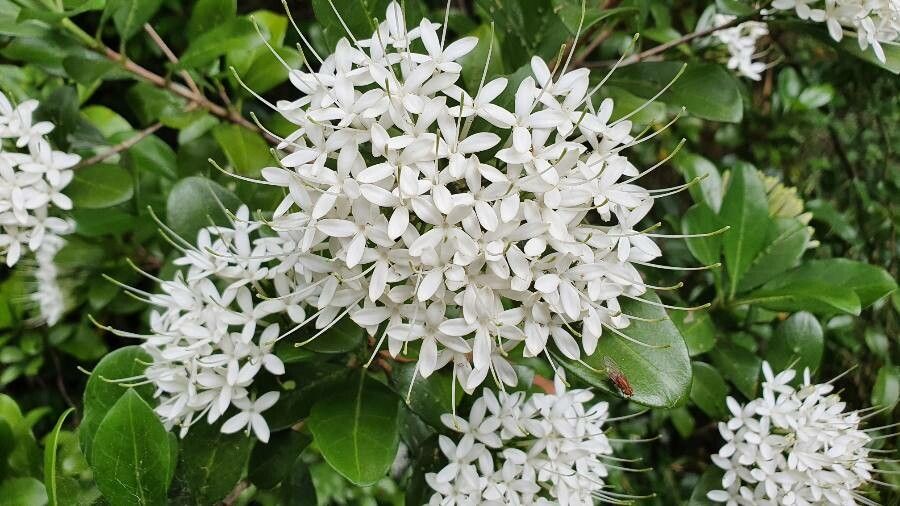
The Australian bush is brimming with hidden gems, and amongst them shines the delicate beauty of Pavetta australiensis, more affectionately known as the Native Bride or Wedding Bush. While admired for its glossy leaves and creamy white, fragrant flower clusters, this evergreen shrub holds even more appeal for the propagation enthusiast. Whether you’re a seasoned gardener or just venturing into the world of plant parenthood, propagating your own Pavetta australiensis is a rewarding endeavor, and we’re here to guide you through it.
Understanding the Plant:
Before diving into propagation, it’s helpful to understand a little about the plant itself. Pavetta australiensis is native to the east coast of Australia, thrives in well-drained soils, and enjoys a sunny to partially shaded position. This adaptable plant can tolerate moderate frost and periods of dryness once established.
Propagation Pathways:
Two main methods yield satisfactory results when propagating Pavetta australiensis:
1. Seed Propagation:
- Timing is Key: Collect ripe fruits in autumn. These resemble small berries and turn black when mature. Extract the seeds promptly, as they have a limited viable lifespan.
- Sowing the Seeds: Sow the seeds directly into a seed raising mix. Cover lightly with mix and keep consistently moist.
- Patience is a Virtue: Germination can be slow and erratic, taking anywhere from a few weeks to several months. Be patient, and don’t be disheartened if not all seeds sprout.
- Transplanting Success: Once seedlings develop a few sets of true leaves, transplant them into individual pots with a well-draining potting mix.
2. Cutting Propagation:
- Choosing the Right Moment: Late spring or early summer is the ideal time for taking cuttings. Select young, healthy stems for the best results.
- Creating the Cuttings: Take semi-hardwood cuttings, approximately 10-15 cm long. Remove the lower leaves and trim the cutting just below a leaf node.
- Encouraging Root Development: Dip the cut end in rooting hormone to stimulate root growth (optional but recommended).
- Planting the Cuttings: Plant the cuttings in a well-draining propagation mix. Keep the mix consistently moist but not waterlogged.
- Creating a Humid Environment: Cover the cuttings with a plastic bag or use a propagation dome to maintain humidity and encourage root development.
- Transplanting Time: After about 6-8 weeks, gently tug on the cuttings to check for root development. If resistance is felt, it’s ready for transplanting into individual pots with a standard potting mix.
Caring for Your New Propagations:
- Watering Wisely: Keep young plants consistently moist but not waterlogged.
- Feeding for Growth: Fertilize regularly during the growing season with a balanced fertilizer to encourage healthy growth.
- Providing Adequate Light: Place your new Pavetta australiensis in a spot that receives bright, indirect sunlight.
Reaping the Rewards:
Propagating your own Pavetta australiensis is a fulfilling experience. Witnessing the journey from seed or cutting to a thriving plant deepens the connection with this stunning species. In time, your propagated plants will reward your efforts with a bountiful display of fragrant blooms, adding a touch of native elegance to your garden.