Unveiling the Secrets of the Milky Bush: Propagating Pavetta opulina
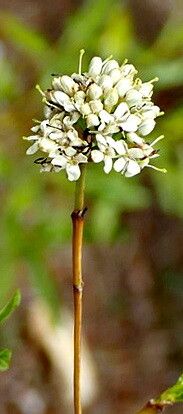
The “Milky Bush,” or Pavetta opulina as it’s scientifically known, is a captivating evergreen shrub with glossy leaves and delicate, star-shaped flowers. It earns its nickname from the milky sap that oozes from any cut or break in its stems or leaves. But beyond its aesthetic charm and intriguing sap, this African native holds another secret: its unique propagation methods.
While growing Pavetta opulina from seed is possible, it can be a slow and challenging process. Luckily, there’s a faster, more reliable alternative: cuttings. This method involves taking a section of a healthy stem and encouraging it to develop roots, essentially creating a clone of the parent plant. Intrigued? Let’s dive into the details.
When to Propagate:
Timing is crucial for successful propagation. The ideal period is during the plant’s active growing season, which typically falls between late spring and early summer. During this time, the plant is brimming with energy, significantly increasing the chances of your cuttings taking root.
Taking the Cuttings:
- Choose Your Weapon: Use a sharp, sterilized pruning shear or knife to ensure a clean cut and minimize the risk of infection to the parent plant and the cutting.
- Select the Perfect Candidate: Look for healthy, non-flowering stems that are approximately 4-6 inches long. The chosen stem should be relatively new growth, identifiable by a lighter green color compared to older branches.
- Make the Cut: Cut just below a leaf node (the point where a leaf emerges from the stem) at a slight angle. Remove the leaves from the bottom third of the cutting to prevent them from rotting in the soil.
Planting the Cuttings:
- Prepare the Rooting Medium: Pavetta opulina thrives in well-draining soil. A mix of equal parts peat moss and perlite provides an ideal environment for root development.
- The Hormone Boost (Optional): While not essential, dipping the cut end of your stem in rooting hormone powder can significantly increase your success rate, encouraging faster and stronger root development.
- Potting Up: Plant the cutting vertically in your prepared rooting medium, ensuring the bottom node (where you removed the leaves) is buried.
- Creating a Humid Haven: Cover the pot with a clear plastic bag or place it inside a humidity dome. This helps to maintain a warm, moist environment, mimicking the conditions needed for optimal root development.
Care and Maintenance:
- Light: Place your cutting in a brightly lit area, but away from direct sunlight, which can scorch the sensitive new growth.
- Moisture: Maintain a consistently moist but not waterlogged rooting medium.
- Patience is Key: It can take several weeks to a couple of months for roots to develop. Avoid disturbing the cutting during this time. You’ll know it’s working when you see new growth emerging from the top.
Transplanting:
Once your Pavetta opulina cutting shows signs of new growth and a well-developed root system, it’s ready for its new home in a larger pot or even outdoors in a suitable climate.
Propagating Pavetta opulina may require a touch of patience, but the reward of successfully growing this unique plant from a simple cutting is well worth the effort. So, grab your gardening gloves, and get ready to unlock the milky secrets of Pavetta opulina!