Blooming Beauties: Mastering Pavonia Strictiflora Propagation
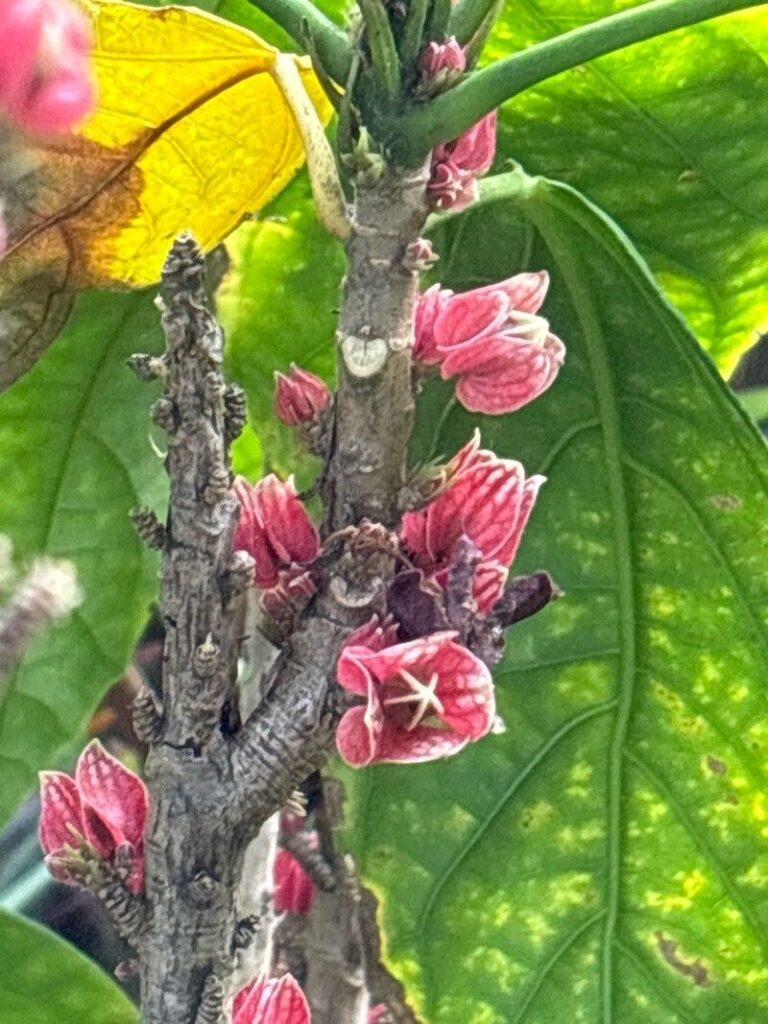
Pavonia strictiflora, with its charming bell-shaped blooms and graceful arching stems, is a delightful addition to any indoor garden. This Brazilian native, also known as the Candle Plant or Brazilian Candles, is surprisingly easy to care for, and propagating it can be a truly rewarding experience. Whether you’re looking to expand your plant family or share the joy with fellow plant enthusiasts, this guide will equip you with the know-how to propagate Pavonia strictiflora successfully.
Understanding the Basics
Before we delve into the methods, let’s cover the essentials. Propagation simply means creating new plants from an existing one. For Pavonia strictiflora, we’ll explore two effective techniques:
- Stem Cuttings: This method involves rooting sections of the parent plant’s stem.
- Seeds: While less common, Pavonia strictiflora can be grown from seeds, offering a unique and sometimes unpredictable journey.
Method 1: Stem Cuttings – Your Guide to Success
-
Timing is Key: The best time to take cuttings is during the plant’s active growing season, ideally in spring or early summer. This ensures the cuttings have the best chance of rooting.
-
Tools of the Trade: Gather a sharp, sterilized pruning shears or knife, a small pot, well-draining potting mix (a mix of peat moss, perlite, and vermiculite works well), and rooting hormone (optional but helpful).
-
Taking the Cutting:
- Select a healthy, non-flowering stem.
- Make a clean cut just below a leaf node (the point where the leaf attaches to the stem).
- Your cutting should be about 4-6 inches long.
- Remove the leaves from the bottom inch or two of the cutting.
-
Encouraging Root Development:
- Dip the cut end of the stem in rooting hormone (optional).
- Make a small hole in your prepared potting mix and gently insert the cutting.
- Water thoroughly.
-
Creating a Humid Environment:
- Cover the pot with a clear plastic bag or use a propagation dome to create a humid environment—this will help prevent the cutting from drying out.
- Place the pot in a bright location but out of direct sunlight.
- Patience is a Virtue:
- Rooting can take anywhere from a few weeks to a couple of months.
- Keep the potting mix consistently moist but not waterlogged.
- Once new growth appears, you’ll know your cutting has successfully rooted!
Method 2: Seeds – Embracing the Element of Surprise
-
Sourcing Seeds: Pavonia strictiflora seeds can be a bit elusive but can sometimes be found online or through specialty retailers.
-
Sowing the Seeds:
- Fill a seed tray or small pots with a well-draining seed starting mix.
- Sow the seeds on the surface of the mix and lightly cover them with a thin layer of the mix.
- Mist the soil with water, being careful not to dislodge the seeds.
-
Warmth and Light: Place the seed tray in a warm, brightly lit location, but out of direct sunlight.
-
Germination: Germination can be erratic and may take several weeks or even months. Be patient and continue to keep the soil consistently moist.
- Transplanting: Once the seedlings are large enough to handle, carefully transplant them into individual pots filled with well-draining potting mix.
Caring for Your New Additions:
Once your new Pavonia strictiflora plants are established, provide them with bright, indirect light, and water them when the top inch of soil feels dry. Feed them every few weeks during the growing season with a balanced liquid fertilizer to keep them thriving.
Propagating Pavonia strictiflora might require a touch of patience, but the reward of nurturing new life into your home is well worth the effort. With these tips and a sprinkle of plant-parent love, you’ll be enjoying the beauty of these charming blooms for years to come!