Unlocking the Secrets of Perralderia coronopifolia: A Guide to Successful Propagation
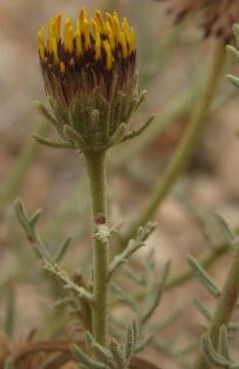
Perralderia coronopifolia, with its unique foliage and delicate, daisy-like flowers, is a captivating plant that can add a touch of whimsy to any garden. But have you ever considered growing your own Perralderia coronopifolia from scratch? The answer lies in the art of propagation.
This blog post will guide you through the various methods of propagating Perralderia coronopifolia, ensuring success and a bountiful garden filled with these charming plants.
The Power of Seeds:
For those willing to wait, starting Perralderia coronopifolia from seeds is a rewarding experience.
- Step 1: Gathering Seeds: Collect seeds from mature flower heads after they have dried completely.
- Step 2: Sowing the Seeds: Sow seeds in a seed tray filled with a light, well-draining seed-starting mix. Cover the seeds lightly with soil and water gently.
- Step 3: Patience is Key: Germination can take anywhere from 2-4 weeks, so patience is key. Keep the soil moist but not soggy.
- Step 4: Transplanting Time: Once seedlings have developed two sets of true leaves, gently transplant them into individual pots to encourage healthy root growth.
The Ease of Cuttings:
For a quicker and more efficient propagation method, consider taking stem cuttings.
- Step 1: Choose the Right Cuttings: Select healthy, non-flowering stems from your Perralderia coronopifolia plant. Cuttings about 4-6 inches long are ideal.
- Step 2: Prepare the Cuttings: Remove the leaves from the lower inch of the stem and trim the cut at an angle.
- Step 3: Root Hormone Advantage: Dip the cut end of the stem in rooting hormone powder to encourage root growth.
- Step 4: Potting up: Plant the cuttings in a pot filled with a well-draining potting mix. Water well and place the pot in a shady, humid location.
- Step 5: Root Development: Keep the soil moist and the cuttings should start rooting within a few weeks.
Division – A Multiplicative Miracle:
For established Perralderia coronopifolia plants, division is an excellent way to increase your collection.
- Step 1: Timing is Key: Divide your plant in early spring or late summer, when growth is active.
- Step 2: Getting Started: Gently dig around the base of your Perralderia coronopifolia plant and carefully separate the clumps into smaller divisions, making sure each division has its own root system.
- Step 3: Replanting with Care: Replant the divisions in a well-prepared bed or pot, ensuring they are spaced appropriately for optimal growth. Water thoroughly after planting.
Propagation Tips for Success:
- Optimum environment: Provide your Perralderia coronopifolia a well-drained soil mix and a sunny location for optimal growth.
- Regular watering: Keep the soil consistently moist, especially during the first few weeks after planting or propagation.
- Protection from Pests: Watch out for pests like aphids and mealybugs. Maintain healthy conditions to prevent infestations.
Conclusion:
Propagating Perralderia coronopifolia through seeds, cuttings, or division is not only a fulfilling gardening experience but also an effective way to expand your collection of this beautiful and unique plant. By following these simple tips and techniques, you can easily grow your own Perralderia coronopifolia and enjoy its charm in your garden for years to come. So get your hands dirty and start your propagation journey today!