Unlocking the Secrets: How to Propagate the Antlered Beauty, Phalaenopsis cornu-cervi
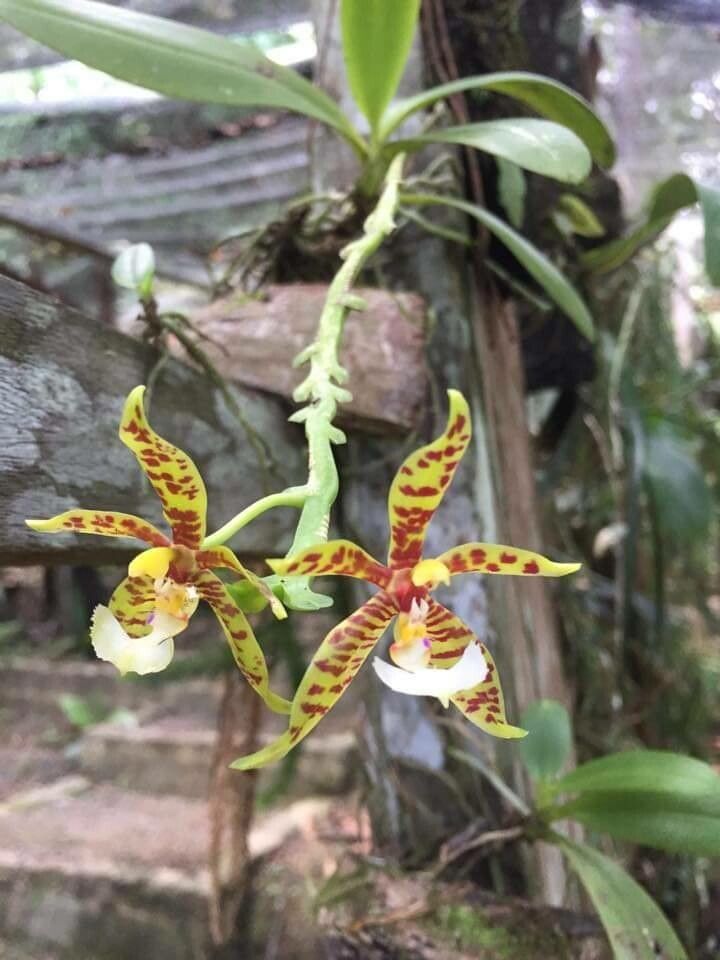
The Phalaenopsis cornu-cervi, affectionately known as the “Antler Orchid” thanks to its uniquely shaped, antler-like blooms, is a sight to behold. Native to Southeast Asia, this epiphytic orchid charms with its cascading flowers that range from vibrant yellow to a captivating reddish-brown. While caring for a mature plant is rewarding in itself, there’s a certain satisfaction in propagating it and witnessing the birth of new life.
While propagating Phalaenopsis cornu-cervi may seem daunting, it’s an achievable feat with the right knowledge and a dash of patience. Unlike some orchids that propagate through keikis (baby plants), the cornu-cervi primarily reproduces through seed propagation or, less commonly, division.
1. Seed Propagation: A Labor of Love
Propagating orchids from seed requires a sterile environment and a bit more technical know-how. Here’s a glimpse into the process:
- Obtaining Seeds: You’ll likely need to purchase seeds from a reputable supplier as collecting them yourself can be challenging.
- Sowing the Seeds: Orchid seeds are dust-like and require a specialized nutrient-rich agar medium to germinate.
- Sterilization: Maintaining sterility is crucial to prevent fungal or bacterial contamination. This involves sterilizing tools, flasks, and the agar medium itself.
- Patience is Key: Seed germination can take several months, and it might be a year or two before you see a small plant.
2. Division: The Easier Route
Dividing a mature, healthy Phalaenopsis cornu-cervi is a more accessible method for home growers. However, it’s crucial to divide responsibly to minimize stress on the plant. Here’s how:
- Timing is Everything: Divide during the plant’s active growing season, ideally in spring or early summer.
- Healthy Candidates Only: Choose a plant that’s robust and has at least 6 healthy pseudobulbs (the thickened stem segments).
- The Division Process: Carefully remove the plant from its pot and gently disentangle the roots. Identify natural division points where pseudobulbs are connected, ensuring each division has at least 3 pseudobulbs and healthy roots.
- Potting the Divisions: Plant each division in a well-draining orchid mix, ensuring the base of the pseudobulbs is level with the potting medium’s surface.
Post-Propagation Care
Whether you choose seed propagation or division, providing the right care is crucial for success:
- Light: Bright, indirect light is ideal. Avoid direct sunlight, which can scorch the leaves.
- Water: Water thoroughly when the potting mix approaches dryness. Don’t let the plant sit in water.
- Humidity: Aim for humidity levels between 50-70%. Use a pebble tray or humidifier if necessary.
- Fertilizer: Use a diluted orchid fertilizer every other week during the growing season.
Propagating your Phalaenopsis cornu-cervi might require some effort, but the reward of nurturing new life and expanding your orchid collection makes it a truly fulfilling endeavor. With patience, the right knowledge, and a touch of dedication, you can witness the magic of these antlered beauties unfold right before your eyes.