Unleash the Magic of the Chilean Lily: A Guide to Propagating Philesia magellanica
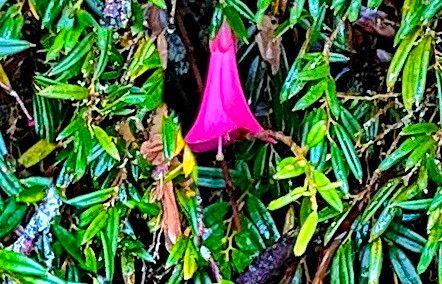
The Chilean Lily, scientifically known as Philesia magellanica, is a captivating plant that brings a touch of exotic beauty to any garden. Its vibrant red, bell-shaped flowers, reminiscent of lilies, are a sight to behold, and the plant’s evergreen leaves add year-round interest. But did you know you can easily share this beauty with others or expand your own collection by propagating your Chilean Lily?
This article will delve into the fascinating world of propagating Philesia magellanica, offering a comprehensive guide for both beginners and experienced gardeners.
Understanding the Basics of Propagation
Propagation refers to the process of creating new plants from existing ones. For Philesia magellanica, the two most common and reliable methods are seed propagation and division.
1. Seed Propagation: A Journey from Seed to Flower
- Harvesting Seeds: The first step is to collect seeds from mature fruit capsules. These usually turn reddish-brown and contain small, black seeds. Carefully extract the seeds and allow them to dry thoroughly.
- Sowing the Seeds: Fill shallow trays with a well-draining seed-starting mix. Lightly press the seeds into the soil and cover them with a thin layer of vermiculite. Mist the soil with water and cover the tray with a clear plastic dome or film to maintain humidity.
- Germination and Care: Place the trays in a bright, indirect location, maintaining a temperature of around 65-75°F. Germination can take 2-3 weeks, but be patient, as some seeds may take longer. Once seedlings have emerged, gradually acclimate them to brighter light. Keep the soil consistently moist but not waterlogged.
- Transplanting: After a few months, once the seedlings have developed a few true leaves, you can carefully transplant them into individual pots filled with a well-draining potting mix.
2. Division: A Quicker Route to New Plants
- When to Divide: The best time to divide Philesia magellanica is in spring or early summer after the plant has finished flowering.
- Preparing for Division: Choose a healthy, established plant with multiple stems. Using a sharp, clean knife or spade, carefully separate the plant, ensuring each division has its own healthy root system and several stems.
- Planting the Divisions: Plant each division in a pot or in the garden with well-draining soil. Water thoroughly and provide indirect light for a few weeks until the plants establish themselves.
Tips for Success: A Few Secrets
- Soil Choice: Philesia magellanica thrives in well-draining, acidic soil. Use a potting mix specifically designed for acid-loving plants or amend the soil with peat moss.
- Light Needs: While Philesia magellanica tolerates partial shade, it prefers a sunny location with at least 4-5 hours of direct sunlight each day.
- Watering: Keep the soil evenly moist, especially during the first few weeks after planting. Allow the top inch of soil to dry between waterings to prevent root rot.
Embrace the Joy of Propagation
Propagating Philesia magellanica is a rewarding experience that allows you to share the plant’s unique beauty with friends, family, or simply expand your own gardening collection. Whether you choose the patient method of seed propagation or the quicker route of division, remember to provide your new plants with the right care and they will flourish, bringing a touch of Chilean magic to your garden.