Taming the Kurdish Sage: A Practical Guide to Propagating Phlomis kurdica
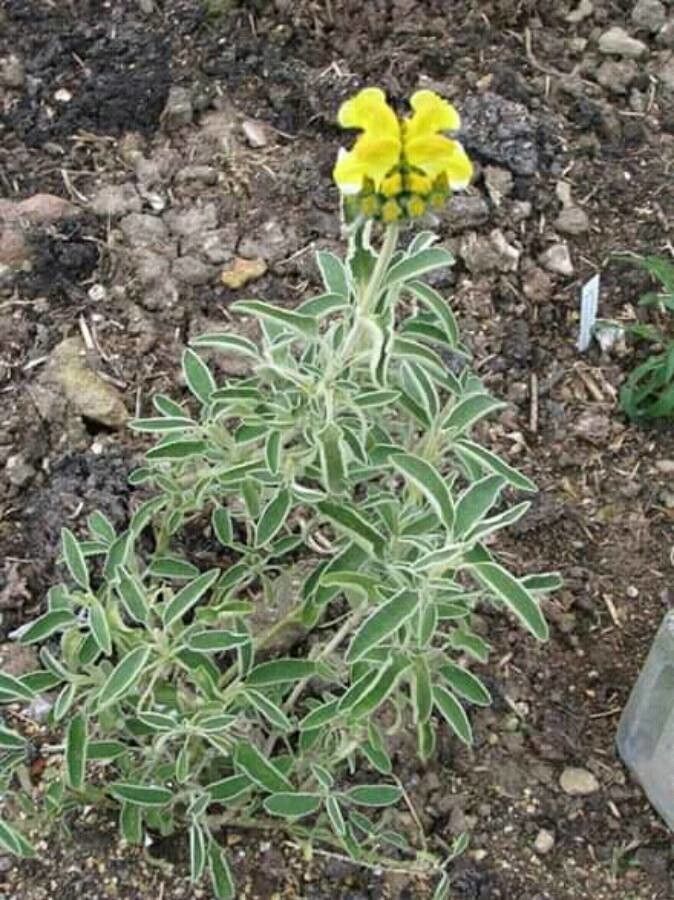
Phlomis kurdica, or Kurdish Sage as it’s more affectionately known, is a captivating perennial boasting architectural beauty and pollinator-pleasing blooms. Native to the mountains of Turkey and Iran, this sun-loving plant forms a statuesque clump of silvery-green foliage, later adorned with whorls of hooded, yellow flowers – a sight that would leave any gardener yearning for more. If, like me, you’ve fallen for its charms, you’re in luck! Propagating Phlomis kurdica, while not as common as for other perennials, is entirely achievable through different methods. Let’s delve into the secrets of expanding your Kurdish Sage collection.
Method 1: Seed Starting – Embracing the Element of Surprise
While not the fastest route, growing Phlomis kurdica from seed offers a rewarding experience and the potential for unique variations.
Timing is Key: Spring, after the threat of frost has passed, is ideal.
Sowing the Seeds:
- Prepare the Potting Mix: Use a well-draining seed starting mix and moisten it evenly.
- Sow the Seeds: Scatter them on the surface, pressing them in lightly. Phlomis seeds need light to germinate.
- Cover and Patience: Cover the pot with a humidity dome or plastic wrap to retain moisture. Place it in a warm, bright spot, out of direct sunlight. Germination can be slow, ranging from a few weeks to a couple of months.
- Transplantation: Once seedlings develop a couple of true leaves, transplant them into individual pots and gradually acclimate them to outdoor conditions before planting in the garden.
Method 2: Basal Cuttings – Clones of Contentment
For a guaranteed replica of your existing plant, basal cuttings are the way to go. This method takes advantage of new shoots emerging directly from the plant’s base.
The Right Time: Spring, when new growth is vigorous, is optimal.
The Cutting Edge:
- Select and Snip: Identify healthy new shoots at the base. Using clean, sharp shears, take a cutting about 3-4 inches long, making the cut just above the point where the shoot joins the main stem.
- Prepare the Cutting: Remove the lower leaves, leaving only a couple at the top. Dip the cut end in rooting hormone (optional but helpful).
- Potting Up: Plant the cutting in a well-draining potting mix, burying the leaf nodes.
- Encouraging Roots: Water well and cover the pot with a plastic bag or humidity dome to maintain moisture. Place in a bright spot, out of direct sun.
- Testing for Success: In a few weeks, gently tug on the cutting. Resistance indicates rooting!
Method 3: Division – Sharing the Bounty
Dividing established Phlomis kurdica clumps offers a twofold benefit: propagation and maintaining the plant’s health.
The Right Time: Spring or early Fall, when the plant is not in active growth, is ideal.
The Division Process:
- Prepare the New Home: Amend the soil with compost and ensure good drainage.
- Gentle Extraction: Carefully dig up the entire clump, loosening the soil around the roots.
- Separation Anxiety? None Needed! Using a sharp knife or spade, divide the plant into sections, ensuring each division has a good portion of roots and shoots.
- Replanting: Place the divisions in their new homes, making sure the crown is level with the soil surface. Water well.
Cultivating Success
Whichever method you choose, providing the right growing conditions is crucial. Phlomis kurdica flourishes in full sun and well-draining soil. Once established, it’s reasonably drought-tolerant and low-maintenance.
With a little patience and the right techniques, you can fill your garden with the majestic beauty of Phlomis kurdica, creating a haven for pollinators and a sight to behold for years to come.