Unlocking the Secrets of Polystichum prescottianum Propagation: A Fern Fanatic’s Guide
Polystichum prescottianum, with its delicately divided fronds and graceful arching habit, brings a touch of woodland magic to any shade garden. Once you’ve welcomed this elegant fern into your life, it’s only natural to want to multiply your leafy treasures. While propagating ferns might seem like a task for seasoned botanists, fear not! This guide will demystify the process and empower you to successfully grow new Polystichum prescottianum plants.
The Spore Route: A Rewarding Challenge
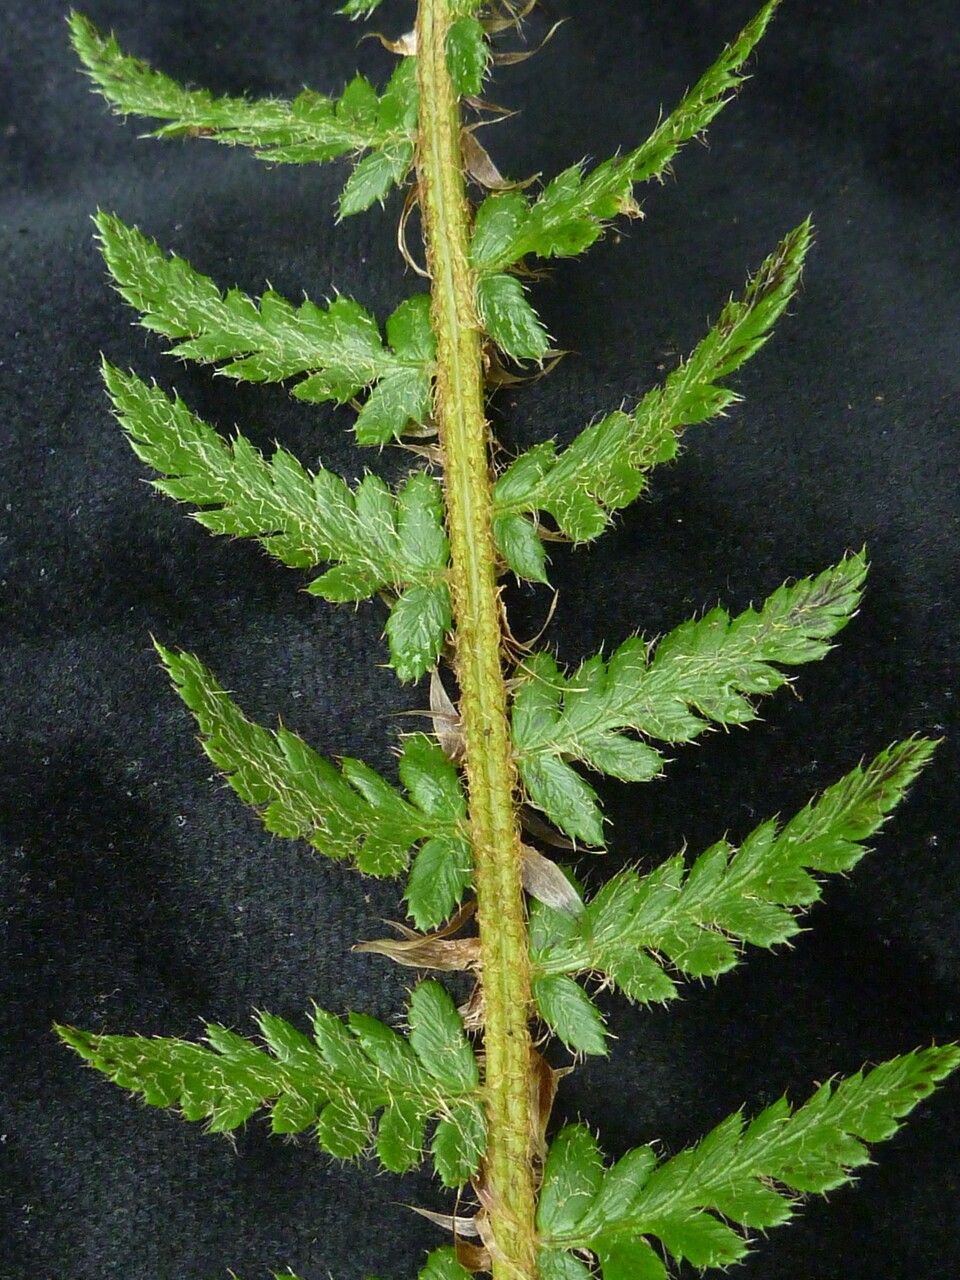
In their natural habitat, ferns reproduce through tiny, dust-like spores found on the underside of their fronds. While this method requires patience and a delicate touch, it offers a fascinating glimpse into the fern’s life cycle and can yield a satisfying abundance of new plants.
Here’s what you’ll need:
- Mature Polystichum prescottianum Fronds: Look for fronds with dark, mature spores, usually brownish in color.
- Sterile Growing Medium: Peat moss or a seed starting mix designed for ferns work well.
- Shallow Trays or Pots
- Humidity Dome or Plastic Wrap
- Patience: Spore propagation can take several months.
Step-by-Step Guide:
- Spore Collection: Carefully cut a frond with mature spores and place it in a paper bag to dry for a few days. The spores will naturally release from the frond.
- Sowing: Sprinkle the spores thinly over the surface of your moistened growing medium. Do not bury them.
- Creating a Humid Environment: Cover the tray with a humidity dome or plastic wrap to maintain high humidity, essential for spore germination.
- Light and Warmth: Place the tray in a bright location out of direct sunlight. Maintain a temperature of around 70-75°F (21-24°C).
- Germination: Be patient! It can take anywhere from a few weeks to a couple of months for the spores to germinate. You’ll first notice a green film resembling moss, which will eventually develop into tiny fern structures called prothalli.
- Transplanting: Once the prothalli develop small fronds, you can carefully separate and transplant them into individual pots.
Division: A Quicker Path to New Ferns
For a faster and less intricate method, consider dividing established Polystichum prescottianum plants. This method is best done in early spring or fall.
Here’s how to divide your fern:
- Prepare the New Pots: Choose pots slightly larger than the divisions you’ll be creating.
- Carefully Lift the Plant: Gently remove the fern from its pot and shake off excess soil to expose the root system.
- Divide the Rhizome: Using a sharp, clean knife or gardening shears, divide the rhizome (the fern’s underground stem) into sections, ensuring each section has a good amount of roots and fronds.
- Potting the Divisions: Plant each division in its own pot, ensuring the crown (where the fronds emerge) is level with the soil surface.
- Water and Care: Water thoroughly and provide the same light and humidity conditions as the parent plant.
Tips for Success:
- Sterilize your tools: Before handling spores or dividing plants, sterilize all your tools with rubbing alcohol to prevent the spread of diseases.
- Be patient and observant: Propagation takes time. Be patient, observe your plants closely, and adjust care as needed.
Propagating your Polystichum prescottianum is a rewarding way to expand your fern collection and deepen your appreciation for these ancient and fascinating plants. So, embrace the journey, experiment with different methods, and enjoy the satisfaction of nurturing new life from spores or divisions. Your dedication will be rewarded with a thriving collection of these enchanting ferns, bringing lasting beauty to your garden haven.