Paint the Town Red (With Flowers!): Propagating Your Own Pomaria rubicunda
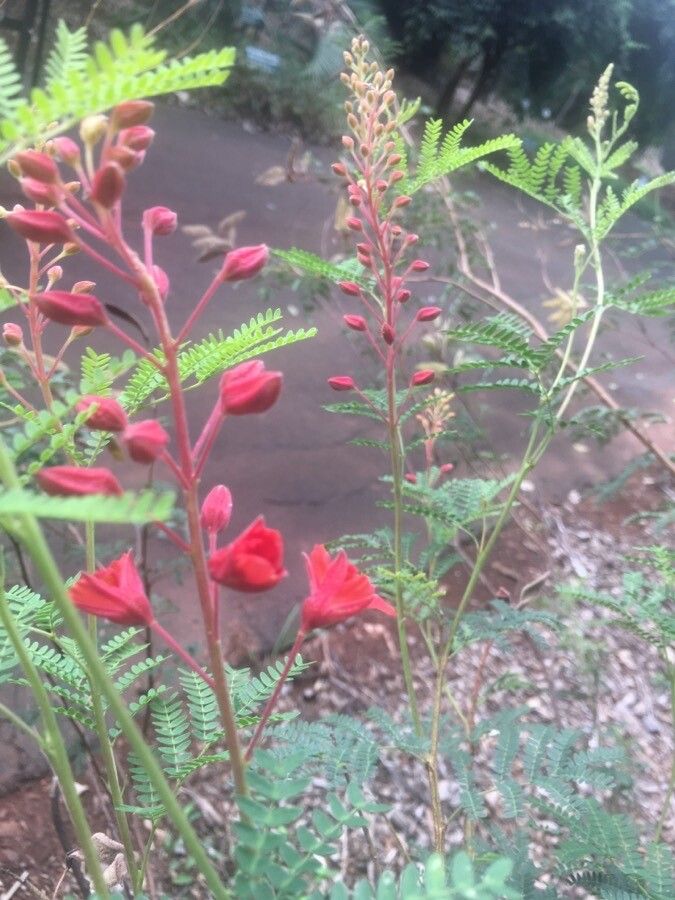
Looking to add a splash of vibrant color and pollinator-friendly blossoms to your garden? Look no further than the Pomaria rubicunda, also known as the Apache Plume or Desert Bird of Paradise. This stunning shrub, native to the southwestern United States and Mexico, flaunts feathery, smoke-like plumes of bright reddish-pink flowers from spring to fall, attracting hummingbirds and butterflies like beacons.
Luckily, sharing the beauty of Pomaria rubicunda with friends and expanding your own collection is surprisingly easy through propagation. So, put on your gardening gloves, and let’s delve into the world of multiplying these crimson delights!
Two Paths to Propagation:
Pomaria rubicunda can be propagated through two main methods, each with its own advantages:
Seed Propagation: For adventurous gardeners who enjoy the element of surprise and want to grow in bulk, seed propagation is the way to go.
- Gather Your Gear: Collect ripe seed pods from an existing Pomaria rubicunda in late summer or fall. Allow the pods to dry thoroughly before cracking them open to reveal the small, brown seeds.
- Prepare for Success: Sow the seeds in a seedling tray filled with a well-draining seed starting mix. Lightly cover the seeds and mist the soil, ensuring it remains evenly moist.
- Patience is Key: Seed germination can take anywhere from a few weeks to a couple of months. Be patient and keep the soil consistently moist but not soggy.
- Time to Transplant: Once the seedlings develop a strong root system and several sets of true leaves, transplant them into individual pots or directly into your garden after the last frost.
Cutting Propagation: This method offers a higher success rate and yields plants that are genetically identical to the parent plant.
- Choose Wisely: In the spring or early summer, select healthy, non-flowering stems from a mature Pomaria rubicunda. Look for stems that are about 4-6 inches long and have several nodes.
- The Cutting Edge: Using a sharp, sterilized knife or pruning shears, make a clean cut just below a node. Remove any leaves from the bottom two inches of the cutting.
- Rooting Hormone Boost: While optional, dipping the cut end in rooting hormone powder can significantly increase your chances of success.
- Potting Perfection: Plant the cuttings in a well-draining potting mix, burying at least one node below the surface. Water thoroughly.
- Humidity is Key: To create a humid environment, cover the pot with a clear plastic bag or use a propagation dome. This helps retain moisture and promotes root development.
- Root Check: After a few weeks, gently tug on the cuttings to check for resistance. This indicates that roots have developed. Once the roots are established, you can transplant your new Pomaria rubicunda plants.
Tips for Success:
- Sunny Disposition: Pomaria rubicunda thrives in full sun, so ensure your propagation area receives at least 6 hours of direct sunlight each day.
- Well-Drained Bliss: These plants prefer well-drained soil. If your native soil is heavy clay, amend it with perlite or sand to improve drainage.
- Water Wisely: While Pomaria rubicunda is relatively drought-tolerant once established, it’s crucial to keep the soil consistently moist during propagation. However, avoid overwatering, which can lead to root rot.
Propagating Pomaria rubicunda is a rewarding experience that allows you to expand your garden with these stunning, low-maintenance shrubs. So go forth, propagate, and enjoy the fiery blossoms of your new Pomaria rubicunda!