Unlocking the Secrets of the Burning Bush: Propagating Pseudodictamnus acetabulosus
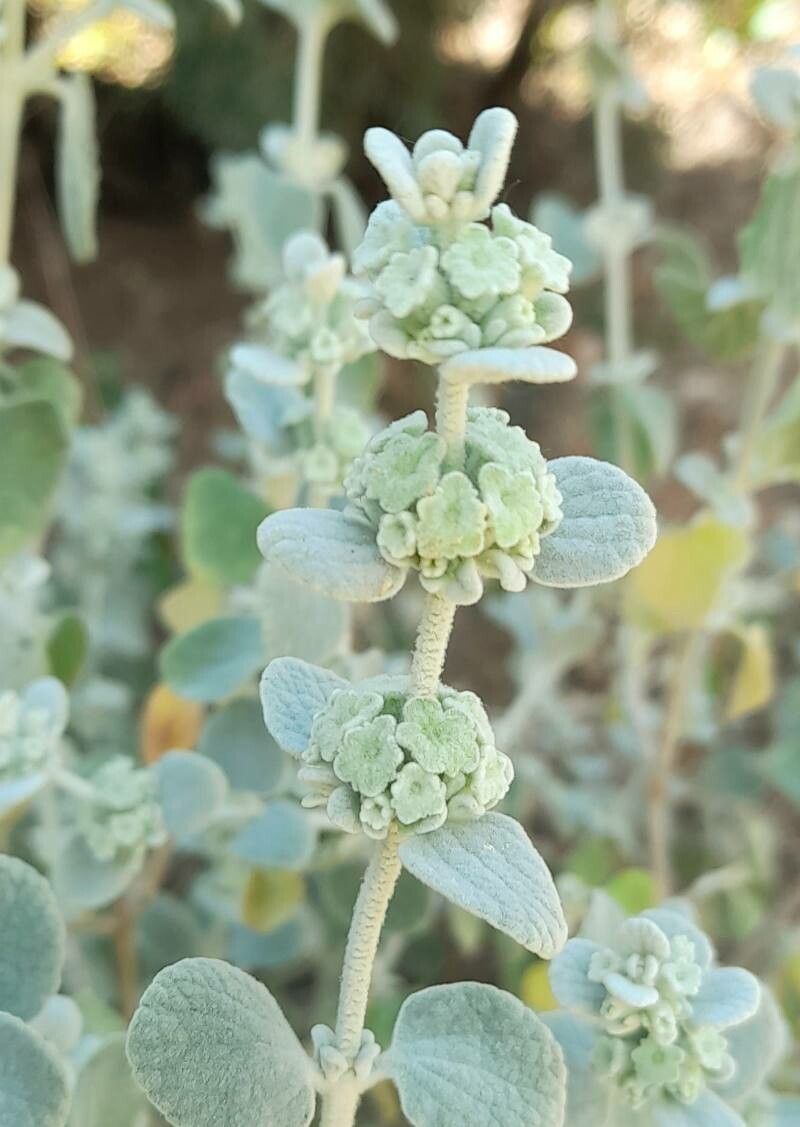
The “Burning Bush,” also known as Pseudodictamnus acetabulosus, is a captivating Mediterranean plant prized for its attractive foliage, delicate flowers, and unique aroma. This drought-tolerant, sun-loving perennial adds a touch of exotic beauty to any garden, but how do you go about adding more of these stunning plants to your collection? This guide delves into the secrets of propagating Pseudodictamnus acetabulosus so you can enjoy its charm for years to come.
Method 1: Seed Propagation
- Collecting Seeds: After the charming pink flowers fade in late summer, they develop into small, intriguing seed capsules. These papery capsules eventually dry and split open, revealing shiny, black seeds. Collect the seeds once the capsules begin to open, ensuring they are fully mature.
- Sowing: Patience is key with Pseudodictamnus acetabulosus seeds. They require a period of cold stratification to mimic natural winter conditions and break their dormancy. In late autumn or early winter, sow the seeds in a well-draining seed starting mix, covering them lightly with vermiculite or fine grit. Alternatively, you can cold stratify them by placing the seed tray in a refrigerator (around 40°F) for 4-6 weeks.
- Germination: After stratification, place the seed tray in a bright location, but out of direct sunlight. Maintain a temperature of around 65-70°F. Germination can be erratic and slow, taking anywhere from a few weeks to a few months.
- Transplanting: Once seedlings develop a couple of true leaves, carefully transplant them into individual pots filled with a well-draining potting mix. Gradually acclimate them to outdoor conditions before planting them in their permanent location in the garden.
Method 2: Basal Cuttings
For a faster and potentially more reliable method, consider propagating Pseudodictamnus acetabulosus through basal cuttings:
- Timing: Early spring, just as new growth emerges, is the optimal time to take basal cuttings.
- Taking the Cuttings: Using a sharp, clean knife or pruner, carefully remove a section of new growth from the base of the plant. These cuttings should be around 3-4 inches long and taken from healthy, disease-free stems.
- Preparing the Cuttings: Remove the lower leaves from the cutting, leaving only a few at the top. You can dip the cut end in rooting hormone powder to encourage faster root development, though it is not strictly necessary.
- Planting and Care: Plant the prepared cuttings in a well-draining potting mix, burying a node or two beneath the surface. Water well and place the pots in a warm, bright location out of direct sunlight. Maintaining a humid environment can be beneficial. Cover the pots with a clear plastic bag or humidity dome to increase humidity levels.
- Rooting and Transplanting: After 4-6 weeks, gently tug on the cuttings to check for root development. Once roots have formed, you can transplant them into individual pots or directly into your garden, ensuring they are spaced adequately apart.
Tips for Success:
- Well-draining soil: Pseudodictamnus acetabulosus is highly susceptible to root rot, so ensure excellent drainage in both seed starting mix and your garden soil.
- Patience is key: Whether you choose seed propagation or basal cuttings, remember that Pseudodictamnus acetabulosus can be slow to establish. Don’t be discouraged if it takes time for them to take root and grow.
- Protect from pests: While relatively pest-resistant, keep an eye out for common garden pests like aphids and spider mites, especially on young plants.
By following these guidelines and with a little patience, you can successfully propagate Pseudodictamnus acetabulosus and enjoy the captivating beauty of this unique and rewarding plant for many years to come.