From One Stonecrop to Many: Propagating Sedum Compactum for a Lush Garden
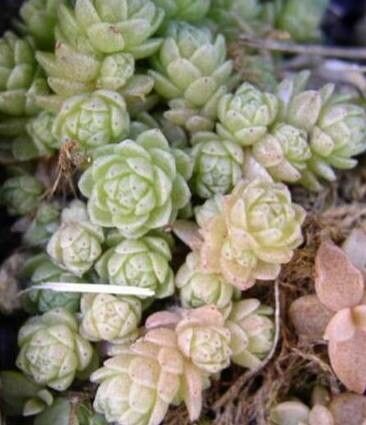
Sedum compactum, also known as “stonecrop,” is a delightful succulent with charming, compact, and low-growing rosettes of fleshy leaves. Its beautiful foliage, adorned with shades of green, blue, and even purple, can transform any rock garden or container into a miniature landscape. But did you know that propagating this stunning plant is incredibly easy?
This post is your guide to getting the most out of your Sedum compactum and creating a flourishing garden oasis. We’ll unveil the secrets to successful propagation, enabling you to multiply your plants and share them with friends, or simply expand your own little patch of green.
Understanding the Process
Sedum compactum is an ideal candidate for propagation through several methods:
- Leaf Cuttings: This involves detaching individual leaves and coaxing them to produce new roots. It’s a simple and effective way to start new plants from existing ones.
- Stem Cuttings: This technique utilizes portions of the stems, which are carefully cut and placed in a suitable medium for root development.
Preparation is Key
Before embarking on propagation, ensure you have all the necessary tools and supplies:
- Sharp, clean knife or scissors: These tools prevent damage and disease transmission.
- Potting mix: Select a well-draining mix designed for succulents or cacti.
- Containers: Choose containers with drainage holes to prevent waterlogging.
- Optional rooting hormone: This is not essential, but it can be helpful for promoting root growth.
Leaf Cuttings: A Simple Approach
- Select healthy leaves: Choose leaves that are free of pests and diseases and have a healthy, vibrant color.
- Detach the leaves: Gently twist the leaves at their base so they detach cleanly from the stem.
- Prepare the environment: Fill your chosen containers with the succulent potting mix, leaving a little space at the top to prevent overwatering.
- Place the leaves: Lay the detached leaves on top of the potting mix, ensuring the base of the leaf is in contact with the soil.
- Moistening the soil: Gently mist the soil, ensuring not to overwater the leaves themselves.
Stem Cuttings: A Little More Involved
- Select healthy stems: Choose stems with at least a few nodes, small bumps on the stems where leaves grow.
- Cut the stems: Use a sharp knife or scissors to make clean, angled cuts above the nodes.
- Prepare the cuttings: Remove the lowermost leaves from each stem cutting.
- Apply rooting hormone (optional): If using rooting hormone, dip the cut ends of the stems into the powder.
- Plant the cuttings: Insert the stem cuttings into the potting mix, ensuring the nodes are buried in the soil.
- Water: Water the cuttings thoroughly.
Patience is a Virtue
Once your cuttings are planted, maintain an environment that encourages root development. Keep the potting mix slightly moist but avoid overwatering. Place the containers in a well-lit area out of direct sunlight.
With care and patience, you’ll witness the magic of propagation. New leaves will emerge from the stem and leaf cuttings, signifying the growth of new roots.
Don’t Be Afraid to Experiment
You can also try different techniques like layering or division with Sedum compactum. Explore the diverse methods and see what works best for you.
The joy of propagating is not only in creating new life, but also in sharing the beauty of Sedum compactum with others. Pass on your knowledge and a few cuttings, and you’ll see gardens blossom with joy, one stonecrop at a time.