Sida hackettiana
Unlocking the Secrets of Sida hackettiana Propagation: Tips for Growing More of This Stunning Shrub
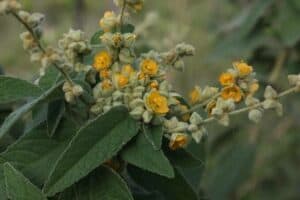
Sida hackettiana, with its elegant, arching branches and delicate white flowers, can be a show-stopping addition to any garden. Native to Australia, this resilient shrub, also known as Hackett’s Sida or Flannel Weed (though don’t let the latter name deter you!), thrives in sunny spots and adds a touch of understated beauty to landscapes.
If you’re smitten with Sida hackettiana and eager to propagate it, you’re in luck! This plant is surprisingly easy to multiply, allowing you to fill your own garden or share its beauty with friends.
Here’s a closer look at the two most effective methods for propagating Sida hackettiana:
1. Propagating from Seed:
- Timing is key: The optimal time for sowing Sida hackettiana seeds is during the warmer months, ideally in spring or early summer.
- Preparing the seeds: While not essential, cold-stratifying the seeds for a few weeks in the refrigerator can encourage quicker and more uniform germination. To do this, place the seeds in a damp paper towel, seal them in a plastic bag, and store them in your refrigerator’s crisper drawer.
- Sowing the seeds: Use a well-draining seed-starting mix and sprinkle the seeds on the surface. Lightly press them into the mix, but avoid burying them too deeply.
- Nurturing the seedlings: Place the seed tray in a warm, sunny location and keep the soil consistently moist but not waterlogged. With proper care, you should start to see seedlings emerge in 2-4 weeks.
- Transplanting: Once the seedlings have developed a couple of sets of true leaves, they are strong enough to be transplanted into individual pots or directly into your garden. Choose a location with full sun to partial shade and well-drained soil.
2. Propagating from Cuttings:
- The perfect time: Taking cuttings is best done in the spring or early summer from new growth. This tender, fresh growth tends to root more easily.
- Selecting your cuttings: Look for healthy stems that are approximately 4-6 inches long. Using clean, sharp pruning shears, make your cuts just below a leaf node.
- Preparing the cuttings: Remove the lower leaves from the cutting, leaving only 2-3 leaves at the top. This encourages the plant to focus its energy on root development.
- Encouraging root development: You can dip the cut end in rooting hormone powder (though not strictly necessary) to give your cuttings an extra boost.
- Planting the cuttings: Insert the cuttings into a pot filled with a well-draining potting mix or a 50/50 mix of peat moss and perlite. Water thoroughly.
- Providing a humid environment: To improve the success rate of your cuttings, create a humid environment around them. You can achieve this by covering the pot with a clear plastic bag or using a propagation dome.
- Signs of success: Within a few weeks, you should start to see new growth, indicating that your cuttings have successfully rooted. At this point, you can begin to gradually acclimate them to regular humidity levels before transplanting them to their permanent location.
Caring for your new Sida hackettiana plants:
Once your Sida hackettiana plants are established, they are relatively low-maintenance. They tolerate a variety of soil conditions but prefer well-drained soil. While they are relatively drought-tolerant once established, regular watering during their first year will encourage strong root development.
By following these simple propagation techniques, you can easily increase your stock of Sida hackettiana and enjoy its graceful beauty in your own backyard for years to come!