Unlocking the Secrets of Sweet Sarsaparilla: A Guide to Propagating Smilax glyciphylla
Sweet sarsaparilla, also known as Smilax glyciphylla, is a fascinating climber native to Australia. This versatile plant boasts beautiful foliage, edible berries, and a rich history of medicinal use by Indigenous Australians. If you’re looking to welcome this unique plant into your garden, understanding its propagation is key. While it might seem a bit tricky at first, this guide will equip you with the knowledge to successfully grow sweet sarsaparilla.
Two Paths to Propagation:
Sweet sarsaparilla can be propagated through two main methods:
Seed Propagation: This method requires patience, as Smilax glyciphylla seeds are known for their irregular germination rates and can take anywhere from a few months to a year to sprout. Here’s how to increase your chances of success:
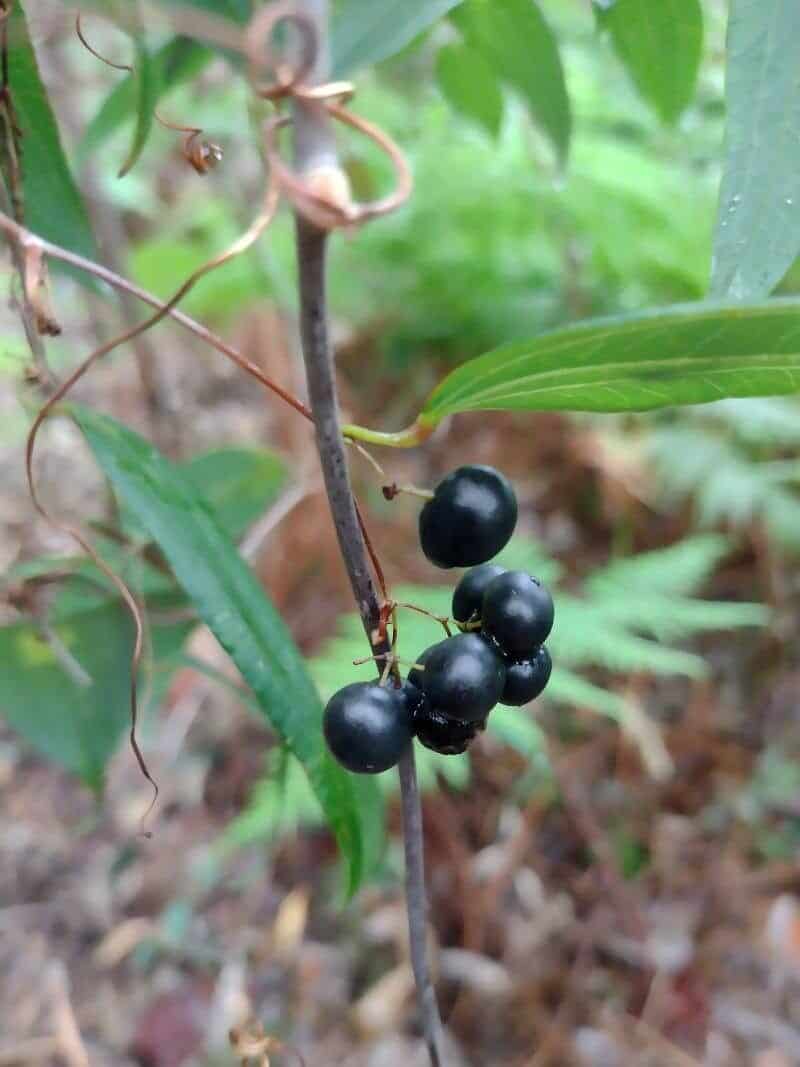
- Harvesting Seeds: Collect ripe berries from a healthy plant during the summer months. Remove the fleshy pulp and allow the seeds to dry thoroughly.
- Breaking Dormancy: Smilax glyciphylla seeds have a hard outer coating that can inhibit germination. To overcome this, employ one of these techniques:
- Scarification: Gently rub the seed coat with sandpaper or a file to create a small nick.
- Cold Stratification: Place the seeds in a moist paper towel within a sealed plastic bag and store them in the refrigerator for 2-3 months.
- Sowing: Sow the treated seeds in a well-draining seed raising mix, covering them lightly with soil. Keep the mix consistently moist and place the tray in a warm, bright location, out of direct sunlight.
Cutting Propagation: This method offers a faster route to establishing your own sweet sarsaparilla plant. Here’s a step-by-step approach:
- Taking Cuttings: In spring or early summer, take semi-hardwood cuttings from healthy stems. Ideally, each cutting should be around 10-15cm long and have a few nodes.
- Preparing the Cuttings: Remove the leaves from the lower half of each cutting. Dip the cut end in rooting hormone powder to encourage root development.
- Planting and Care: Plant the cuttings in a pot filled with a well-draining potting mix. Keep the mix consistently moist and cover the pot with a plastic bag or propagation dome to create a humid environment. Place the pot in a warm, bright location, out of direct sunlight.
- Transplanting: Once the cuttings have developed a strong root system, usually after 6-8 weeks, they can be transplanted into individual pots or directly into the garden.
Nurturing your Sweet Sarsaparilla:
Regardless of the propagation method you choose, providing the right environment is crucial for healthy growth.
- Soil: Well-draining, slightly acidic to neutral soil is ideal.
- Light: Sweet sarsaparilla prefers dappled shade or partial sun.
- Watering: Maintain consistent moisture, especially during dry periods. However, avoid overwatering, as this can lead to root rot.
- Support: As a climber, this plant thrives with a trellis, fence, or other structure to climb.
A Rewarding Endeavour:
Propagating Smilax glyciphylla requires a touch of patience and care. But with the right approach, you can successfully cultivate this intriguing native plant and enjoy its unique beauty and versatility in your own garden.