Unlocking the Secrets of Tillandsia Capitata Propagation: Grow Your Tillandsia Family
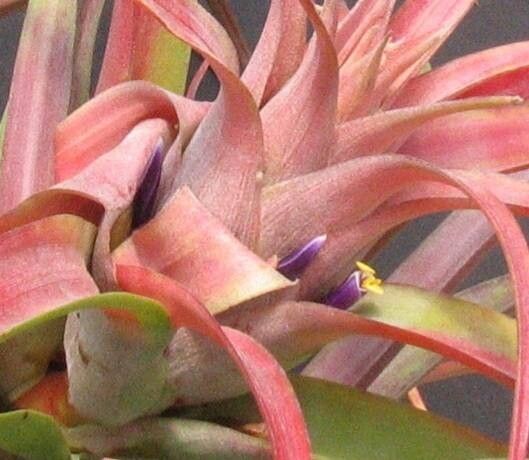
Tillandsia capitata, with its captivating rosette of silvery-green leaves and vibrant pink blooms, is a popular choice among air plant enthusiasts. Its unique beauty and relatively low-maintenance nature make it a welcome addition to any plant lover’s collection. But did you know that you can easily multiply your Tillandsia capitata collection through propagation?
This article dives into the fascinating world of Tillandsia capitata propagation, providing you with a comprehensive guide to successfully grow new plants from your existing ones.
Understanding Tillandsia Capitata
Before we delve into propagation techniques, let’s first understand what makes Tillandsia capitata special. As an epiphyte, it naturally grows on other plants, absorbing moisture and nutrients from the air and rainfall. Unlike traditional potted plants, they don’t rely on soil for survival. This unique characteristic opens up interesting propagation possibilities.
Two Paths to Propagation: Pups and Seeds
Tillandsia capitata can be propagated through two primary methods:
Pup Division: This is the most common and easiest method. After blooming, Tillandsia capitata produces “pups” – small offshoots that grow at the base of the mother plant. These pups are essentially baby Tillandsias.
- Seed Propagation: While less common and more time-consuming, propagating from seeds offers a rewarding challenge. Tillandsia capitata produce seed pods after flowering.
Propagating Tillandsia Capitata – Step-by-Step Guide
Method 1: Pup Division:
Timing is Key: Wait until the pups are at least one-third the size of the mother plant, usually a few months after the mother plant has finished blooming. This size ensures the pups have developed a robust root system for independent survival.
Gentle Separation: Carefully remove the pup from the mother plant. If it doesn’t detach easily, use a clean, sharp knife or shears to make a clean cut as close to the mother plant as possible.
Allow to Callus: Leave the separated pup in a well-ventilated area for a day or two. This allows the cut section to dry and form a callus, reducing the risk of rot.
Mounting or Placing: Tillandsia capitata can be mounted on various surfaces like driftwood or placed in a shallow dish with good drainage. If mounting, use plant-safe glue or tie them securely with natural fibers like cotton yarn or fishing line.
- Indirect Light and Misting: Provide your newly propagated Tillandsia capitata with bright, indirect light and mist them regularly, ensuring they don’t sit in water.
Method 2: Seed Propagation:
Harvesting Seeds: Once the seed pods are dry and brown, carefully collect them.
Preparing the Seedbed: Fill a shallow tray with a well-draining mix, like a combination of perlite and sphagnum moss.
Sowing the Seeds: Sprinkle the tiny Tillandsia capitata seeds over the surface of the mix but don’t bury them.
Humidity and Light: Mist the seeds regularly and provide them with bright, indirect light. A humidity dome or placing the tray in a well-lit greenhouse can be beneficial.
- Patience is Key: Seed propagation requires patience as it can take several weeks to months for the seeds to germinate and develop.
Caring for Your New Tillandsia Capitata
Provide your newly propagated Tillandsia capitata with the same care as the mother plant. This includes:
Bright, indirect light: Avoid direct sunlight, which can scorch their leaves.
Regular misting or soaking: Depending on your climate, mist 2-3 times a week or soak them in a bowl of water for 20-30 minutes once a week. Allow them to dry completely afterward.
- Good air circulation: Ensure good air circulation around your Tillandsias to prevent rot.
Propagating your Tillandsia capitata is a rewarding experience, allowing you to expand your collection while witnessing the plant’s life cycle firsthand. With this guide and a little patience, you can enjoy these captivating air plants for years to come.