The Tiny Orchid with a Tail: Propagating Trichosalpinx caudata
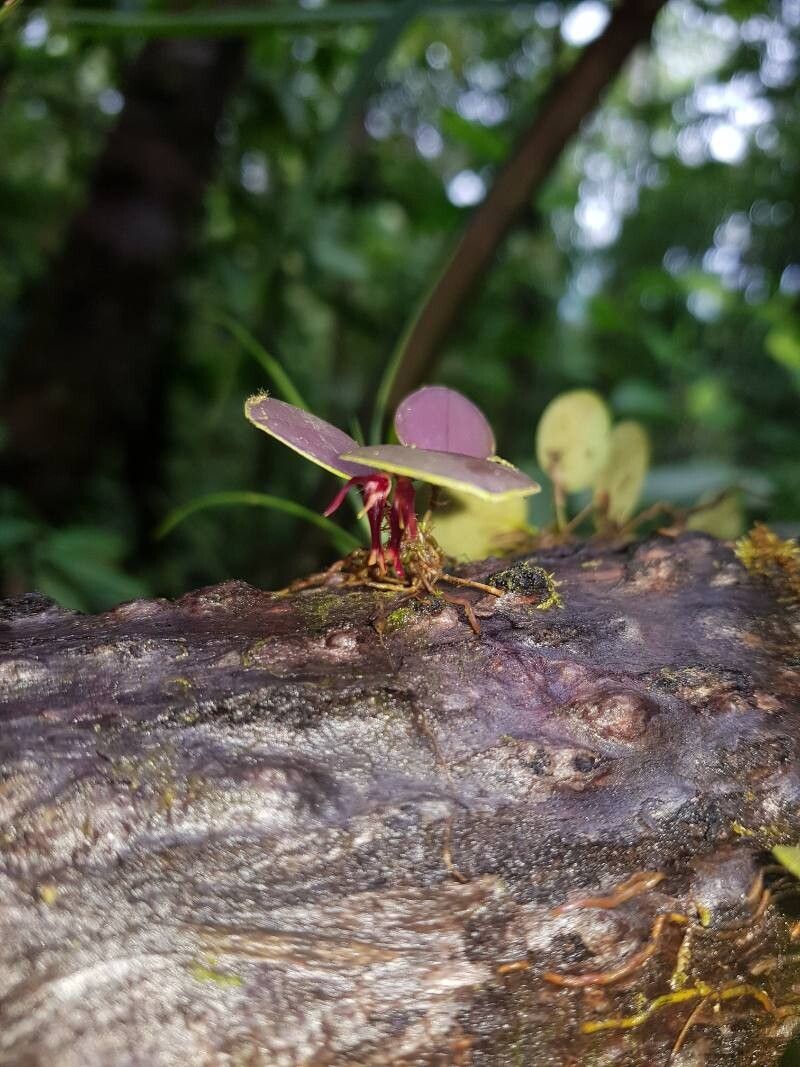
For orchid enthusiasts, the allure of Trichosalpinx caudata lies not only in its charming name – “tailed trich* – but also in its delicate beauty. These miniature orchids, with their tiny, trailing flowers, are a captivating sight. But getting your hands on one can be tricky, as they’re not commonly found in nurseries. Luckily, propagation isn’t as intimidating as it might seem, and the rewards – a tiny, enchanting plant growing in your home – are well worth the effort!
There are two main methods for propagating Trichosalpinx caudata: seed propagation and division. Let’s delve into each method, highlighting the pros and cons.
Seed Propagation: A Tiny Seed, a Mighty Start
Trichosalpinx caudata seeds are incredibly small, almost dust-like. This makes them challenging to handle, but also fascinating!
The Process:
- Collect seeds: You’ll need to hand-pollinate your Trichosalpinx caudata to obtain seeds. This involves carefully transferring pollen from the anther of one flower to the stigma of another.
- Prepare a sterile medium: A mix of sphagnum moss and perlite works well. Sterilize the medium by microwaving it for a few minutes to kill any harmful bacteria.
- Sow the seeds: Sprinkle the seeds on the surface of the sterilized medium. Don’t bury them—light is needed for germination.
- Maintain high humidity and warmth: Keep the medium consistently moist and the environment warm (around 75-80°F).
- Patience is key: Germination can take several months, and the seedlings will be tiny and delicate during their initial growth.
Pros:
- High number of plants: One seed pod can produce hundreds of seedlings.
- Genetic diversity: Seed propagation allows for the creation of new variations.
- Cons:
- Time-consuming: The process requires patience and dedication.
- Challenging for beginners: Handling the tiny seeds and maintaining sterile conditions requires specialized equipment.
Division: A More Direct Approach
Dividing a mature Trichosalpinx caudata plant is a simpler and quicker way to propagate more plants.
The Process:
- Choose a healthy plant: Select a well-established Trichosalpinx caudata with multiple growth points.
- Carefully divide the rhizome: Gently separate the rhizome into sections, ensuring each section contains at least one growth point.
- Plant the divisions: Individually pot each division in a suitable orchid potting mix, ensuring the growth point is above the substrate.
- Maintain consistent humidity and warmth: Keep the newly divided plants consistently moist and warm until they establish new roots.
Pros:
- Faster and easier: Division is generally a less demanding process than seed propagation.
- More predictable results: You’re likely to obtain plants that closely resemble the parent.
- Cons:
- Limited number of plants: You can only create as many new plants as you have divisions.
- May stress the parent plant: Division can potentially stress the parent plant, especially if it’s not done correctly.
Beyond the Basics
No matter the method you choose, there are a few important factors to remember for successful Trichosalpinx caudata propagation:
- Sterility: Always maintain sterile conditions, especially when working with seeds or dividing rhizomes.
- Humid environment: Both seed propagation and division require high humidity.
- Adequate lighting: Trichosalpinx caudata thrives in bright, indirect light.
- Correct temperature: Maintain a consistently warm environment, around 75-80°F.
With a bit of dedication and attention to detail, you can successfully propagate these enchanting orchids and enjoy these tiny beauties adorning your home.