From One to Many: Mastering the Art of Propagating Waltheria ovata
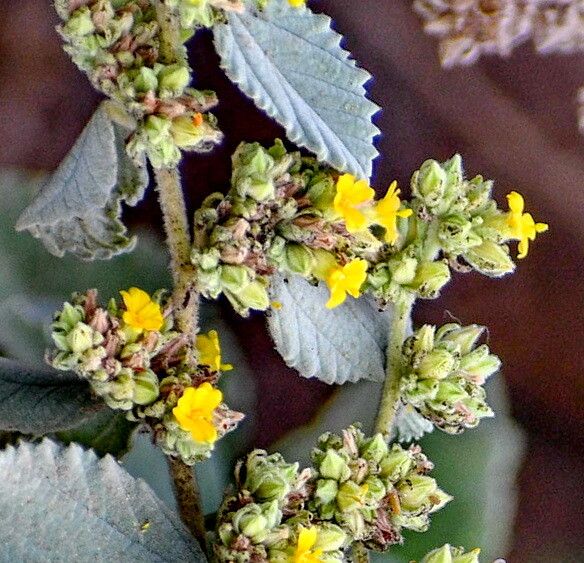
The Waltheria ovata, also known as the “slipper plant” or “velvet plant,” is a charming, low-maintenance shrub that adds a touch of tropical elegance to any garden. Its soft, velvety foliage and petite, yellow flowers make it a delightful addition to containers, hanging baskets, or even as a groundcover. But what if you want to share this beauty with others or simply expand your own collection? Enter the world of plant propagation – a rewarding and surprisingly simple way to multiply your Waltheria ovata and enjoy its enchanting charm even more.
There are two primary methods of propagation for Waltheria ovata: stem cuttings and seed starting.
Stem Cuttings: A Quick and Easy Option
Stem cuttings are a straightforward and highly successful method for propagating Waltheria ovata. Here’s how to do it:
- Choose your cuttings: Select healthy, non-flowering stems with at least a few nodes (the bumps on the stem where leaves grow). Aim for cuttings that are about 4-6 inches long.
- Prepare the cuttings: Using a sharp, clean knife or pair of scissors, make a clean cut just below a node. Remove any leaves from the bottom inch or two of the cutting to prevent rotting.
- Root hormone (optional): Dipping the cut end of the stem in rooting hormone can encourage faster root development.
- Planting: Fill a small pot with a well-draining potting mix. Make a small hole in the center and insert the cutting, ensuring the nodes are buried in the soil. Water thoroughly.
- Humidity: Provide the cuttings with high humidity by placing them in a humidity dome or covering the pot with a clear plastic bag. This helps to retain moisture and prevent the cuttings from wilting.
- Light and temperature: Position the pot in a bright location, avoiding direct sunlight. Keep the soil consistently damp but not soggy. The ideal temperature for rooting is between 65-75°F.
- Patience: Within a few weeks, you should start to see new growth, indicating that roots are forming. Once the cuttings have established themselves, gradually acclimate them to the outdoors by gradually decreasing the humidity.
Seed Starting: A New Generation
While propagating Waltheria ovata from seeds might take a little longer, it provides a unique opportunity to witness the plant’s lifecycle from the very beginning. Follow these steps:
- Collecting seeds: Allow the Waltheria ovata flowers to mature and produce seed pods. These pods will turn brown and dry when the seeds are ready to be collected.
- Sowing: Fill a seed tray or small pots with a seed starting mix. Sow the seeds on the surface, lightly pressing them into the soil.
- Watering: Water the seeds with a gentle spray, ensuring the soil remains moist but not waterlogged.
- Light and temperature: Keep the seeds in a warm location (around 70-75°F) and provide bright, indirect light.
- Germination: Waltheria ovata seeds typically germinate within a few weeks.
- Thinning: Once the seedlings have a few true leaves, carefully thin them to give each seedling enough space to grow.
- Transplanting: When the seedlings are large enough to handle, transplant them into individual pots with well-draining potting mix.
Beyond the Basics: Tips for Success
- Choose the right time: The best time to propagate Waltheria ovata is during the spring or summer when temperatures are warm and growth is active.
- Use fresh cuttings: Avoid using stems that are too old or overly woody, as these may be less likely to root.
- Maintain good hygiene: Sterilize all tools before and after use to prevent the spread of diseases.
- Be patient: It can take several weeks for cuttings to root and even longer for seed-started plants to grow.
Whether you choose to propagate by stem cuttings or seed starting, the process is a rewarding one that allows you to expand your collection and share the beauty of Waltheria ovata with others. With patience and the right techniques, you’ll soon be enjoying a thriving collection of these delightful plants!