Immortalize Your Garden: Propagating Xeranthemum cylindraceum (Strawflower)
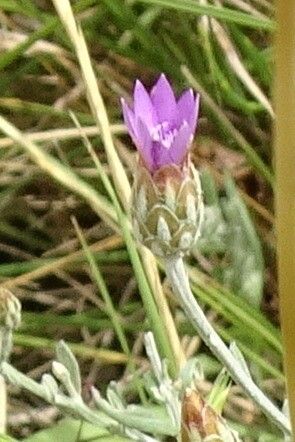
Looking for a low-maintenance, vibrant addition to your flower beds? Look no further than Xeranthemum cylindraceum, commonly known as Strawflower. These beautiful blooms not only bring a pop of color to your landscape but also boast an incredible ability to retain their shape and color long after being cut, earning them the nickname “immortelle.” But what if you want to amplify the joy of Strawflowers? Propagation is the key to multiplying your blooms and sharing the beauty with friends or starting new gardens.
Seeds of Success:
Strawflowers are readily propagated through seeds. This method is both straightforward and rewarding, allowing you to enjoy a fresh batch of these hardy plants year after year.
Here’s what you’ll need:
- Seeds: Gather seeds from mature flower heads once they have fully dried.
- Potting Mix: Choose a well-draining soil blend suited for seedlings.
- Seed Starting Trays: Small trays with individual cells or pots will work well.
- Watering Can: Use a gentle watering can to avoid disturbing the delicate seeds.
- Sunlight: A sunny windowsill or grow light is ideal.
Steps for sowing seeds:
- Fill the trays: Moisten the potting mix thoroughly, leaving about a half-inch of space at the top of each cell.
- Sow the seeds: Lightly press one to two seeds into each cell, burying them no more than ¼ inch deep.
- Water gently: Use a watering can with a fine rose to mist the soil, ensuring the seeds stay moist.
- Sunlight: Place the trays in a location that receives 6-8 hours of sunlight daily.
- Germination: Expect seeds to sprout within 2-3 weeks, depending on temperature and moisture.
- Thinning: Once the seedlings have their second set of true leaves, carefully remove the weaker plant from each cell, leaving the strongest to grow.
- Transplanting: When the seedlings are a few inches tall, harden them off by gradually introducing them to outdoor conditions. Once they’re acclimated, you can transplant them to your garden bed, spacing them 6-12 inches apart.
Cuttings for Clones:
For a faster method of propagation, try taking cuttings from your existing Strawflower plants.
What you’ll need:
- Sharp Knife or Scissors: Ensure they are clean to prevent disease.
- Rooting Hormone: Optional but can aid in root development.
- Potting Mix: A mixture specifically designed for rooting cuttings.
- Clear Plastic Bag or Dome: To retain moisture.
Steps for taking cuttings:
- Choose Stems: Select healthy, non-flowering stems from your established plants.
- Cuttings: Make a sharp cut just below a node (where leaves grow), leaving about 4-6 inches of stem.
- Remove Lower Leaves: Trim away the leaves on the bottom 1-2 inches of the cutting.
- Dip in Hormone: (Optional) Dip the cut end of the stem into rooting hormone powder.
- Plant Cuttings: Insert the cuttings into individual pots filled with rooting mix, leaving the nodes exposed. Water generously.
- Cover and Care: Place the pots in a warm, bright location, covering them with a clear plastic bag or dome to create humidity. Mist the cuttings regularly to keep the soil moist.
- Rooting: Cuttings will typically develop roots within 2-4 weeks.
Sharing the Beauty:
Once your new plants are established, whether from seed or cuttings, you will be ready to enjoy the vibrant colors of Strawflowers in your garden. You can also share the joy by gifting them to friends, or even drying the blooms to create beautiful dried flower arrangements for your home or for special occasions.
Simple Care for Continued Bloom:
Strawflowers are relatively easy to care for. They prefer full sun and well-drained soil. Water regularly, especially during dry spells, but allow the soil to dry out slightly between waterings. By following these basic tips, you can enjoy vibrant and long-lasting Strawflowers that will bring joy to your garden for years to come!