Get Ready to Grow: Super Simple Seed Starting on a Shoestring!
Hey there, fellow gardening enthusiasts! Eager to get your hands dirty and grow your own goodies? Today, we’re diving into the wonderful world of seed starting – the super simple, budget-friendly way! So many articles out there try to sell you fancy gadgets and gizmos, but guess what? You don’t need all that to get amazing results.
If you’re feeling a bit intimidated by the whole seed-starting shebang, don’t sweat it! I’m here to walk you through a no-fuss, totally affordable method that anyone can master.
I learned from the best – my grandparents! They gardened out of necessity during the Great Depression, and they were masters at making the most of what they had. Forget expensive equipment. They knew how to grow beautiful, bountiful gardens with just a few simple things, most of which they found around the house. Let’s channel that resourceful spirit!
And just so we’re clear, this is different from “winter sowing,” which is ANOTHER great way to start seeds on a budget!
Let’s Get Growing: Your Budget-Friendly Seed Starting Toolkit
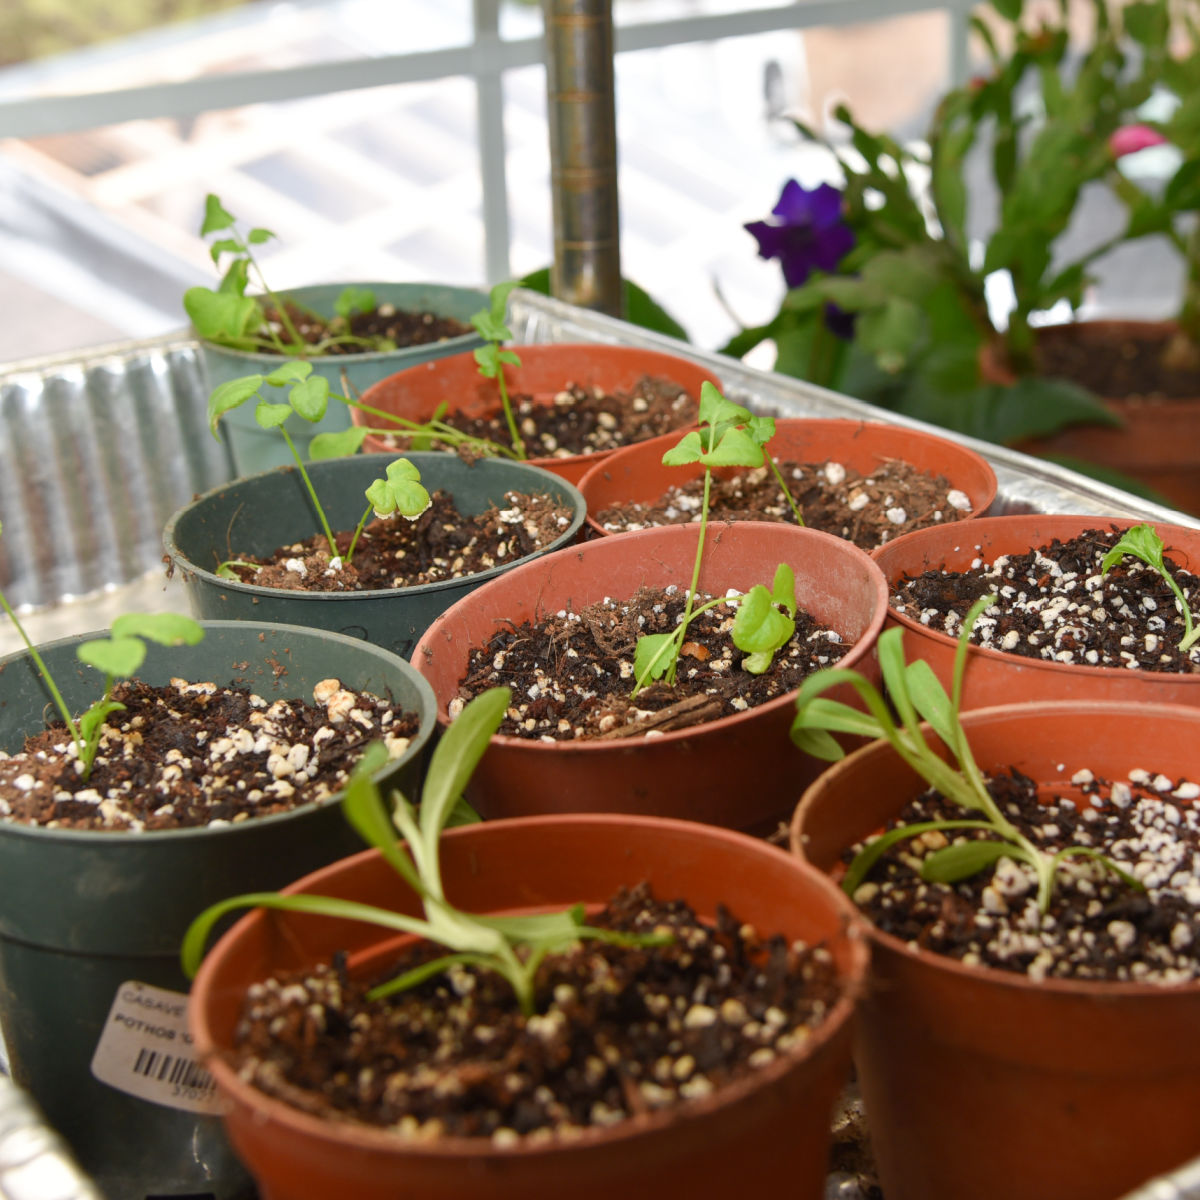
Containers: Free is the Magic Word!
Who needs fancy seed-starting trays when you have a treasure trove of recyclables waiting to be repurposed? Here are some awesome freebies to keep an eye out for:
- Salad containers (those clear plastic ones? The lids make perfect little humidity domes!)
- Solo cups
- McDonalds drink cups
- Yogurt tubs or sour cream containers
- Milk jugs (cut in half, they’re great!)
Pro Tip: Drainage is key! Grab a skewer, screwdriver, or old knife, heat it up a bit – carefully! – and poke some holes in the bottom of your containers. A utility knife also works. (I find the hot tools safer, but use whatever you’re comfortable with!)
Soil: Ditch the Pricey Mixes
Forget fancy seed-starting mixes. Good ol’ potting soil works just fine, and honestly, sometimes even better! A lot of those special mixes are mostly peat moss, which can actually repel water if it dries out too much. Opt for a good-quality potting soil, preferably organic if you can, and you’re golden.
You might want to fluff it up a little by mixing in some perlite, but other than that, you’re all set.
Trays for Bottom Watering: Use What You’ve Got!
Skip the seed trays – raid your kitchen instead! These make awesome watering trays:
- Old baking trays
- Plastic takeout containers
- Metal tubs
Bottom watering is like a gentle hug for your seeds. It keeps the soil evenly moist without disturbing those delicate little guys while they’re sprouting.
Planting Time: Getting Those Seeds Started
Alright, time to get those seeds in the ground! (Well, in the soil, actually.)
- Fill it up: Fill your container with about 2-3 inches of potting soil.
- Spacing: Give those seeds some elbow room! Space them about 1-2 inches apart so they have room to grow and will be easier to transplant later.
- Cover Up: Sprinkle a light layer of soil or vermiculite over the seeds, depending on what the seed packet recommends. Some seeds actually need light to germinate, so read those packets carefully!
- Gentle Press: Give everything a gentle pat to make sure the seeds are making good contact with the soil.
- Watering Time: Place the container in your chosen tray, and add some water to the tray. Let the soil soak up the water.
Light & Temperature: Sunshine is Your Friend!
No need for expensive grow lights! After the Spring Equinox roll around, find a sunny windowsill that gets at least 12 hours of daylight and let nature do its thing.
Make sure the room is nice and cozy – between 65-75°F is perfect for germination.
Heat mats are totally optional. They can speed things up, but your seedlings will be just fine without them, just a little slower.
Feeding Your Seedlings: A Little Boost
If you’re using regular potting soil that already has some fertilizer in it, you don’t need to add any extra early on.
But if you’re using organic soil, give your seedlings a little snack once they’ve sprouted their second set of “true leaves” (those are the ones that look like tiny versions of the adult plant’s leaves).
I love using a liquid organic fertilizer, diluted to half or even a quarter of the recommended strength, and applying it weekly.
Affordable Seeds: Dollar Store Magic!
Did you know you can snag amazing seeds at Dollar Tree for just $1.25 for 4 packs? Seriously!
Seed industry regulations mean that even the most budget-friendly seeds have to meet certain germination standards.
To hedge your bets, plant a few extra seeds in each container, because you never know if every single one will sprout.
The Grand Total: How Much Will This Cost You?
- Containers: FREE (recycled, remember?)
- Potting soil: $5-$8
- Vermiculite (optional): $8
- Seeds: $2.50 for 8 packs (those amazing Dollar Tree seeds! Although it can still be budget-friendly from some other places!)
- Garden Markers: FREE (cut them from yogurt, cream cheese, or cottage cheese containers! Or, reuse plastic cutlery knives.)
- Fertilizer (optional): $15 for a liquid organic option
GRAND TOTAL: Around $20! For a small investment, you can start a thriving garden and see if seed starting if right for you before you spend any more.
Final Thoughts: Get Growing!
Seed starting is not only incredibly rewarding, I promise! By using recycled containers, opting for potting soil instead of fancy mixes, and choosing budget-friendly seeds, you can grow a beautiful garden without breaking the bank.
Give it a try and let me know how it goes! Happy gardening, friends!
Click here for my method for starting seeds with lights and other supplies!