Unveiling the Mystery: Propagating the Enchanting Dipcadi Glaucum
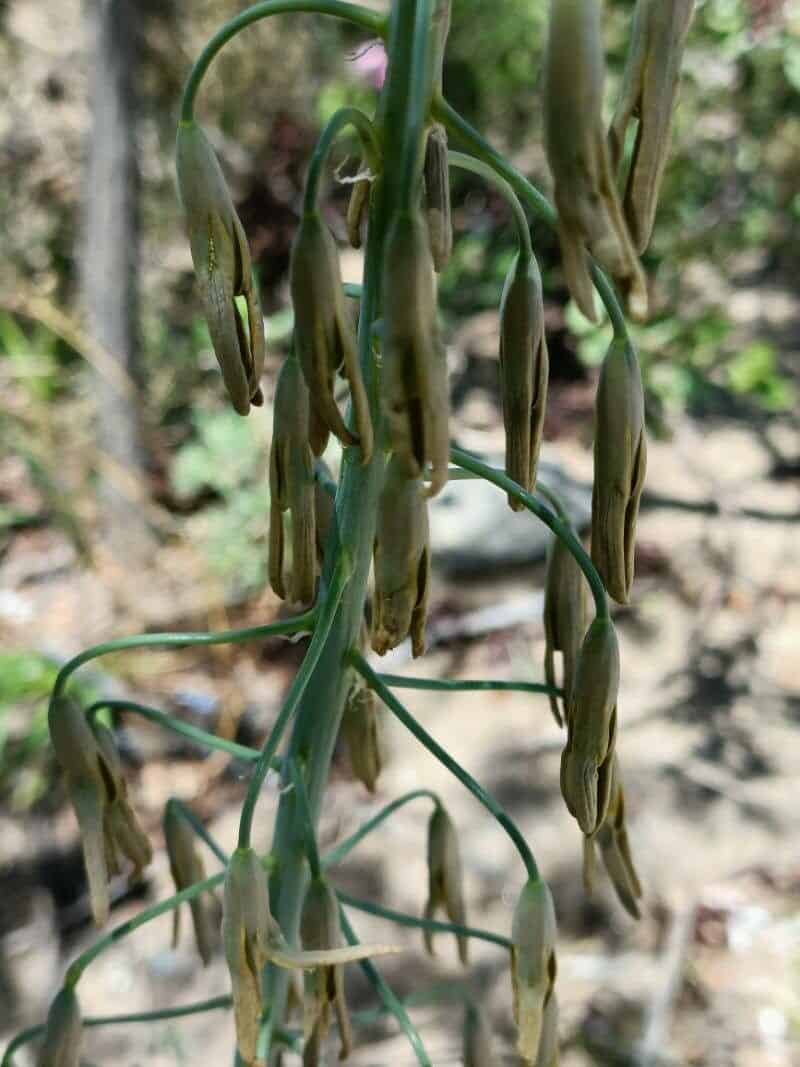
The Dipcadi glaucum, also known as the hooded dracunculus or glaucous dipcadi, is a captivating bulbous plant native to the grasslands and rocky outcrops of South Africa. With its cascading foliage and unique, hooded blooms that range in color from greenish-white to purplish-brown, this exotic beauty is a fascinating addition to any plant enthusiast’s collection. But unlike more common bulbs, the Dipcadi glaucum holds its secrets close, especially when it comes to propagation. So, let’s delve into the world of this intriguing species and uncover the best methods for increasing your own Dipcadi collection.
Understanding the Dipcadi Glaucum Life Cycle
Before embarking on the propagation journey, it’s crucial to understand the Dipcadi glaucum’s life cycle. These plants thrive in a mediterranean climate, experiencing a dormant period during the dry summer months and springing to life with the arrival of cooler temperatures and rainfall in fall and winter. Understanding this cycle is key to successfully propagating them.
Propagation Methods: Seed vs. Offsets
While patience is paramount in either case, successfully cultivating Dipcadi glaucum from seed can be more challenging compared to propagating from offsets:
1. Propagating from Seed:
- Source and Timing: Sourcing Dipcadi glaucum seeds can be tricky as they are not readily available commercially. Your best bet is to join specialty bulb or plant societies and connect with other enthusiasts who might share seeds. The ideal time to sow the seeds is in the fall, mimicking their natural growing cycle.
- Sowing Technique: Sow the seeds in a well-draining potting mix, lightly cover them with a thin layer of soil, and keep the soil consistently moist but not waterlogged.
- Patience is Key: Germination can be erratic, taking anywhere from a few weeks to several months. Be patient and continue to provide the appropriate growing conditions. Keep the pot in a cool, shaded area until seedlings are established.
2. Propagating from Offsets:
- Offset Development: Over time, mature Dipcadi glaucum bulbs will produce small offset bulbs at their base.
- Separation and Potting: Divide these offsets carefully during the plant’s dormant season when the foliage has died back. Ensure each offset has its own roots attached for successful establishment. Plant the offsets in well-draining soil, similar to the parent plant, and water sparingly until new growth emerges.
Nurturing your Dipcadi Glaucum
- Light and Water: Dipcadi glaucum thrives in bright, indirect light. Overwatering is the quickest way to damage these bulbs, so water only when the soil is completely dry to the touch.
- Soil and Fertilizer: A well-draining potting mix is crucial to prevent bulb rot. During the growing season, fertilize lightly every few weeks with a balanced liquid fertilizer diluted to half strength.
- Dormancy Period: Allow the foliage to die back naturally during the summer dormancy period. Reduce watering significantly during this time.
Propagating Dipcadi glaucum requires dedication and a gentle touch, but the rewards are well worth the effort. By understanding their unique life cycle and employing the right propagation techniques, you can cultivate a collection of these captivating plants and enjoy their intriguing beauty for years to come.