Propagating Anthurium durandii: A Gardener’s Guide
Introduction:
Anthurium durandii, often called the Bird’s Foot Anthurium, is a captivating species known for its unusual, bird’s-foot-like inflorescence and leathery, deep green leaves. Unlike its showier cousins with vibrant spathes, A. durandii boasts a unique charm appreciated by collectors and enthusiasts. Its relatively compact size and distinctive appearance make it a desirable addition to any collection, but its propagation presents particular challenges. This article will explore the various methods available for propagating this intriguing plant.
Seed Germination:
Currently, there are no known reliable methods for seed germination propagation of Anthurium durandii. While the plant does produce seeds, germination rates are notoriously low and often unreliable. The challenges likely involve intricate seed dormancy mechanisms and the specific environmental requirements for successful germination, which have not yet been fully elucidated. Further research is needed to determine if viable seed germination protocols can be developed.
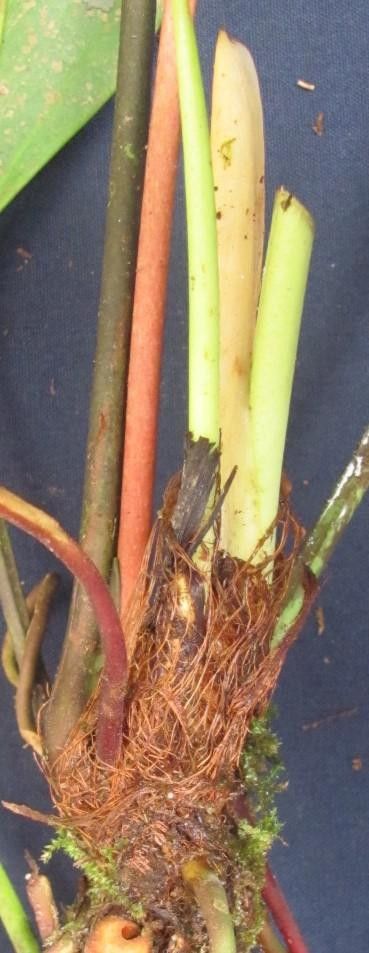
Cuttings:
Challenges: Propagating Anthurium durandii from cuttings, specifically stem cuttings, is possible but slow and potentially challenging. The success rate can be variable, and the cuttings are susceptible to rot if proper hygiene and environmental conditions aren’t maintained.
Practical Tips: Take stem cuttings that include at least two nodes. Use a sharp, sterile blade to minimize damage. Treat the cuttings with a rooting hormone to stimulate root development. Plant in a well-draining, moist propagation mix (e.g., perlite and peat moss). Maintain high humidity through misting or using a humidity dome. Position the cuttings in a bright, indirect light location. Patience is key; rooting can take several weeks to months.
- Rewards: Cuttings are a relatively straightforward technique, requiring less specialized equipment than other methods. Success provides a genetically identical clone of the parent plant, thus preserving desirable traits.
Division:
Challenges: Division is a less common method for Anthurium durandii due to its generally single-stemmed growth habit. Mature plants may exhibit some offsetting, providing limited opportunities for division. Careful handling is crucial to avoid damaging the delicate roots.
Practical Tips: Division should only be undertaken when the plant is sufficiently large and healthy, typically during repotting. Carefully separate the plant into sections, ensuring each section has healthy roots and leaves. Replant each section in its own pot with suitable potting mix.
- Rewards: When successful, division can rapidly propagate a mature plant into multiple, equally developed specimens. This method is generally quicker than cuttings given the established root systems.
Tissue Culture:
Challenges: Tissue culture requires specialized equipment, sterile conditions, and expertise in plant tissue culture techniques. Developing successful protocols requires significant experimentation and investment. This is generally not a feasible home propagation method.
Practical Tips: This method is best left to professionals or well-equipped laboratories. Protocols would involve isolating meristematic tissues, sterilizing them, culturing them on a nutrient media, and then transferring the resulting plantlets to soil.
- Rewards: Tissue culture allows for mass propagation of genetically uniform plants, which is significantly important for preserving rare varietals or for commercial production. It also reduces the risk of disease transmission.
Conclusion:
Propagating Anthurium durandii presents unique challenges across all methods, with cuttings offering the most accessible option for home gardeners. While seed germination remains elusive, the rewards of successfully propagating this unique plant are significant. The patience and dedication required to cultivate A. durandii from cuttings or through division are rewarded with the satisfaction of nurturing a plant prized for its distinctive beauty. Remember to maintain patience, meticulous hygiene, and the right environmental conditions for success. The successful propagation of this species is a testament to the gardener’s skill and dedication, offering a special sense of accomplishment.
