Unlocking the Secrets of Argyrolobium Zanonii Propagation: A Guide for Plant Enthusiasts
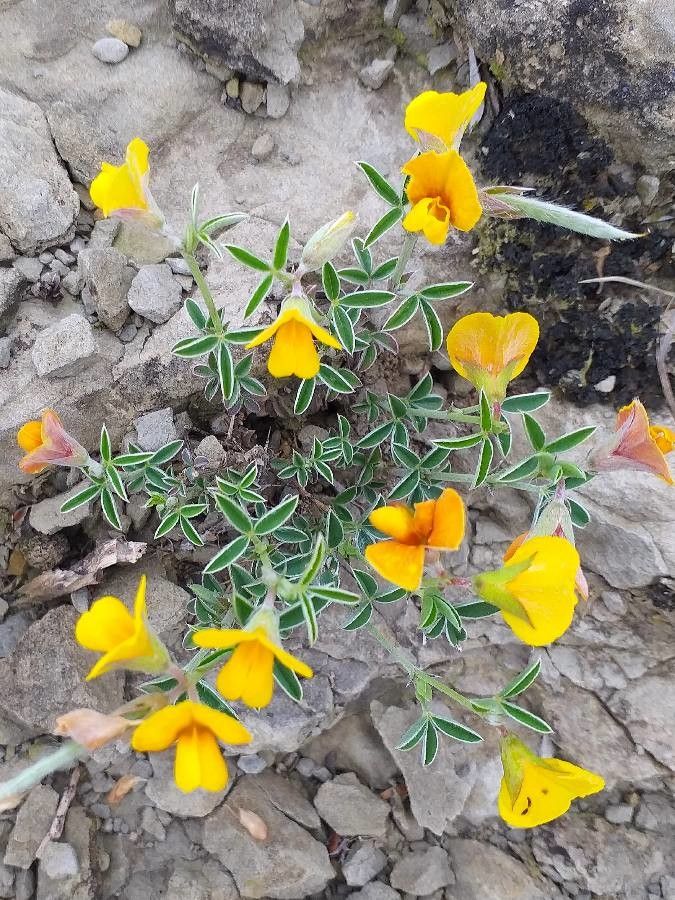
Argyrolobium zanonii, with its enchanting yellow blooms and delicate foliage, is a hidden gem amongst flowering subshrubs. Native to South Africa, this lesser-known beauty is a captivating addition to gardens in suitable climates, attracting pollinators and adding a touch of exotic charm.
While commercially obtaining Argyrolobium zanonii might be challenging, propagating this captivating plant at home is possible, even for budding gardeners! Let’s explore two common methods that offer the best chance for success.
Method 1: Seed Sowing – Embracing the Cycle of Life
Propagating Argyrolobium zanonii from seeds allows you to witness the plant’s entire life cycle, making it a rewarding experience.
Here’s what you need:
- Fresh Argyrolobium zanonii seeds: Look for reputable seed suppliers online or at specialized nurseries.
- Seed starting mix: Choose a well-draining mix formulated for starting seeds.
- Seed trays or small pots: Ensure they have drainage holes.
- Water mister: This allows for gentle watering.
- Plastic wrap or humidity dome (optional): Helps retain moisture during germination.
Step by Step Guide:
- Prepare the Seeds: Argyrolobium zanonii seeds have a hard outer coating. Nicking this coating with a nail file or lightly sanding it can improve germination rates. Soak the seeds in lukewarm water for 24 hours before sowing.
- Sow the Seeds: Fill your chosen containers with seed starting mix. Sow the seeds at a depth of about half an inch and lightly cover them with the mix.
- Water Gently: Using a mister, moisten the soil without dislodging the seeds.
- Provide Warmth and Humidity: Place the trays/pots in a warm location with bright, indirect sunlight. A temperature around 70-75°F (21-24°C) is ideal. Using a humidity dome or covering the containers with plastic wrap can aid in maintaining moisture.
- Be Patient: Germination can take anywhere from a few weeks to a couple of months. Be patient and ensure the soil remains consistently moist but not waterlogged.
- Thinning Out: Once the seedlings have developed a few sets of true leaves, thin them out to provide adequate space for growth.
- Transplanting: When the seedlings are large enough to handle, transplant them into individual pots or directly into your garden once the danger of frost has passed.
Method 2: Cuttings – A Shortcut to Success
Propagating from cuttings utilizes a portion of a mature plant to create a clone, offering a quicker route to establishing new plants.
You Will Need:
- Sharp Pruning Shears: These should be sterilized to prevent disease transmission.
- Rooting Hormone (optional): While not essential, rooting hormone can improve the success rate.
- Potting Mix: Choose a well-draining mix similar to the one used for seeds.
- Small Pots: Ensure good drainage.
Step by Step Guide:
- Take the Cuttings: In the early morning when the plant is hydrated, take cuttings approximately 4-6 inches long from healthy, non-flowering stems. Make the cut just below a leaf node.
- Prepare the Cuttings: Remove any lower leaves from the cuttings, leaving a couple of sets at the top.
- Apply Rooting Hormone (optional): Dip the cut end of the cutting in rooting hormone according to product instructions.
- Plant the Cuttings: Insert the prepared cuttings into pots filled with the chosen potting mix. Ensure the leaf nodes are below the soil line.
- Water Gently: Moisten the soil thoroughly without overwatering.
- Provide Indirect Light: Place the pots in a location with bright, indirect sunlight.
- Maintain Moisture: Keep the soil consistently moist but not waterlogged.
- Signs of Growth: After a few weeks, you should observe new growth, indicating successful rooting.
Nurturing Your Argyrolobium Zanonii
Whether you choose to propagate through seed or cuttings, providing the right conditions will ensure your Argyrolobium zanonii thrives:
- Well-Drained Soil: This plant is susceptible to root rot, so well-drained soil is essential.
- Sunlight: Plant in a location that receives at least 6 hours of sunlight daily.
- Moderate Watering: Water deeply but allow the soil to dry out between waterings.
- Pruning: Lightly prune to maintain shape and encourage bushier growth.
Propagating your own Argyrolobium zanonii is a fulfilling endeavor that allows you to enjoy the captivating beauty of this plant for years to come. So go ahead, embrace the joy of propagation and add this hidden gem to your plant collection!