Waking the Sleeping Beauty: A Guide to Propagating Astragalus australis
Astragalus australis, also known as the alpine milkvetch, is a captivating little plant with a delicate beauty that belies its tough alpine origins. This low-growing perennial, boasting charming pink-purple flowers and fern-like foliage, is a unique addition to any rock garden, alpine trough, or well-drained border. If you’ve been lucky enough to encounter this enchanting species, you might be wondering how to welcome more of them into your life. While a bit tricky, propagating Astragalus australis is definitely achievable with patience and the right techniques.
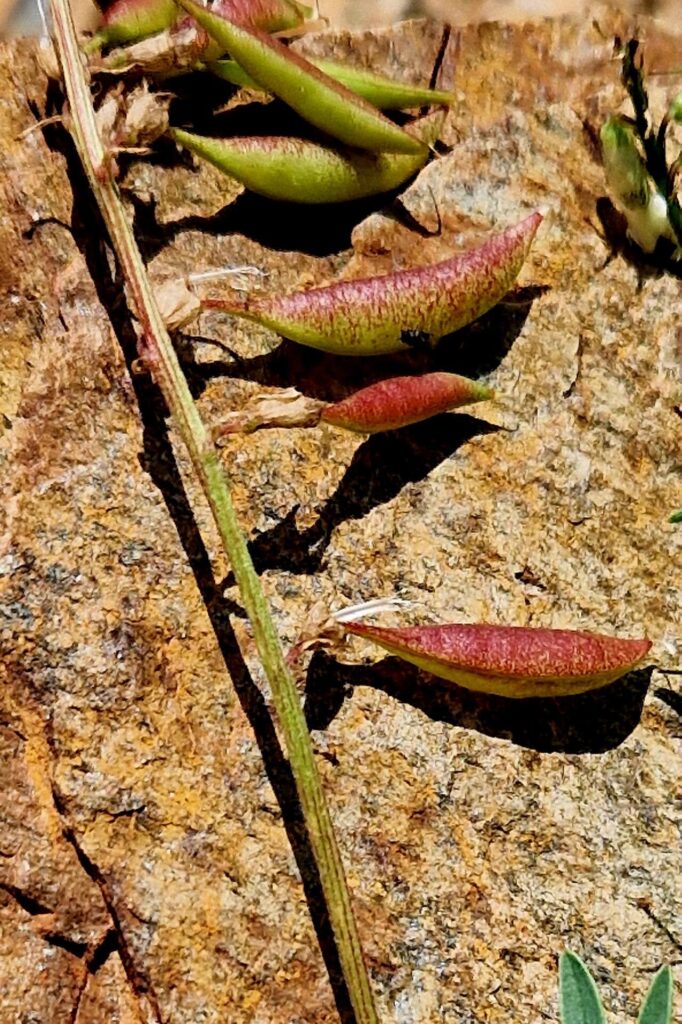
Seed Starting: A Test of Patience
Astragalus australis seeds possess a hard seed coat, a trait common to many alpine plants, which means they require a little extra encouragement to break dormancy. This can be accomplished in two ways:
- Scarification: This involves gently nicking or sanding the seed coat to allow moisture penetration. Use fine-grit sandpaper or a nail clipper for a controlled approach, being careful not to damage the embryo inside.
- Cold Stratification: Mimicking nature’s way, this method involves subjecting seeds to a period of cold and moist conditions. Place your scarified seeds between layers of damp paper towel in a sealed bag and store them in your refrigerator (around 4°C) for 4-6 weeks.
Once your seeds have been stratified, sow them in a well-draining seed starting mix, barely covering them with soil. Maintain a cool environment (around 15-18°C) and keep the soil consistently moist but not waterlogged. Be prepared to wait, as germination can take anywhere from a few weeks to several months.
Cuttings: A Quicker Route to Success
While generally more reliable than seed propagation, taking cuttings from Astragalus australis is still a delicate process. Here’s how to increase your chances of success:
- Timing is Key: The best time to take cuttings is in late spring or early summer, when the plant is actively growing.
- Choose Wisely: Select healthy, non-flowering shoots for your cuttings. They should be about 5-8 cm long.
- Sharp and Clean: Use a sharp, sterilized knife or pair of pruning shears to make a clean cut just below a leaf node. Remove the lower leaves, leaving only a few at the top.
- Hormone Help: Dipping the cut end in rooting hormone powder can significantly increase the chances of successful rooting.
- Patience is Still a Virtue: Insert the cuttings into a well-draining rooting medium, like a mixture of perlite and peat moss. Keep the medium consistently moist and provide bottom heat if possible. Rooting can take several weeks.
Transplanting and Beyond:
Whether you’ve painstakingly nurtured seedlings or coaxed roots from cuttings, handle your young Astragalus australis with care. Transplant them into individual pots filled with a well-draining soil mix once they are large enough to handle. Gradually acclimatize them to outdoor conditions before planting them in their final location.
Astragalus australis, like many alpine plants, thrives in well-drained soil and a sunny location. Once established, these hardy little beauties are relatively low-maintenance, rewarding your efforts with their unique charm year after year. Propagating this species may require a bit of patience and skill, but the reward of seeing these enchanting plants grace your garden makes it well worth the effort.