Unlocking the Secrets of Propagation: Growing Banksia ashbyi from Seeds and Cuttings
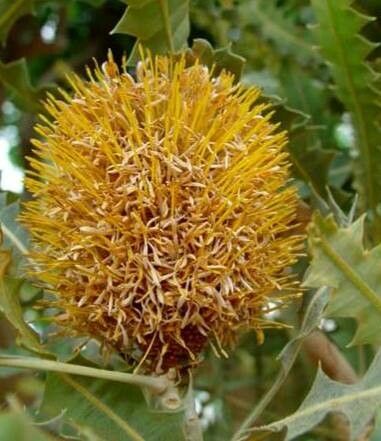
The Banksia ashbyi, with its stunning golden, bottlebrush-like flowers, is a striking addition to any garden. This unique and beautiful plant, native to Western Australia, can be a challenge to grow from seed, but with patience and the right techniques, you can increase your chances of success. Let’s delve into the world of propagation and uncover the secrets to cultivating your own Banksia ashbyi.
From Seeds to Saplings: A Natural Journey
Propagation from seed is a rewarding process that allows you to observe the life cycle of a Banksia ashbyi from its very beginning.
-
Harvesting Seeds: Collect ripe seed pods from mature Banksia ashbyi plants. They will be brown and dry, and the seeds within will rattle when shaken. Once harvested, store the pods in a cool, dry place until you’re ready to extract the seeds.
-
Preparing the Seeds: Carefully open the pods and extract the seeds. You’ll notice they’re encased in a hard, woody shell that needs to be broken before germination. This can be achieved through a process called scarification. One simple method is to soak the seeds in boiling water for 5 minutes, followed by an overnight soak in cold water.
-
Sowing the Seeds: A well-drained potting mix is essential for Banksia ashbyi seeds. Fill small pots or seed trays with the mix and sow the seeds about 1cm deep, spaced 5cm apart. Gently water the seeds and maintain a consistently moist environment.
- Patience is Key: Germination can take several weeks to months, depending on the seed’s age and the temperature. Keep the seed trays under a shade cloth and watch for signs of new growth. Once the seedlings emerge, they will need regular watering and light until they’re strong enough to be transplanted.
Cuttings: A Shortcut to Success
For those who prefer a slightly faster route, propagation from semi-hardwood cuttings is a viable option.
-
Selecting Cuttings: Choose healthy, young shoots that have finished flowering. Cuttings should be about 10cm long and include a few sets of leaves.
-
Preparation: Trim the bottom leaves and dip the cut ends in rooting hormone powder. This will encourage root development.
-
Rooted in Success: Insert the cuttings into a well-drained potting mix, leaving only a few leaves exposed above the soil. Maintain a consistently moist environment and place the cuttings under a shade cloth to protect them from direct sunlight.
- Time for Growth: It can take several months for cuttings to develop a strong root system. Regularly check for signs of new growth and keep the potting mix moist. Once the cuttings have established roots, they can be transplanted.
Nurturing Your New Banksia ashbyi:
Once your seedlings or cuttings have taken root, they are ready to be planted in their final location. Remember, Banksia ashbyi thrives in well-drained, sandy soil and full sun.
-
Planting Time: Spring or autumn offer ideal conditions for transplanting.
-
Site Selection: Choose a sunny position and ensure the soil is well-drained.
-
Watering Wisdom: Water regularly, especially during dry periods. Once established, Banksia ashbyi is drought-tolerant.
- Mulching Magic: A layer of organic mulch around the base of the plant helps retain moisture and suppress weeds.
Cultivating a Thriving Banksia ashbyi:
Growing Banksia ashbyi is a rewarding experience. By understanding the nuances of propagation and providing the right care, you can enjoy the beauty of these extraordinary plants for years to come. So, embrace the challenge and unlock the secrets of this remarkable species.