Spider Orchid Secrets: How to Propagate Brassia arachnoidea
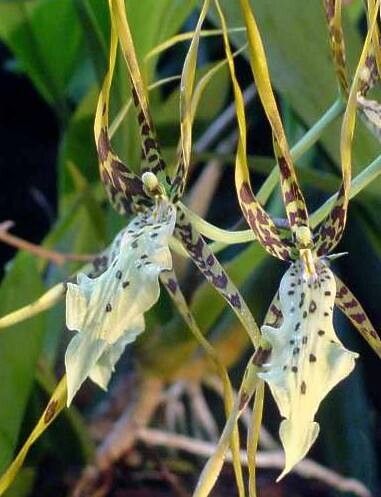
The Brassia arachnoidea, affectionately nicknamed the “Spider Orchid” for its unique, spidery blooms, is a captivating plant that draws orchid enthusiasts with its intricate beauty. But what if you want to share this wonder with friends or expand your own orchid collection? The good news is, you can! This guide will walk you through the fascinating process of propagating your Brassia arachnoidea, unlocking the secrets of this captivating orchid.
Understanding the Basics of Propagation
Propagation is the process of creating new plants from existing ones. For Brassia arachnoidea, the most successful methods are:
- Division: This method involves carefully separating the plant’s pseudobulbs, each of which should have its own root system and at least one growing shoot.
- Keiki: Keikis, which mean “baby” in Hawaiian, are miniature versions of the parent plant that form on the flower stem or along the base of the orchid.
Division: A Hands-On Approach
- Timing is Key: The best time to divide your Brassia arachnoidea is after the blooming period, when the plant is entering its resting stage.
- Prepare the Tools: Gather sharp, sterilized scissors or a knife for a clean cut, a pot with fresh orchid potting mix, and some rooting hormone (optional).
- Gentle Division: Carefully remove the plant from its pot and examine the roots. Identify distinct sections with their own roots and at least one growing shoot. Use your scissors or knife to carefully separate the plant into these sections.
- Repotting and Care: Plant each section in a separate pot with fresh orchid mix, ensuring the roots are spread out. Water lightly and place the pots in a bright, indirect location. The new plants will need a bit of time to adjust and establish themselves.
Keiki Propagation: A Patient Approach
- Spotting the Keiki: Look for tiny, new plantlets emerging from the flower stem or along the base of the plant. These are the keikis.
- Patience is Virtue: Let the keiki develop its own roots. This can take several months. You can encourage root development by misting the air around the keiki and keeping the humidity high.
- Separation and Repotting: Once the keiki has developed a root system of at least 2 inches, carefully remove it from the parent plant. You can gently twist or cut the keiki from the stem.
- New Beginnings: Plant the keiki in a pot with fresh orchid mix, making sure the roots are spread out. Place the pot in a bright, indirect location and water lightly.
Essential Tips for Success
- Sterilization: Sterilize all your tools before and after working with your orchid to prevent infections.
- Gentle Care: Be mindful during the division process and handle the plants with care to avoid damaging the roots.
- Proper Watering: Water only when the potting mix is almost dry to prevent root rot.
- Patience: Propagation takes time! Be patient and give your new orchids the right conditions to thrive.
By understanding the basics of propagation and following these steps, you can share the beauty of your Brassia arachnoidea with others or cultivate an exciting collection of these captivating spiders. Remember, the care you provide will determine the success of your propagation journey. So, grab your tools, gather your patience, and discover the joys of growing your own Spider Orchids!