From Snipping to Thriving: Propagating the Fragrant Snowberry (Chiococca alba)
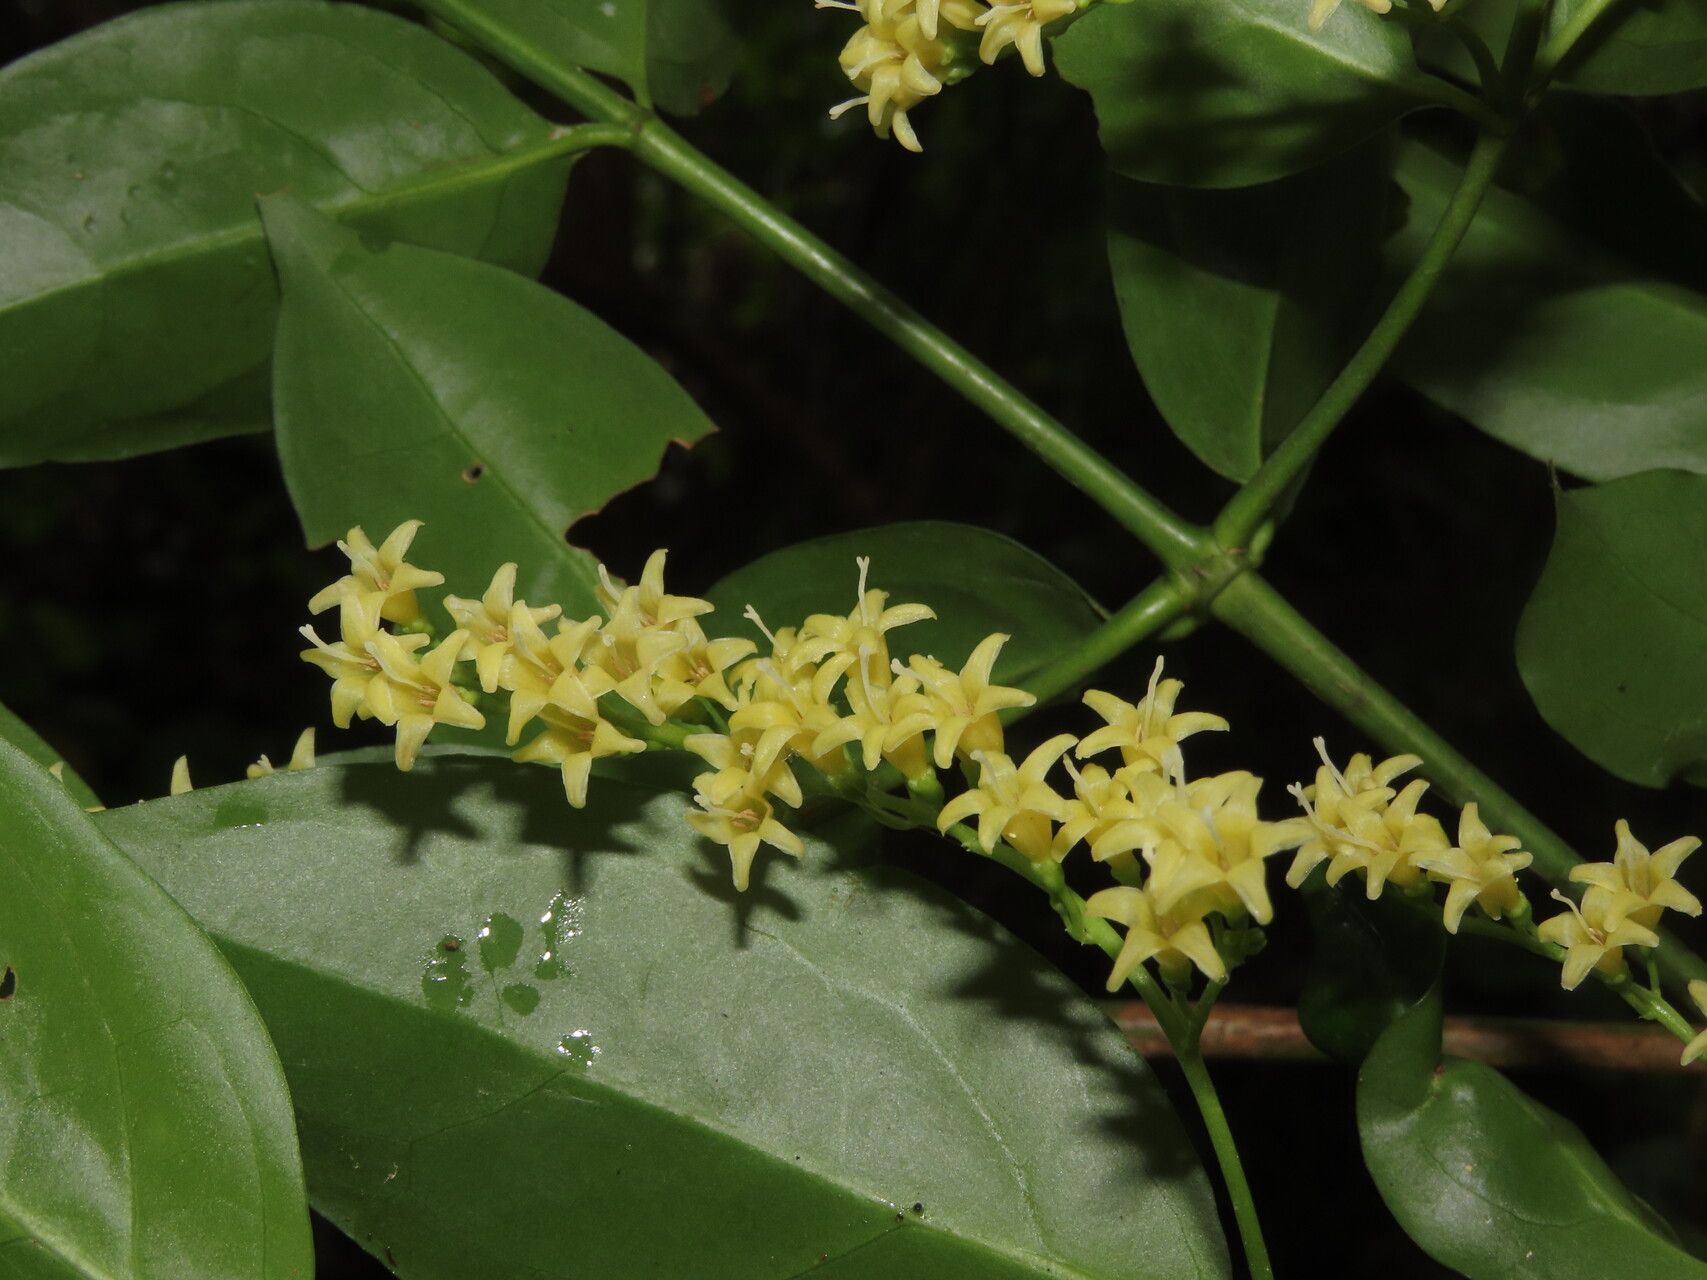
The fragrant Snowberry, scientifically known as Chiococca alba, is a captivating tropical vine prized for its lush foliage and intoxicatingly sweet scent. Its charming white berries, resembling tiny pearls, add further beauty to this versatile plant. But the joy of owning this alluring vine doesn’t have to stop with a single specimen. Propagation, the art of creating new plants from existing ones, allows you to share the beauty of the Snowberry with your garden and beyond.
A Simple Guide to Propagating Snowberry
Propagating Chiococca alba is a relatively straightforward process, even for novice gardeners. Here’s a step-by-step guide for successful propagation:
1. Gather Your Materials:
- Sharp, sterilized pruning shears or knife
- Rooting hormone powder (optional but recommended)
- Small pots filled with a well-draining potting mix
- Plastic wrap or humidity dome
2. Select Your Cuttings:
- Choose healthy, non-flowering stems from the current season’s growth.
- Cut 4-6 inch long sections just below a node, which is the point where leaves or branches emerge.
3. Prepare the Cuttings:
- Remove the leaves from the bottom half of the stem to create a clean surface for root development.
- Dip the cut end of the stem into rooting hormone (if using). This aids in root formation.
4. Plant the Cuttings:
- Create small holes in your potting mix and insert the cuttings, ensuring the cut end is submerged.
- Firmly pack the soil around the base of the cutting, promoting stability.
5. Provide a Humid Environment:
- Cover the pot with plastic wrap or a humidity dome to create a warm and humid environment. This mimics the natural conditions of the plant’s native habitat.
- Place the pot in a warm, bright location, but avoid direct sunlight.
6. Monitor for Signs of Growth:
- After approximately 4-6 weeks, check for new growth. The presence of fresh leaves is a sign of successful rooting.
- Gradually acclimate the new plants to their permanent location by removing the plastic wrap or dome for increasing durations of time.
7. Transplanting:
- Once the roots are well-established, you can transplant the new Snowberry plants into larger pots or directly into your garden.
Beyond Cuttings: An Alternative Method
Though cuttings are the preferred method, you can also try propagation via air layering. This fascinating technique involves encouraging root development on a branch while still attached to the parent plant:
- Select a suitable branch: Choose a healthy branch that you can easily bend down.
- Make a cut: Remove a section of bark along the branch, leaving about 1-2 inches bare.
- Apply rooting hormone: Lightly dust the exposed area with rooting hormone.
- Wrap with sphagnum moss: Wrap the cut area with moist sphagnum moss and secure it with a plastic wrap or aluminum foil.
- Water regularly: Keep the moss moist, but not waterlogged.
- Wait for new growth: Roots will eventually develop within the moss. Once the new growth is evident, carefully sever the layered branch and plant it in a pot or garden.
A Few Helpful Tips:
- Use sterilized tools to prevent infections.
- The optimal time for propagation is during the spring or summer when the plant is actively growing.
- Provide adequate humidity and warmth for successful rooting.
- Be patient. Root development can take time, so don’t be discouraged if you don’t see immediate results.
Propagating the Snowberry is a rewarding endeavor that allows you to expand your garden and share its beauty with others. With a little care and attention, you can easily create new plants from cuttings or air layering, embracing the joy of propagation and captivating your senses with the fragrant magic of the Chiococca alba.