Unlocking the Secrets of Cola lizae: A Guide to Propagation
Cola lizae, a stunning tropical plant with its lush foliage and unique, vibrant flowers, can be a showstopper in any garden or home. But have you ever wondered how to multiply your Cola lizae and share its beauty? While you might not find it at your local garden center, propagating Cola lizae is an exciting endeavor with rewarding results. Let’s dive into the different methods you can use to grow new plants from your existing Cola lizae.
Understanding the Basics
Before we dig into specifics, it’s helpful to understand that Cola lizae can be propagated through two main methods:
- Sexual Propagation (Seeds): This involves the plant flowering, being pollinated, producing seed pods, and then carefully germinating those seeds. While rewarding, this method can be time-consuming and tricky as seeds might not be readily available or viable.
- Asexual Propagation (Cuttings): This method involves taking a cutting from a healthy mother plant and encouraging it to develop roots, essentially creating a clone. It’s typically faster and boasts higher success rates.
Method 1: The Magic of Seed Germination
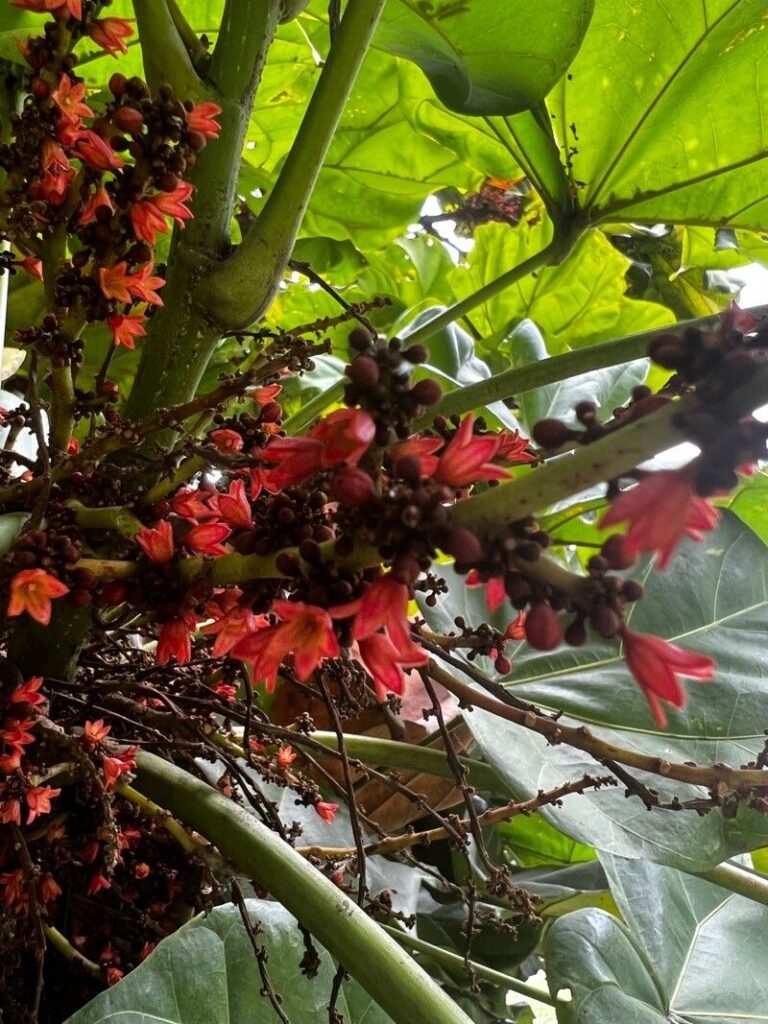
- Source your seeds: Getting your hands on Cola lizae seeds can be a challenge. You can check specialist online nurseries or, if you’re lucky enough to own a mature plant, carefully collect seed pods after flowering.
- Prepare for sowing: Cola lizae seeds benefit from a pre-sowing soak in warm water for 24 hours. This helps soften the outer shell and encourages germination.
- Create the perfect environment: Utilize a well-draining seed starting mix and sow the seeds about 1/2 inch deep in seedling trays or small pots. Maintain a consistent temperature of around 70-75°F (21-24°C) and ensure adequate humidity by covering the trays with a humidity dome or plastic wrap.
- Be patient: Germination can be unpredictable and may take anywhere from a few weeks to a couple of months. Once the seedlings emerge and develop a couple of true leaves, you can transplant them into individual pots.
Method 2: Mastering the Art of Cuttings
- Select healthy stems: Choose a robust stem from your Cola lizae that’s not flowering and has at least two sets of leaves. Using sterilized shears or a sharp knife, make a clean cut just below a leaf node (where the leaf attaches to the stem).
- Prepare the cutting: Remove the lower leaves from the cutting, leaving just one or two sets at the top. This encourages root development.
- Encourage root growth: You can either dip the cut end in rooting hormone powder (optional but helpful) or make your own using a willow water solution.
- Potting and care: Plant the cutting in a well-draining potting mix, burying the node where you removed the lower leaves. Water thoroughly but avoid overwatering.
- Creating a humid environment: Cover the pot with a clear plastic bag or place it in a propagator to maintain high humidity, crucial for root development.
- Be patient and observant: It typically takes 4-6 weeks for roots to establish. Once new growth appears, you can gradually acclimate the cutting to normal humidity by opening the bag slightly each day.
Nurturing Your New Cola lizae Plants
Whether you’ve propagated your Cola lizae from seed or cuttings, the key to their success lies in understanding their needs. These plants thrive in bright, indirect light and prefer slightly acidic, well-draining soil. Water when the top inch of soil feels dry, and fertilize regularly during the growing season with a balanced fertilizer diluted to half strength.
Propagating Cola lizae is a rewarding experience that connects you to the fascinating world of plant propagation. By following these steps, you can multiply your plant collection and share the beauty of Cola lizae with fellow plant enthusiasts. So, why not give it a try? You might just discover your new favorite gardening skill.