Unleash Your Inner Gardener: Propagating Cotoneaster Moupinensis Like a Pro
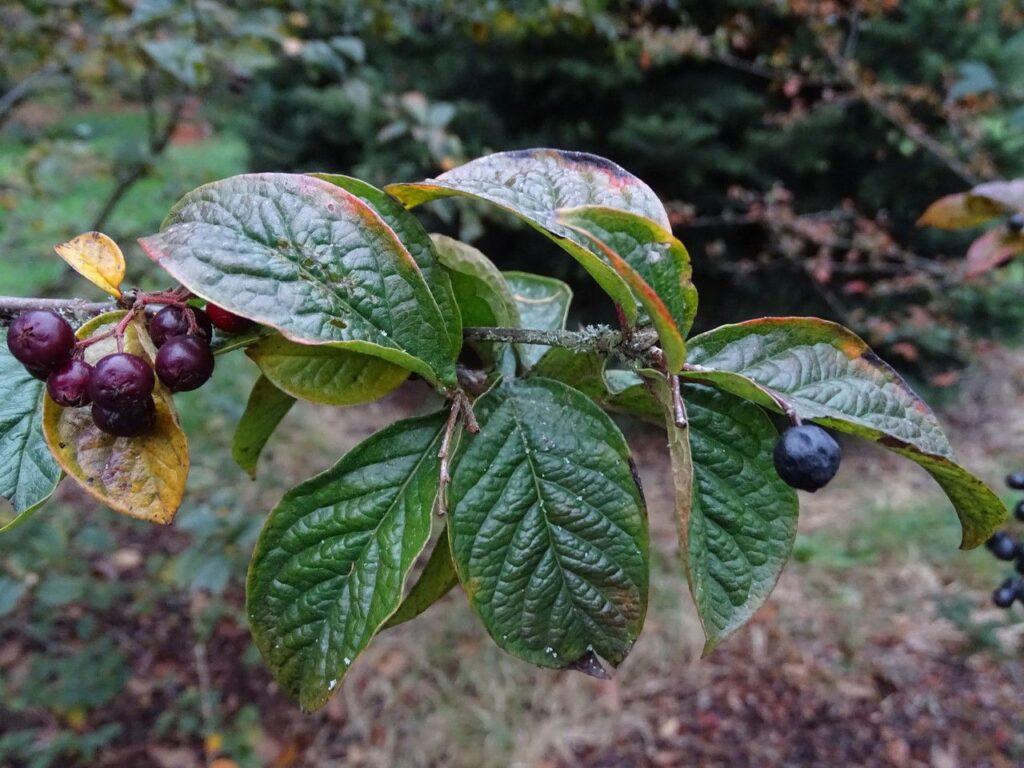
Cotoneaster moupinensis, also known as the Tibetan Cotoneaster, is a stunning shrub prized for its vibrant red berries and attractive foliage that transforms from lush green to fiery red in the fall. While readily available in nurseries, there’s a special satisfaction in propagating your own Cotoneaster, and with a little patience and the right know-how, you can easily expand your garden with these beauties.
This guide delves into the two most effective methods of propagating Cotoneaster moupinensis:
1. Seed Propagation: Embracing the Cycle of Nature
Propagating from seed offers a rewarding journey, allowing you to witness the entire life cycle of your Cotoneaster. Here’s how:
- Collecting the Seeds: Gather ripe berries in the fall. These should be plump and deeply colored. Gently crush the berries and separate the seeds.
- Cold Stratification: Cotoneaster seeds need a period of cold dormancy to sprout. Place the seeds in a moist mix of sand and peat moss, seal them in a plastic bag, and refrigerate for 60-90 days.
- Sowing Time: Plant the cold-stratified seeds in seed trays filled with well-draining soil, pressing them lightly into the surface.
- Germination Station: Keep the trays in a warm, bright location, out of direct sunlight. Mist the soil regularly to maintain moisture. Germination can take several weeks.
- Transplanting Triumph: Once seedlings have developed a few sets of true leaves, transplant them into individual pots and nurture them until they are strong enough to face the outdoors.
Advantages of seed propagation:
- Cost-effective: Gather seeds from existing plants and grow a multitude of new ones.
- Rewarding experience: Witnessing the entire growth cycle fosters a deeper connection with nature.
2. Semi-Hardwood Cuttings: A Faster Path to New Growth
Semi-hardwood cuttings offer a quicker propagation method compared to seeds. Follow these steps:
- Timing is Key: Take cuttings in mid-summer, when the new growth is partially mature.
- Choosing the Right Cut: Select healthy stems that have just begun to harden. Cut a 4-6 inch section just below a leaf node.
- Preparing the Cutting: Remove the lower leaves from the cutting, leaving 2-3 pairs at the top.
- Hormone Boost: Dip the cut end in rooting hormone to encourage root development (optional but recommended).
- Planting the Cutting: Insert the prepared cutting into a pot filled with a well-draining potting mix.
- Create a Humid Environment: Cover the pot with a plastic bag or place it in a propagator to maintain high humidity, crucial for root development.
- Patience is a Virtue: Keep the cuttings in a warm, bright location, out of direct sunlight. Rooting can take 6-8 weeks or even longer.
- Transplanting Success: Once roots develop, transplant the cuttings into individual pots and allow them to establish themselves before planting them outdoors.
Advantages of semi-hardwood cuttings:
- Faster Results: New plants establish quicker compared to starting from seed.
- Clonal Propagation: Cuttings produce plants that are genetically identical to the parent plant, ensuring you maintain desired traits.
Nurturing Your New Cotoneasters
Regardless of the propagation method you choose, young Cotoneasters thrive in well-drained soil and appreciate full sun to partial shade. Water them regularly, especially during their first year of growth.
Propagating your own Cotoneaster moupinensis is a fulfilling endeavor. Armed with the knowledge and a dash of patience, you’ll soon have an abundance of these beautiful shrubs gracing your garden. Happy propagating!