Unlocking the Secrets of Sea Mist Propagation: A Guide to Growing Cressa truxillensis
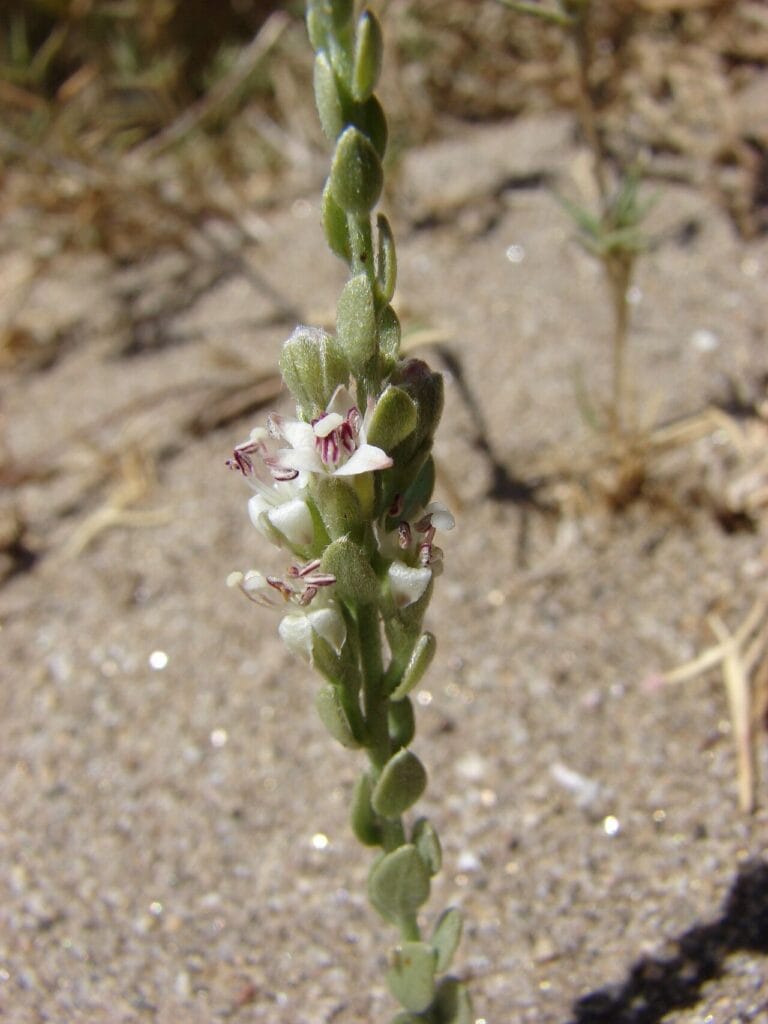
The world of botany is full of fascinating specimens, and Cressa truxillensis, also known as sea mist or alkali blite, is no exception. This resilient succulent, native to the saline soils of coastal regions, captivates with its delicate white flowers and tenacious spirit. If you’re looking to add a touch of coastal charm to your garden or simply admire this unique plant, understanding its propagation methods is key.
While Cressa truxillensis can be grown from seed, it is a notoriously fickle process, often yielding low success rates. This is where vegetative propagation, specifically stem cuttings, emerges as the hero of the story. This method, leveraging the plant’s natural ability to regenerate, offers a faster, more reliable path to success.
Getting Ready for Propagation:
Timing is Everything: The ideal time to take cuttings is during the plant’s active growing season, typically spring to early summer, when energy reserves are high.
Gathering Your Tools: You’ll need a few basic supplies:
- Clean, sharp pruning shears or scissors: This ensures a clean cut, minimizing stress on the parent plant and reducing the risk of infection.
- Small pots or seed trays: Choose containers with good drainage to prevent waterlogging.
- Well-draining potting mix: A mix specifically formulated for succulents or cacti is ideal. Avoid using regular garden soil as it retains too much moisture.
- Rooting hormone (optional): While not strictly necessary, rooting hormone can encourage faster root development.
Taking the Cut:
- Choose healthy stems: Select stems that are firm and free of any signs of disease or damage, ideally from the current year’s growth.
- Make the cut: Using your sterilized shears, take cuttings approximately 3-4 inches long. Make a clean cut just below a leaf node (the point where the leaf attaches to the stem).
- Prepare the cutting: Remove the lower leaves from the cutting, leaving only a few leaves at the top. This encourages the plant to focus its energy on root development. If using rooting hormone, dip the cut end of the stem into the powder or gel according to the product instructions.
Planting the Cutting:
- Fill your pots: Fill your chosen containers with the well-draining potting mix, moistening it evenly.
- Create a planting hole: Make a small hole in the potting mix with your finger or a pencil, deep enough to accommodate the cutting.
- Insert the cutting: Gently insert the prepared cutting into the hole, ensuring that at least one leaf node is buried. Gently firm the soil around the base of the cutting.
Nurturing New Growth:
Location is Key: Place your cuttings in a bright location, but out of direct sunlight which can scorch the delicate new growth.
Moisture Control: Keep the potting mix consistently moist but not waterlogged. You can use a spray bottle to mist the soil surface, ensuring it dries slightly between waterings. Overwatering is a common pitfall, so err on the side of caution.
Patience is a Virtue: Rooting can take several weeks. A good indication of successful rooting is the emergence of new growth. Once the cuttings show signs of vigorous growth, you can gradually acclimate them to outdoor conditions if desired, eventually transplanting them to larger pots or a suitable location in your garden.
By following these straightforward steps, you’ll be well on your way to propagating Cressa truxillensis and enjoying its unique beauty for years to come. With a little patience and care, you can unlock the secrets of this resilient coastal gem and witness firsthand the wonders of plant propagation.