
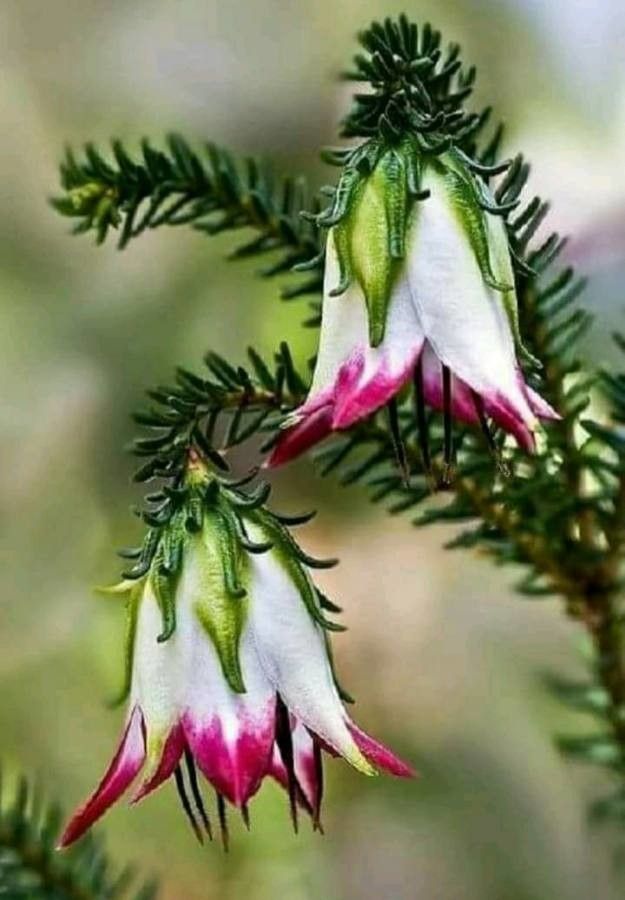
Unlocking the Secrets of the Cranbrook Bell: A Guide to Propagating Darwinia meeboldii
The Cranbrook Bell (Darwinia meeboldii) is a captivating Australian native known for its unique, bell-shaped flowers that dangle like miniature Christmas ornaments. These fiery red blooms, contrasted against the plant’s soft, needle-like foliage, make it a showstopper in any garden. But have you ever considered propagating your own Cranbrook Bell? While it requires a bit of patience and a touch of green thumb magic, successfully growing this beauty from scratch is an incredibly rewarding experience. Let’s delve into the techniques that will have you ringing in success with Darwinia meeboldii propagation.
Two Paths to Propagation: Seed vs. Cuttings:
1. Starting from Seed: An Adventurous Undertaking
Propagating Cranbrook Bell from seed can be a bit challenging, as the seeds are known for their inconsistent germination rates. However, with persistence and the right approach, it’s certainly achievable. Here’s what you need to know:
- Patience is Key: Darwinia meeboldii seeds can take anywhere from a few weeks to several months to germinate.
- Smoke to the Rescue: These seeds respond well to smoke treatments. You can purchase smoked vermiculite or use a specialized smoke water solution to mimic the natural bushfire conditions that trigger germination.
- Sowing the Seeds: Sow the seeds on the surface of a free-draining seed-raising mix and keep them consistently moist but not waterlogged.
- Warmth and Light: Place the seed tray in a warm, bright location, out of direct sunlight.
- Transplanting Time: Once the seedlings are large enough to handle, carefully transplant them into individual pots.
2. Cuttings: A Faster Route to Success:
Taking cuttings is generally the preferred method for propagating Darwinia meeboldii, offering a higher success rate and quicker results compared to seed propagation. Follow these steps:
- Timing is Everything: The best time to take cuttings is during the cooler months, ideally in late autumn or early spring.
- Selecting the Right Cuttings: Choose healthy, non-flowering stems that are around 7-10 cm long.
- Preparing the Cuttings: Remove the leaves from the bottom third of the stem and wound the base slightly to encourage root development.
- Hormone Help: Dip the prepared end in rooting hormone powder to enhance rooting success.
- Planting the Cuttings: Plant the cuttings in a well-draining potting mix specifically formulated for cuttings.
- Creating a Humid Environment: Cover the cuttings with a clear plastic bag or use a propagation dome to create a warm, humid environment.
- Patience, Once Again: Keep the cuttings in a bright spot, out of direct sunlight. Rooting usually takes around 6-8 weeks.
- Transplanting Success: Once the cuttings have developed a strong root system, carefully transplant them into individual pots.
Nurturing Your Newly Propagated Plants:
Whether you’ve chosen the seed or cutting route, nurturing your young Darwinia meeboldii is essential for their long-term health and vigor.
- Well-Drained Soil: Plant them in a light, well-drained soil mix.
- Sunshine is Key: They thrive in full sun to part shade positions.
- Watering Wisely: Keep the soil evenly moist, but avoid overwatering.
- Feeding for Growth: Use a slow-release fertilizer specifically formulated for native Australian plants.
- Pruning for Shape: Prune lightly after flowering to maintain a compact shape and encourage bushier growth.
By following these guidelines and arming yourself with a little patience, you’ll be well on your way to enjoying the striking beauty of Darwinia meeboldii in your own garden for years to come. Remember, propagating your own plants is an adventure, and even if you encounter setbacks, the journey itself can be incredibly fulfilling.