Unfurling the Magic: Propagating the Exquisite Elaphoglossum Splendens
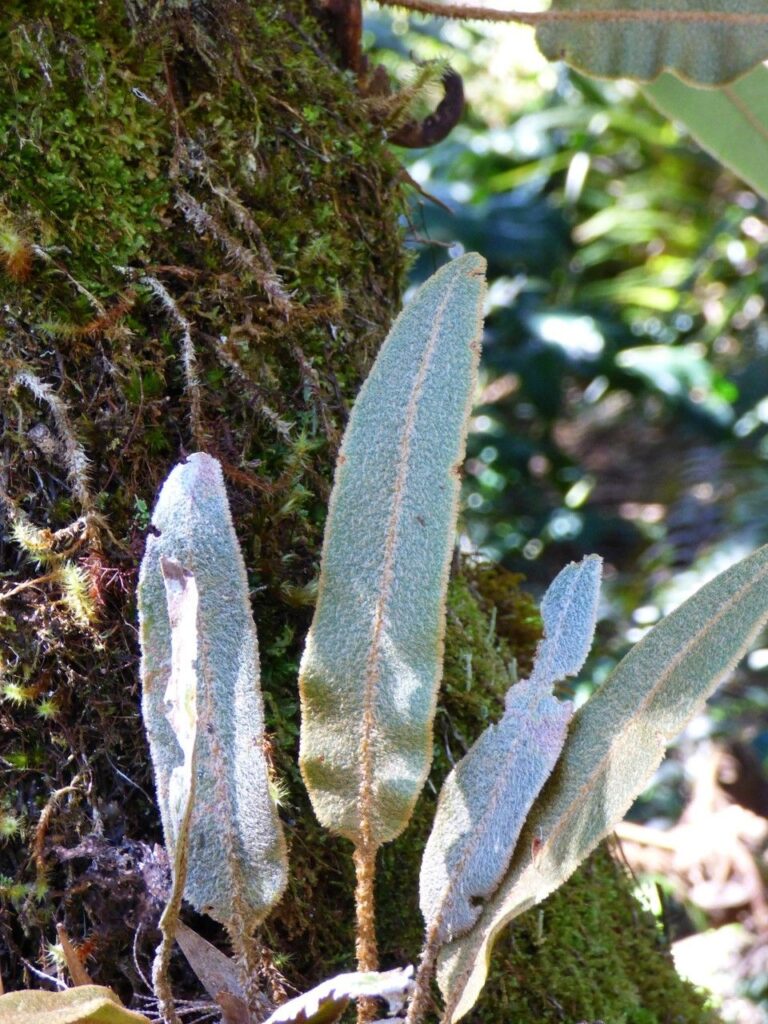
The Elaphoglossum splendens, with its captivating, velvety green fronds and striking, silver-tipped veins, is a plant that instantly commands attention. But how do you bring more of this beauty into your life? The good news is, propagating this stunning fern is surprisingly achievable.
While seeds aren’t a viable option for Elaphoglossum splendens, there are two primary methods of propagation: division and spores.
Division: A Splitting Success
Division is the most straightforward method for those new to propagation. This technique involves simply dividing a mature plant into smaller sections, each with its own root system. Here’s how:
-
Choose the Right Time: Spring or early summer is the ideal moment for dividing your Elaphoglossum splendens, when the plant is actively growing.
-
Prepare for the Split: Carefully remove the plant from its pot and gently loosen the soil around the roots.
-
Divide and Conquer: Using a sharp, sterile knife, divide the plant into sections, ensuring each section has a healthy root system and several fronds.
- Repot the Divisions: Plant each section individually in a suitable pot with a well-draining potting mix. Water thoroughly and keep the soil consistently moist.
Spore Propagation: A Journey of Patience
While division offers faster results, spore propagation brings unique rewards. It allows you to cultivate multiple plants from a single source and offers a sense of accomplishment after a period of meticulous care. Here’s a step-by-step guide:
-
Harvest the Spores: Gather mature spores from the underside of the fronds of your parent Elaphoglossum splendens plant. They are usually dusted across the surface in little brown patches.
-
Prepare the Spore Medium: Use a sterile, fine-textured medium like sphagnum moss or a mixture of peat moss and perlite.
-
Sowing the Spores: Spread the spores evenly on the surface of the prepared medium. Don’t bury them, as they need light to germinate.
-
Create a Humid Environment: Cover the container with a clear plastic lid or wrap to retain moisture and warmth. This will help create a humid environment that is ideal for spore germination.
-
Patience is Key: Germination takes time, anywhere from a few weeks to several months. Keep the container in a well-lit, warm location, out of direct sunlight.
- Pricking Out and Transplanting: Once the spores have germinated into tiny, leafy plants, carefully prick them out and transplant them into individual pots with a suitable potting mix.
Nurturing Your Propagated Plants
- Light: Elaphoglossum splendens thrives in bright, indirect light. Avoid direct sunlight, which can burn their delicate leaves.
- Watering: Maintain consistently moist soil but avoid overwatering, as this can lead to root rot.
- Humidity: These ferns love humidity, so consider placing them in a humid room or grouping them with other plants to increase the humidity around them.
- Temperature: Try to maintain a temperature range between 60-75 degrees Fahrenheit for optimal growth.
Unveiling the Magic
Propagating your Elaphoglossum splendens is a rewarding endeavor that allows you to expand your plant family and showcase the captivating beauty of this unique fern. Whether you choose the speed and simplicity of division or the patience and detail-oriented approach of spore propagation, the journey is sure to be captivating. With a little care and a passion for cultivating nature’s wonders, you’ll be surrounded by the elegant beauty of Elaphoglossum splendens in no time.