Multiply Your Myrtle-Leaved Magic: A Guide to Propagating Escallonia Myrtoidea
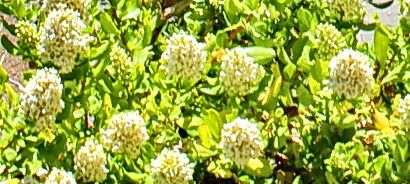
Escallonia myrtoidea, with its charming sprays of pink or white flowers and glossy evergreen foliage, is a garden gem. This South American native, also known as the myrtle-leaved escallonia, brings year-round structure and a burst of summer color to gardens. But did you know that you can easily multiply this beauty and share the joy? Propagating Escallonia myrtoidea is a rewarding endeavor, and this guide will walk you through the process.
Two Paths to Propagation: Seed vs. Cuttings
While you can propagate Escallonia myrtoidea from seed, it’s a less reliable method. Seeds can be slow to germinate and may not inherit the exact characteristics of the parent plant. For guaranteed success and replicating the beauty of your existing plant, cuttings are the way to go!
The Cutting Edge: Propagating from Stem Cuttings
Here’s how to propagate Escallonia myrtoidea from cuttings:
Timing is Everything:
- Best time: Late summer to early fall is ideal. This allows the cuttings to develop roots before winter dormancy sets in.
- Acceptable time: Spring is also an option, but rooting may take longer.
Tools of the Trade:
- Sharp, clean pruning shears or a garden knife
- Small pots (around 3 inches in diameter)
- Seed starting mix or a well-draining potting mix
- Rooting hormone (powder or liquid form) – optional, but recommended
Let’s Get Cutting!
- Select Healthy Shoots: Look for non-flowering stems that are approximately 4-6 inches long. These younger shoots are more vigorous and root readily.
- Make the Cut: Using your clean shears or knife, make a clean cut just below a leaf node (the point where a leaf emerges from the stem).
- Prepare the Cutting: Remove the leaves from the bottom third of the cutting. Lightly wound the base of the cutting by scraping a small section of the bark; this can encourage root development.
- Hormone Boost (Optional, but Recommended): Dip the wounded end of the cutting in rooting hormone, following the product instructions.
- Potting Time: Fill your pots with moist seed-starting mix or potting mix. Create a hole in the center with your finger or a pencil. Gently insert the cutting into the hole, ensuring the bottom leaves are above the soil line.
- Create a Humid Environment: Cover the pot with a clear plastic bag or a propagation dome to maintain humidity. Place the pot in a bright location, but out of direct sunlight.
- Patience is Key: Rooting can take 6-8 weeks. Check the moisture level regularly and mist the soil if it feels dry. Tug gently on the cutting; resistance indicates root development.
Transplanting Time:
Once the cuttings have a good root system (gently tugging will tell you), they can be transplanted into larger pots or directly into the garden. Choose a spot with well-draining soil and full sun to partial shade. Water regularly until established.
Enjoy the Fruits (and Flowers) of your Labor!
Propagating your own Escallonia myrtoidea is a fulfilling experience. Not only will you have more of these lovely plants to grace your garden, but you’ll also have the satisfaction of successfully multiplying your green companions. So, get those shears ready and get propagating!