Unlocking the Secrets of Grammitis Contigua Propagation: A Step-by-Step Guide
Grammitis contigua, with its delicate fronds and captivating texture, is a true gem among terrarium enthusiasts and houseplant lovers. This epiphytic fern, native to the tropical rainforests, brings a touch of the wild indoors. While caring for Grammitis contigua can be relatively straightforward, propagating it might seem like a mystery to some. Fear not, fellow plant parents! This guide will unveil the secrets to successfully multiplying your Grammitis contigua, turning you into a propagation pro in no time.
Understanding the Basics
Before we dive into the methods, let’s understand the plant’s natural propagation strategies. In its natural environment, Grammitis contigua reproduces through spores (like typical ferns) and, more commonly, through plantlets. These miniature replicas form on mature fronds, ready to take root and grow independently.
Method 1: Plantlet Propagation – Embracing the Circle of Life
This method is the easiest and most rewarding way to propagate Grammitis contigua. Here’s how:
- Identify Mature Plantlets: Look for plantlets on mature fronds that have developed tiny roots.
- Careful Removal: Using clean, sharp scissors, carefully detach the plantlet from the parent frond. Ensure you are cutting above the roots and not damaging the plantlet itself.
- Preparing the Planting Medium: Choose a well-draining potting mix suitable for ferns or epiphytes. A mix of peat moss, perlite, and vermicast works well.
- Planting: Place the plantlet gently on the surface of the moist potting mix, ensuring the roots are in contact with the medium. Do not bury the plantlet.
- Creating a Humid Environment: Cover the pot with a clear plastic bag or a humidity dome to maintain high humidity levels, crucial for successful rooting.
- Patience is Key: Place the pot in a warm, bright location but away from direct sunlight. It may take a few weeks for the plantlet to establish itself.
Method 2: Spore Propagation – A More Advanced Approach
While slightly more challenging, spore propagation allows you to grow Grammitis contigua from scratch. Here’s the breakdown:
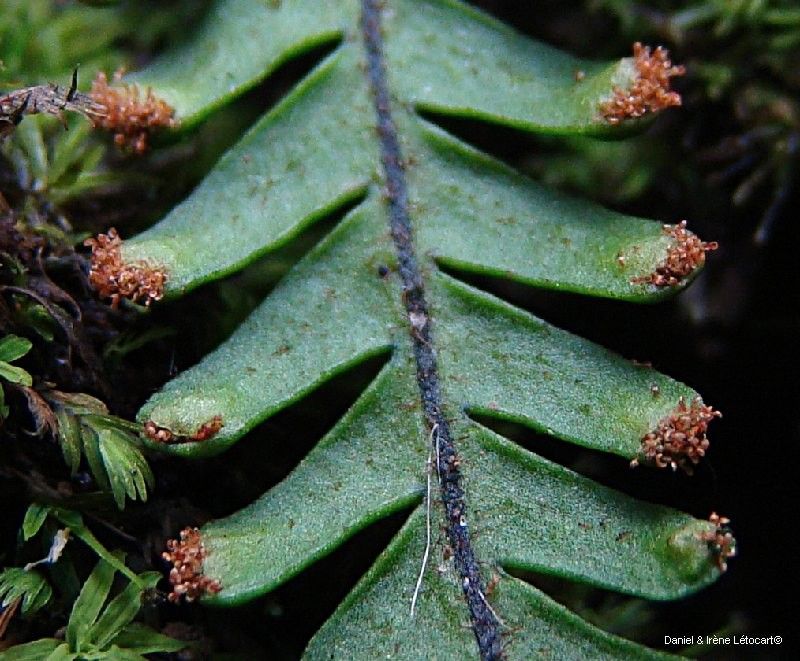
- Spore Collection: Look for mature, dark-colored spore patches on the undersides of the fronds. Carefully scrape the spores onto a clean piece of paper.
- Sowing the Spores: Prepare a seed-starting mix or a similar sterile, fine-textured medium. Moisten the medium and sprinkle the spores evenly over the surface. Do not bury them.
- Creating a Humid Environment: Cover the container with a clear plastic wrap or lid to maintain high humidity.
- Warmth and Indirect Light: Place the container in a warm, shaded location.
- Patience is Paramount: It can take several weeks to months for spores to germinate, so be patient and keep the medium consistently moist.
Caring for your New Grammitis Contigua
Once your new plants are established, whether propagated through plantlets or spores, provide them with the care they need to thrive:
- Bright, Indirect Light: Avoid placing them in direct sunlight, as it can scorch their delicate fronds.
- Consistent Moisture: Water when the top inch of the soil feels dry, ensuring good drainage to prevent root rot.
- High Humidity: Mist regularly or place the pot on a pebble tray filled with water to maintain high humidity levels.
- Regular Fertilization: Feed with a diluted, balanced fertilizer during the growing season (spring and summer) to encourage healthy growth.
Propagating Grammitis contigua might seem daunting at first, but with patience and this guide, you can easily expand your plant family and enjoy the beauty of this unique fern for years to come. So embrace the joy of propagation, and let your Grammitis contigua collection flourish!