Unlocking the Beauty of Hakea Eriantha: A Guide to Propagation
The Hakea Eriantha, also known as the “Woolly Hakea” or “Silky Hakea”, captivates the eye with its fluffy, pink-toned flowerheads. Its striking beauty isn’t just for show though – this hardy Australian native can be a stunning addition to your garden. But how can you enjoy the beauty of Hakea Eriantha without spending a fortune on expensive plants? The answer lies in propagation!
Propagation is the art of creating new plants from existing ones, saving you money and allowing you to share the joy of this unique plant with friends and family. Hakea Eriantha can be primarily propagated using two methods: seeds and cuttings. Let’s dive into each.
Propagation from Seeds:
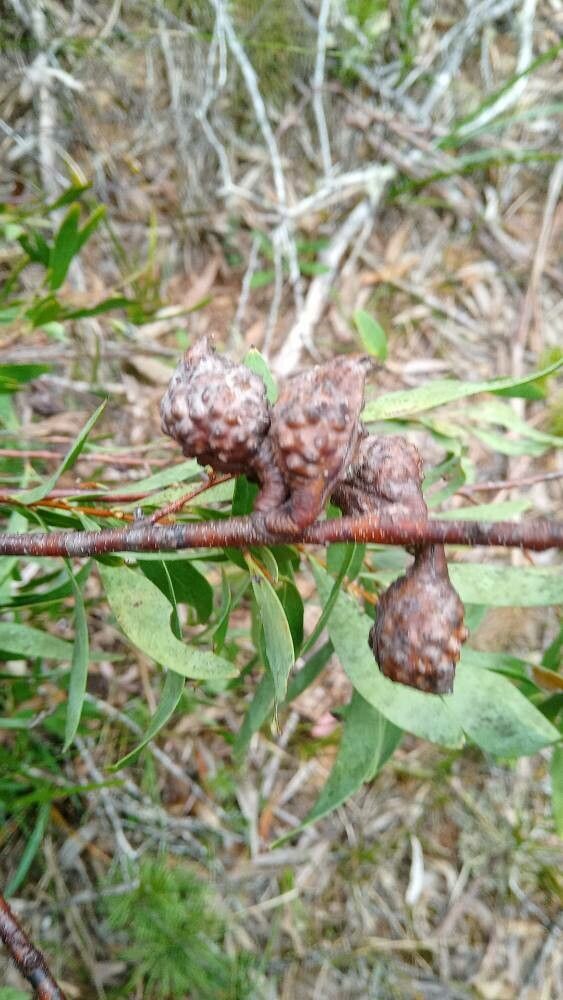
- Collecting Seeds: Hakea Eriantha seed pods are woody capsules that ripen after a long period. Collect pods after they are a dark brown and have split open naturally. The seeds within are small and winged.
- Preparing the Seeds: The hard seed coat of Hakea Eriantha needs to be scarified before sowing. This process creates a weakness in the seed coat that allows water penetration, aiding germination. You can achieve scarification by gently nicking the seed coat with a sharp knife or by soaking the seeds in boiling water for a short period.
- Sowing Seeds: Sow your prepared seeds in a well-drained seed-raising mix. Cover the seeds with a fine layer of compost and water thoroughly. Keep them warm and moist; germination can take several weeks.
- After Germination: Once seedlings emerge, thin them out to ensure each plant has enough space to grow. Gradually acclimate the young Hakea Eriantha to outdoor conditions before planting them in their permanent location.
Propagation from Cuttings:
- Taking Cuttings: The best time to take cuttings is during the cooler months, preferably from new growth. Choose a healthy, non-flowering stem and cut a 10-15cm section, ensuring you have at least 2-3 nodes (leaf joints).
- Preparing Cuttings: Remove the lower leaves from the cutting and dip the cut end in a rooting hormone powder. This helps to stimulate root growth.
- Planting Cuttings: Insert the cut end of each cutting into a well-drained potting mix, ensuring the nodes are below soil level. Keep the soil moist but not waterlogged.
- Rooted Cuttings: Cuttings can take several weeks to root. Ensure good drainage and maintain a humid environment, either by covering them with plastic wrap or placing the pot in a propagator.
Success Tips:
- Location Matters: Hakea Eriantha prefers full sun and well-drained soil. Choose a location that mimics these conditions when planting or transplanting.
- Careful Watering: While Hakea Eriantha is drought-tolerant, they prefer a consistent supply of water, especially during the establishment phase. Water deeply but infrequently.
- Fertilising: Hakea Eriantha doesn’t require heavy fertilization. A light dose of organic fertilizer a few times a year is sufficient.
- Minimal Maintenance: Once well-established, Hakea Eriantha is relatively low maintenance, requiring minimal pruning and pest control.
By following these steps, you can enjoy the delightful blooms and unique beauty of Hakea Eriantha in your garden. Whether you choose seeds or cuttings, propagating this remarkable species is a rewarding experience. Don’t just admire its beauty – embrace it!