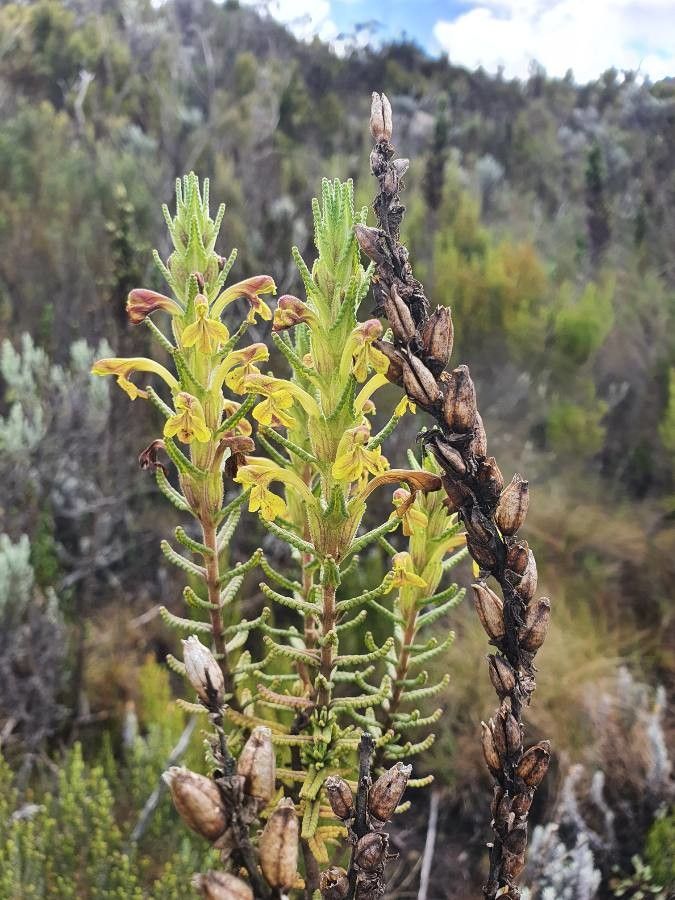
From Seed to Splendor: Unveiling the Secrets of Hedbergia Longiflora Propagation
Are you charmed by the delicate beauty of Hedbergia longiflora, with its captivating, long, trumpet-shaped flowers? Do you yearn to share this stunning plant with others or expand your own collection? Propagation is the answer! While Hedbergia longiflora may seem a bit intimidating, the journey from seed to blooming masterpiece is surprisingly accessible.
This comprehensive guide will equip you with the knowledge and techniques to successfully propagate this captivating species, whether you prefer the patient art of seed germination or the quicker approach of cuttings.
The Seedling Journey: Patience and Precision
Step 1: Sourcing Seeds: Hedbergia longiflora seeds are relatively rare, but a dedicated internet search or contact with specialized plant nurseries may yield success.
Step 2: Preparation: Choose a well-draining seed-starting mix, filling small pots or trays with it. Moisten the mix thoroughly, but avoid over-watering.
Step 3: Sowing Seeds: Hedbergia longiflora seeds are tiny, so it’s crucial to avoid burying them too deeply. Simply sprinkle them onto the surface of the moistened mix and cover lightly with a thin layer of vermiculite or fine sand.
Step 4: Creating the Right Atmosphere: Maintain a consistently warm and humid environment for your seeds. A mini-greenhouse or seed tray covered with plastic wrap can help retain moisture and heat.
Step 5: The Wait is Worth it: Be patient! Hedbergia longiflora seeds can take several weeks to germinate. Provide indirect sunlight and maintain even moisture levels to encourage growth.
The Cutting Method: Speeding Up the Process
Step 1: Taking Cuttings: Utilize sharp, clean scissors or a knife to remove 4-6 inch cuttings from healthy, mature stems. Choose semi-hardwood cuttings taken in late spring or early summer.
Step 2: Preparing the Cuttings: Remove the lower leaves from your cuttings, leaving only a few at the top. Dip the cut end of the stem in rooting hormone powder for enhanced root development.
Step 3: The Perfect Environment: Select a well-draining potting mix and fill small pots or trays. Plant the cuttings deep enough to support them upright.
Step 4: Promoting Root Growth: Maintain a consistently moist environment by covering each pot or tray with a plastic dome or bag. Keep the cutting medium evenly moist, but not soggy.
Step 5: The Signs of Success: Within a few weeks, new roots should begin to develop. Gradually reduce the covering time to acclimate the cuttings to higher humidity conditions.
Nurturing Your Young Hedbergia
Regardless of your chosen propagation method, providing optimal care is essential for healthy growth. Offer your young Hedbergia longiflora a well-draining, slightly acidic soil mix, ample indirect sunlight, and consistent moisture.
As they mature, these plants will reward you with their striking, long-lasting flowers, reminding you of the dedication and joy you invested in their growth.
Whether you’re a seasoned plant pro or a novice gardener, successfully propagating Hedbergia longiflora is within reach. Embrace the challenge, and you’ll be rewarded with the beauty and charm of this extraordinary plant for years to come.