
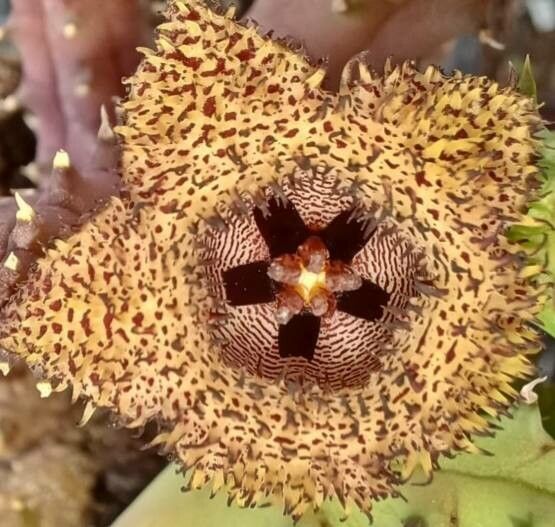
From Spiky Star to Blooming Beauty: Propagating Your Huernia hystrix
If you’re a succulent enthusiast, the Huernia hystrix, with its spiky, star-shaped flowers, is sure to catch your eye. But beyond its striking appearance, this unique succulent is also surprisingly easy to propagate!
This blog post will guide you through the simple process of growing new Huernia hystrix plants from cuttings. Whether you’re a seasoned gardener or a novice, with a little patience and care, you’ll soon be enjoying the beauty of these striking succulents in abundance.
Why Propagate?
Propagating your own Huernia hystrix offers a number of benefits:
- Easy and affordable: You can create new plants from cuttings without spending a fortune on new ones.
- Greater variety: You can easily create multiple plants from a single cutting, allowing you to expand your collection.
- Gift-worthy: Sharing your propagated Huernia hystrix with friends and family is a thoughtful and unique gift, showing your passion for gardening.
Getting Started with Propagation
You can propagate your Huernia hystrix using stem cuttings. Here’s what you’ll need:
- Sharp, clean knife or scissors: To make clean cuts without damaging the plant.
- Potting mix: Use a well-draining cactus mix or blend your own using a mix of perlite, pumice, and potting soil.
- Pot: Choose a pot with drainage holes. Tercotta pots are ideal as they allow the soil to dry faster.
- Optional: Rooting hormone: This can help to encourage root development.
Step-by-Step Guide
- Choose the cutting: Select a healthy, mature stem from your Huernia hystrix. You can take a cutting from the top of the plant or from a side shoot. Aim for a cutting that’s at least 2-3 inches long.
- Make a clean cut: Using your sharp knife or scissors, make a clean, angled cut just below a node (the area where leaves or stems grow).
- Let the cutting dry: Allow the cut end to dry for a few hours to prevent rot.
- Prepare the pot: Fill your chosen pot with your preferred potting mix, leaving about half an inch of space at the top.
- Plant the cutting: Make a small hole in the potting mix and gently insert the cutting. You can use a rooting hormone to promote root growth, but it’s not necessary.
- Water sparingly: Water the cutting lightly. Allow the soil to dry completely before watering again.
- Place in bright, indirect light: Keep your cutting in a sunny location, but away from direct sunlight.
- Patience is key: It can take several weeks for roots to form. Be patient and monitor the cutting regularly.
Signs of Success
You’ll know your Huernia hystrix cutting is successfully rooting when you start to see new growth at the top. This is a sure sign that your new plant is thriving.
Aftercare
Once your Huernia hystrix cutting is rooted and established, you can treat it like your other mature plants. Here are some important care tips:
- Water sparingly: Allow the soil to dry completely between waterings to prevent root rot.
- Fertilize during the growing season: Use a balanced, water-soluble fertilizer diluted to half strength, once a month during the warmer months.
- Protect from frost: Huernia hystrix prefers warm temperatures and is sensitive to cold.
Final Thoughts
Propagating Huernia hystrix is an easy and rewarding process. By following these simple steps, you can multiply your collection of these captivating plants and share their beauty with others. So, get started today and enjoy the process of watching your new Huernia hystrix plants flourish from humble beginnings.