Taming the Tambaqui Grass: Propagating Hyparrhenia hirta
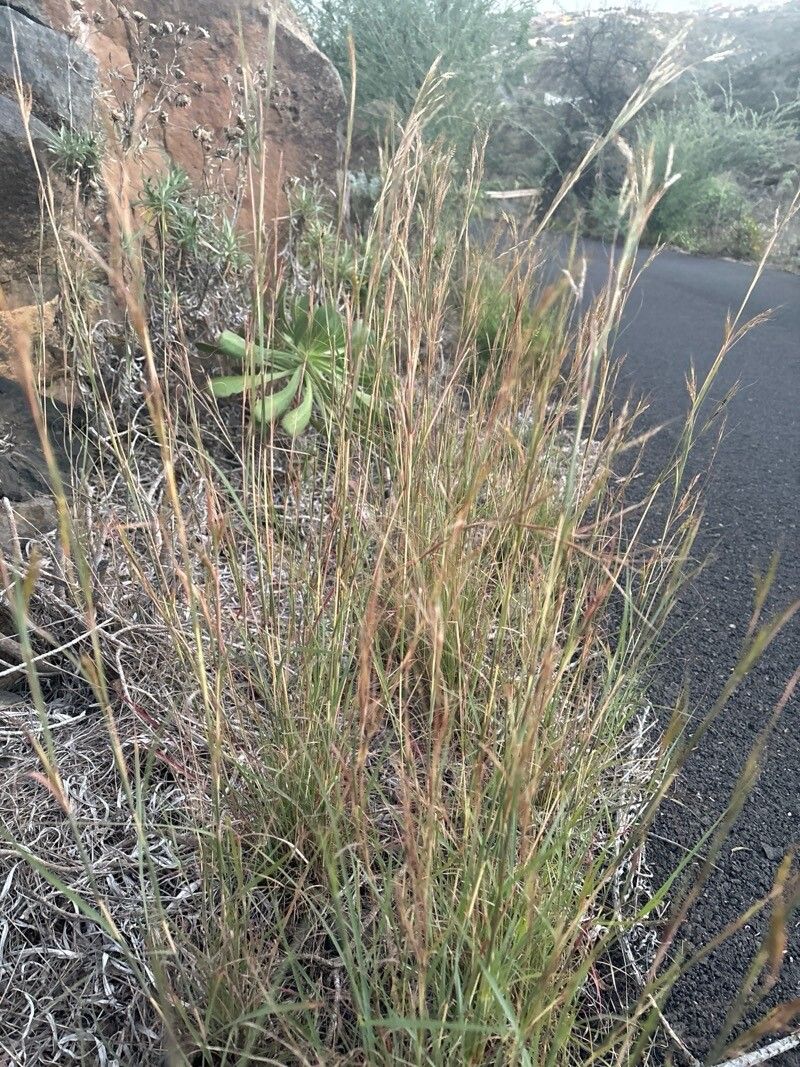
Hyparrhenia hirta, commonly known as “tambaqui grass,” might not roll off the tongue as easily as “rose” or “tulip,” but this tough and adaptable grass deserves a place in any gardener’s heart (and landscape!). Native to Africa, Asia, and the Mediterranean, Hyparrhenia hirta boasts beautiful, feathery plumes and a graceful growth habit, making it a stunning addition to ornamental gardens, meadows, or even erosion-prone areas.
But how do you introduce this intriguing grass into your own outdoor haven? Fear not, propagating Hyparrhenia hirta is surprisingly straightforward. Let’s explore the two main methods:
1. Division: The Simplicity of Splitting
For established clumps of Tambaqui grass, division is your go-to propagation method. It’s easiest to do this in early spring when new growth begins:
- Prepare your tools: You’ll need a sharp spade or garden knife and gardening gloves.
- Dig it up: Carefully dig around the clump, ensuring you get a good amount of the root system.
- Divide and conquer: Gently tease apart the clump into smaller sections, each containing a healthy amount of roots and shoots.
- Replant and rejoice: Replant the divisions in their new homes, ensuring good soil contact and watering them in well.
Division not only multiplies your stock but also helps maintain the health and vigor of your existing plants.
2. Seed Starting: A More Patient Approach
If you’re starting from scratch or enjoy the satisfaction of nurturing a plant from its earliest stages, seed propagation is a rewarding option. Here’s how:
- Time it right: Spring is the optimal time to sow Hyparrhenia hirta seeds.
- Prepare your seedbed: Use a well-draining seed starting mix or create your own using equal parts peat moss, perlite, and vermiculite.
- Sow and cover: Sprinkle your seeds on the surface of the soil and lightly cover them with a thin layer of the mix (around 1/4 inch).
- Light and warmth are key: Hyparrhenia hirta seeds need light to germinate, so ensure they are placed in a bright location, but not in direct sunlight. Consistent warmth (around 70-75°F) is also crucial.
- Patience, young gardener: Germination can take anywhere from a few weeks to a couple of months. Maintain soil moisture, and soon you’ll be rewarded with tiny green shoots.
- Transplanting time: Once the seedlings are large enough to handle, gently transplant them into individual pots or directly into your garden bed after hardening them off.
Caring for your New Additions
Whether you choose division or seed propagation, Hyparrhenia hirta is relatively low-maintenance:
- Sun worshipper: It thrives in full sun but tolerates partial shade.
- Well-drained soil is a must: Soggy roots are a recipe for disaster.
- Water wisely: While drought-tolerant once established, water regularly during the first year to support root development.
- Minimal feeding: Hyparrhenia hirta doesn’t require heavy fertilization.
With a little effort, you can successfully propagate this stunning grass and enjoy its beauty for years to come. So go ahead, conquer the Tambaqui grass and watch it grace your garden with its elegance and resilience!