Unlocking the Secrets of Prickly Cedar Propagation: A Guide to Growing Juniperus oxycedrus
The Prickly Cedar, also known as Juniperus oxycedrus, is a captivating evergreen with its prickly foliage, aromatic berries, and hardy nature. Whether you’re drawn to its Mediterranean charm or simply looking for a resilient addition to your garden, propagating your own Prickly Cedar can be a rewarding experience.
While this species can be a bit stubborn to propagate compared to other junipers, don’t fret! With a dose of patience and the right techniques, you can successfully grow new plants. This guide explores two propagation methods for Juniperus oxycedrus:
Method 1: The Gift of Patience – Growing from Seed
Propagating from seed is a rewarding but lengthy process, requiring about 18-24 months for germination alone! Here’s how to embark on this journey:
-
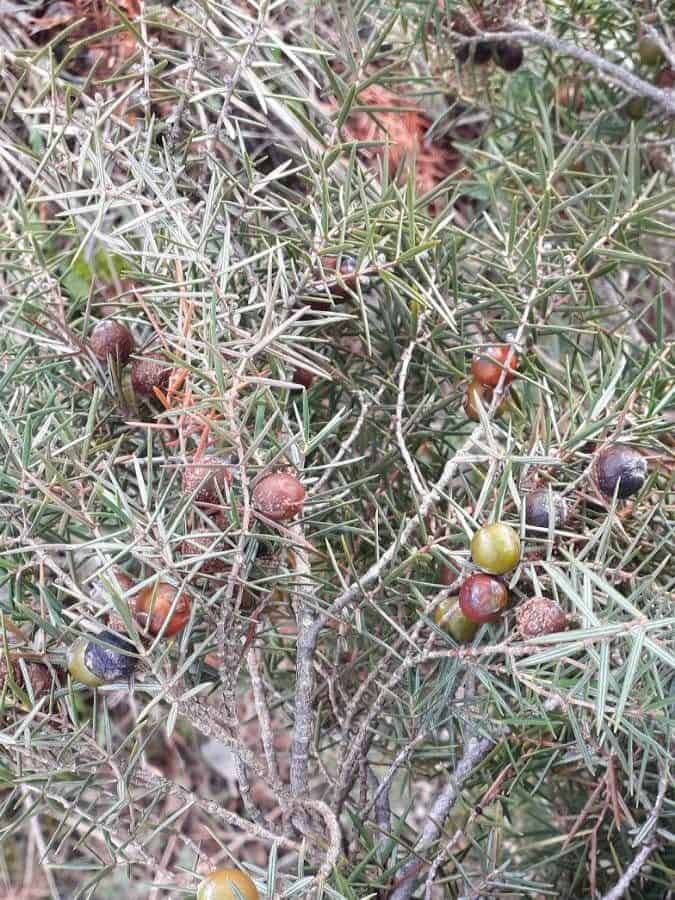
Seed Collection and Preparation: Collect ripe berries during late summer or early fall. These berries are dark blue to almost black. To enhance germination, soak the berries in warm water for 24 hours, then gently rub off the fleshy outer layer.
-
Stratification Time: Juniperus oxycedrus seeds need a period of cold stratification to mimic natural winter conditions and break dormancy. Mix the cleaned seeds with damp vermiculite or sand and place them in a sealed bag in your refrigerator (around 4°C) for 60-90 days.
-
Sowing the Seeds: In spring, sow the stratified seeds in a well-draining seed-starting mix. Lightly cover with soil and keep consistently moist but not waterlogged.
- Light and Warmth: Place the seed tray in a bright location but out of direct sunlight. Maintain temperatures between 20-25°C for optimal germination.
Method 2: A Faster Route – Semi-Hardwood Cuttings
For quicker results, propagating from semi-hardwood cuttings is more efficient. Here’s a step-by-step guide:
-
Timing is Key: Take cuttings during late summer or early fall when new growth has hardened slightly.
-
Choosing the Cuttings: Select healthy, non-flowering shoots that are 10-15 cm long.
-
Preparing the Cuttings: Remove the lower leaves from the bottom third of each cutting. Wound the base of the cutting by making a small vertical cut or scraping off a sliver of bark to expose the cambium layer.
-
Hormone Boost (Optional): Dip the wounded end in rooting hormone powder to stimulate root development.
-
Planting the Cuttings: Plant each cutting in a pot filled with a well-draining rooting mix (a blend of peat moss and perlite works well), burying at least a third of the cutting in the medium.
-
Creating a Humid Environment: Water thoroughly and enclose the pot in a clear plastic bag or use a propagator to maintain humidity. Place in a bright location but out of direct sunlight.
- Patience is Still Needed: Cuttings can take several weeks or months to root. Check for resistance when gently tugged – a good sign that roots are developing.
Caring for Your New Propagations
Whether you choose seed or cuttings, once rooted, gradually acclimate your young Prickly Cedars to outdoor conditions. Plant them in well-drained soil in a sunny location. These hardy plants prefer minimal watering once established and tolerate various soil types.
With some effort and a good dose of patience, you’ll be rewarded with the satisfaction of growing your very own Juniperus oxycedrus, adding a touch of the Mediterranean to your garden for years to come!