Unleash the Fiery Beauty: Propagating Your Lobivia calorubra
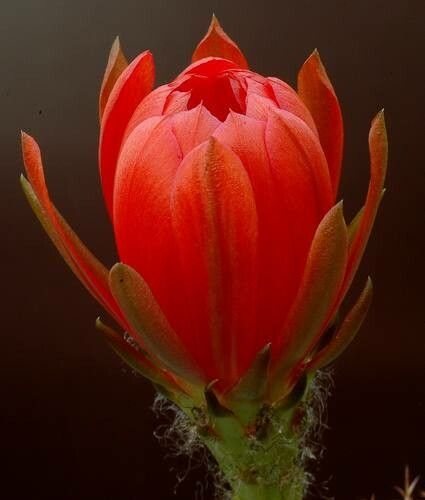
The Lobivia calorubra, with its striking red blooms and intriguing, spiny form, is a cactus guaranteed to catch the eye. While admiring its fiery beauty is reward enough, wouldn’t it be amazing to multiply your collection and share this stunning species with friends? Luckily, propagating Lobivia calorubra is a rewarding endeavor, even for beginner gardeners. Let’s dive into the two main methods:
Method 1: Seeds – A Journey of Patience and Reward
Starting Lobivia calorubra from seed is an exciting (albeit slower) journey that gives you a front-row seat to the entire life cycle of this cactus. Here’s what to do:
-
Source Your Seeds: Reputable online vendors and specialist nurseries are your best bet for high-quality seeds.
-
Prepare the Sowing Mix: Combine equal parts well-draining cactus potting mix and fine-grade pumice or perlite. This creates a light and airy medium that prevents root rot.
-
Sow the Seeds: Moisten the mix thoroughly and lightly press the seeds onto the surface. Don’t bury them!
-
Create a Humid Environment: Cover the seed tray with a transparent lid or plastic wrap to lock in moisture and create a mini greenhouse effect.
-
Provide Light and Warmth: Place the tray in a bright location but out of direct sunlight. Aim for temperatures between 70-80°F (21-27°C).
-
Patience is Key: Germination can take anywhere from a few weeks to a couple of months. Be patient and keep the soil lightly moist by misting it regularly.
- Transplanting Success: Once the seedlings are large enough to handle, carefully transplant them into individual pots using a well-draining cactus mix.
Method 2: Offsets – Taking the Express Route
Lobivia calorubra often produces offsets, also known as “pups,” which are essentially baby cacti growing at the base of the mother plant. These offer a quicker propagation method:
-
Identify a Healthy Offset: Look for plump, firmly attached offsets that are at least an inch in diameter.
-
Gently Twist and Remove: Using clean, sharp tools, carefully twist and wiggle the offset free from the mother plant. Ensure you get a clean break with no damage to the parent.
-
Let the Wound Heal: Allow the offset to sit in a warm, dry location for a few days until the cut surface callouses over.
-
Pot Your Offset: Plant the offset in a well-draining cactus mix, burying the bottom part just enough to keep it stable.
- Water Sparingly: Initially, water only when the soil is completely dry, gradually increasing watering frequency as the offset establishes roots.
General Care Tips for Your New Arrivals:
- Sun Lovers: Lobivia calorubra thrives in bright, indirect sunlight.
- Water Wisely: Allow the soil to dry out completely between waterings, and avoid overwatering, which can lead to root rot.
- Fertilize for Growth: Feed your Lobivia calorubra with a diluted cactus fertilizer during the growing season (spring and summer).
- Protect from Frost: These cacti are not cold-hardy and should be brought indoors or protected when temperatures drop below freezing.
With a little patience and care, you can successfully propagate your Lobivia calorubra and enjoy a fiery display of these captivating cacti for years to come. Happy propagating!