Unlocking the Secrets of Mitracarpus Brevis Propagation: A Guide for Your Miniature Meadow
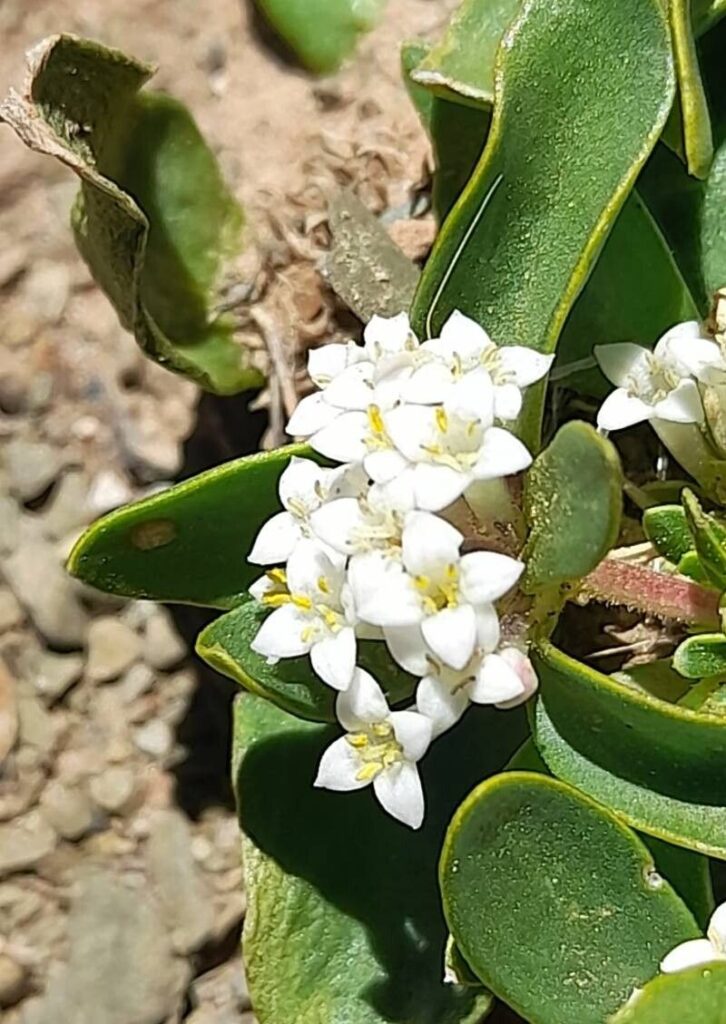
Mitracarpus brevis, while a bit of a mouthful to say, is a charming little plant with the potential to bring a unique touch to your garden. This small, flowering herb, native to regions of South America and now found in various tropical and subtropical climates, boasts delicate white blooms and a resilient, spreading nature. But how do you go about adding this delightful plant to your own outdoor haven? The answer lies in understanding the secrets of Mitracarpus brevis propagation.
Two Roads to Success: Seeds and Cuttings
Like many plants, Mitracarpus brevis can be propagated through two primary methods: seeds and cuttings. Each approach offers its own set of advantages and considerations, allowing you to choose the technique that best suits your gardening style and resources.
1. Sow the Seeds of Success
- Source Your Seeds: Mitracarpus brevis seeds can be a bit tricky to find commercially, so your best bet is to collect them from existing plants. Look for the small, brown seed capsules that develop after the flowers fade. Allow the capsules to dry completely on the plant before collecting to ensure the seeds are mature.
- Prepare Your Seedbed: Choose a well-draining potting mix and fill small pots or seed trays. Lightly moisten the mix before sowing.
- Sow with Care: Mitracarpus brevis seeds are tiny, so sow them sparsely on the surface of the soil. Gently press them down, ensuring good contact but avoid burying them too deeply.
- Light and Water are Key: Place your seed trays in a bright location, but out of direct sunlight. Keep the soil consistently moist but not waterlogged.
- Patience is a Virtue: Germination can take a few weeks. Once your seedlings have developed a couple of sets of true leaves, you can carefully transplant them into individual pots or directly into your garden.
2. Cuttings: A Shortcut to New Growth
- Timing is Everything: Spring or early summer is the ideal time to take cuttings, as the plant is actively growing.
- Select Healthy Stems: Choose healthy, non-flowering stems that are about 3-4 inches long.
- Make a Clean Cut: Using a sharp, sterilized knife or pruning shears, make a clean cut just below a leaf node. Remove any leaves from the lower half of the cutting.
- Encourage Root Development: Dip the cut end in rooting hormone powder (optional but helpful) and gently insert the cutting into a moist, well-draining potting mix.
- Create a Humid Environment: Cover the pot with a plastic bag or humidity dome to trap moisture and promote root development.
- Patience, Once Again: Keep the potting mix consistently moist and wait for signs of new growth, which indicates successful rooting. This can take several weeks. Once rooted, the cuttings can be treated as established plants.
A Few Final Tips for Success:
- Well-Drained Soil is Essential: Mitracarpus brevis thrives in well-drained soil. Whether planting in pots or the ground, ensure adequate drainage to prevent root rot.
- Sunshine is Their Friend: Choose a location that receives plenty of sunlight for optimal growth and flowering.
- Water Wisely: While Mitracarpus brevis is relatively drought-tolerant once established, consistent watering is crucial, especially during dry periods.
Propagating Mitracarpus brevis may require a touch of patience and care, but the rewards are well worth the effort. By mastering these techniques, you can easily multiply your stock of this charming plant, creating a miniature meadow of delicate blooms that will bring joy for seasons to come.