From Seed to Success: Propagating the Tall Rattlesnake Root
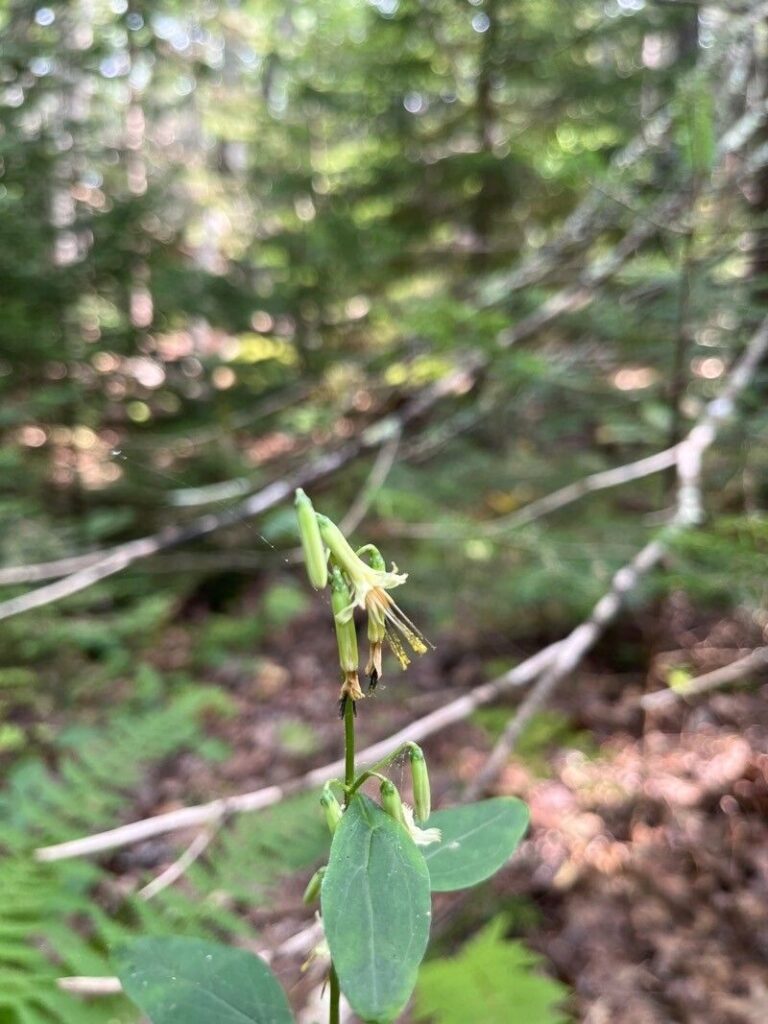
The Tall Rattlesnake Root (Nabalus altissimus) is a stately, charming wildflower native to North America, prized for its striking form and ability to attract pollinators. While you might find it gracing meadows and roadsides, do you know you can bring this beautiful plant into your own garden? This blog post will guide you through the fascinating world of propagating Tall Rattlesnake Root from seed, allowing you to witness its journey from tiny seed to flourishing flower.
Understanding the Basics of Propagation
Propagation refers to the process of creating new plants from existing ones. With Tall Rattlesnake Root, we’ll focus on seed propagation, a straightforward method that allows you to multiply your plants and share the joy with others.
Step-by-Step Guide to Seed Propagation
-
Collecting Seeds: Late summer into fall is prime time for collecting Tall Rattlesnake Root seeds. Look for the mature seedheads – these will be brown and dry, containing delicate, wind-borne seeds. Collect them carefully, and allow them to dry completely in a paper bag in a cool, dry place.
-
Preparing for Sowing: To kickstart the seed’s journey, you’ll need a suitable environment. A seed tray or pot filled with a seed-starting mix is ideal. Moistening the seed-starting mix before sowing is essential.
-
Sowing the Seeds: Sow seeds directly onto the moist seed-starting mix, covering them with a thin layer of the mix. Avoid burying the seeds too deeply, as they need light to germinate.
-
Creating the Right Conditions: Maintain a consistently moist environment, keeping the seed-starting mix lightly watered. Place the tray in a bright, indirect light location, such as a windowsill. To ensure a consistent temperature, consider placing the seed tray in a propagation mat or heated greenhouse.
-
Germination and Patience: Patience is key! Expect the seeds to germinate in a few weeks, depending on the temperature. If the seeds haven’t germinated after a month, it’s possible they need a period of cold stratification, which mimics winter conditions. Place the seed tray in your refrigerator for a month, then transfer it back to a warm spot.
- Thinning and Transplanting: Once the seedlings have developed two sets of true leaves, it’s time to thin them, giving each seedling enough space to grow. As the weather warms, you can transplant your seedlings into larger pots or directly into the garden, choosing a spot with dappled shade and well-drained soil.
Caring for Your Tall Rattlesnake Root
Once established, Tall Rattlesnake Root is generally low-maintenance. Provide sufficient moisture for your seedlings, and they’ll reward you with their graceful forms. Avoid overwatering, which can lead to root rot. Regular fertilization isn’t strictly necessary but can help promote healthy growth, especially during flowering.
Sharing the Joy
With the knowledge you’ve gained, you can now embark on your Tall Rattlesnake Root propagation journey! Witnessing the transformation from a tiny seed to a vibrant plant fills gardening with a sense of accomplishment. And most importantly, don’t forget to share your passion for growing this stunning wildflower by offering your seedlings to other gardeners, spreading the beauty and wonder of the Tall Rattlesnake Root.