Unlocking the Secrets of Nassauvia Axillaris: A Propagation Guide for the Intrepid Gardener
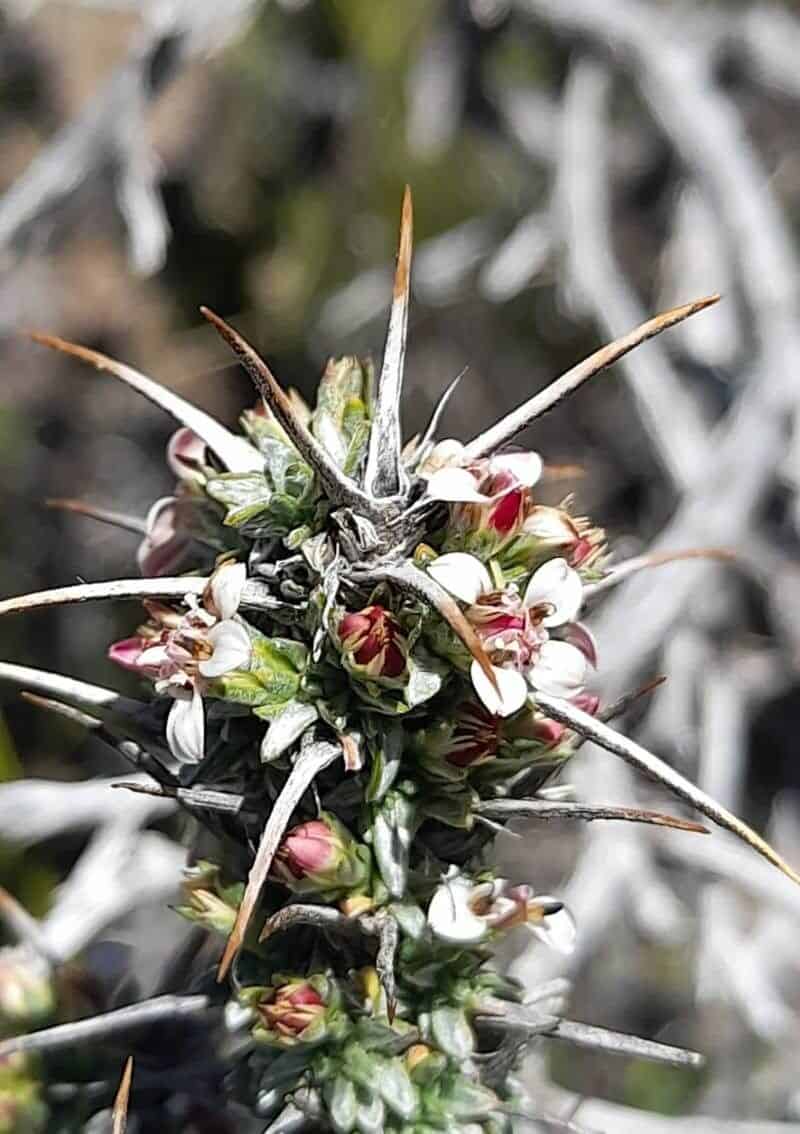
The plant world is full of wonders, and few are as uniquely captivating as Nassauvia axillaris. This intriguing species, with its spiky foliage and captivating blooms, hails from the windswept plains of Patagonia. While cultivating Nassauvia axillaris might seem like a challenge reserved for seasoned botanists, even novice gardeners can invite this extraordinary plant into their own gardens with a bit of know-how.
This guide will delve into the fascinating world of Nassauvia axillaris propagation, equipping you with the tools and knowledge to cultivate this captivating plant at home.
Understanding the Plant
Before embarking on your propagation journey, it’s crucial to understand the needs of this unique plant. Nassauvia axillaris thrives in well-drained soil and sunny conditions, mimicking its natural habitat in the harsh, yet beautiful Patagonian landscape.
Propagation Techniques
There are two primary methods for propagating Nassauvia axillaris:
1. Seed Propagation:
- Source your seeds: Obtaining seeds can be the most challenging aspect. Specialized online retailers or botanical societies focused on alpine or South American flora are good places to start.
- Timing is Key: Sow seeds in late winter or early spring.
- Create a suitable environment: Use a seed-starting mix that provides excellent drainage. Surface sow the seeds, as they require light to germinate.
- Patience is paramount: Germination can be slow and erratic, taking anywhere from a few weeks to a couple of months. Be patient and maintain consistent moisture.
2. Cuttings:
- Choose wisely: Take cuttings from healthy, non-flowering stems in late spring or early summer.
- Prepare the cutting: Use a sharp, clean knife or pruning shears to take a cutting about 3-4 inches long. Remove the lower leaves to prevent rot.
- Encourage root development: Dip the cut end in rooting hormone powder (optional but recommended) and insert the cutting into a well-draining potting mix.
- Create a humid environment: Place the cutting in a propagator or cover the pot with a clear plastic bag to create a warm, humid environment.
- Exercise Patience: Rooting can take several weeks. Check for signs of new growth, and once the cutting shows signs of establishment, gradually acclimate it to outdoor conditions.
Caring for Your New Plants
Once your Nassauvia axillaris plants are established, whether through seeds or cuttings, ensure their continued success by replicating their native environment as closely as possible:
- Sunlight: Provide at least 6 hours of direct sunlight daily.
- Soil: Use a well-draining potting mix or amend your garden soil with sand or grit to ensure proper drainage.
- Watering: Water deeply, allowing the soil to dry out slightly between waterings. Avoid overwatering, which can lead to root rot.
- Fertilizing: Nassauvia axillaris is not a heavy feeder. A light application of a balanced, slow-release fertilizer in spring is usually sufficient.
Reaping the Rewards
While propagating Nassauvia axillaris requires patience and dedication, the rewards are well worth the effort. The unique beauty of this Patagonian gem, with its intriguing form and captivating blooms, will add a touch of the exotic to your garden, reminding you of the incredible diversity of the plant world. So, embrace the challenge, and enjoy the journey of propagating this remarkable species.