Blooming Beautiful: A Guide to Propagating Nemesia Floribunda
Nemesia floribunda, with its charming, petite blooms and vibrant colors, is a fantastic addition to any garden. Whether adorning window boxes, spilling over hanging baskets, or adding a splash of color to borders, this annual delights with its long flowering season. While enjoying the current blooms is a joy, wouldn’t it be wonderful to have these beauties return year after year? Let’s delve into the world of propagating Nemesia floribunda and learn how to make this a reality.
Two Paths to Propagation: Seeds vs. Cuttings
Nemesia floribunda can be propagated through two primary methods: seeds and cuttings. Each method offers its own set of advantages, and selecting the right one depends on your preferences and resources.
1. Starting from Seed: Embracing the Circle of Life
Growing Nemesia floribunda from seed is a rewarding process that allows you to witness the entire lifecycle of the plant. Here’s how:
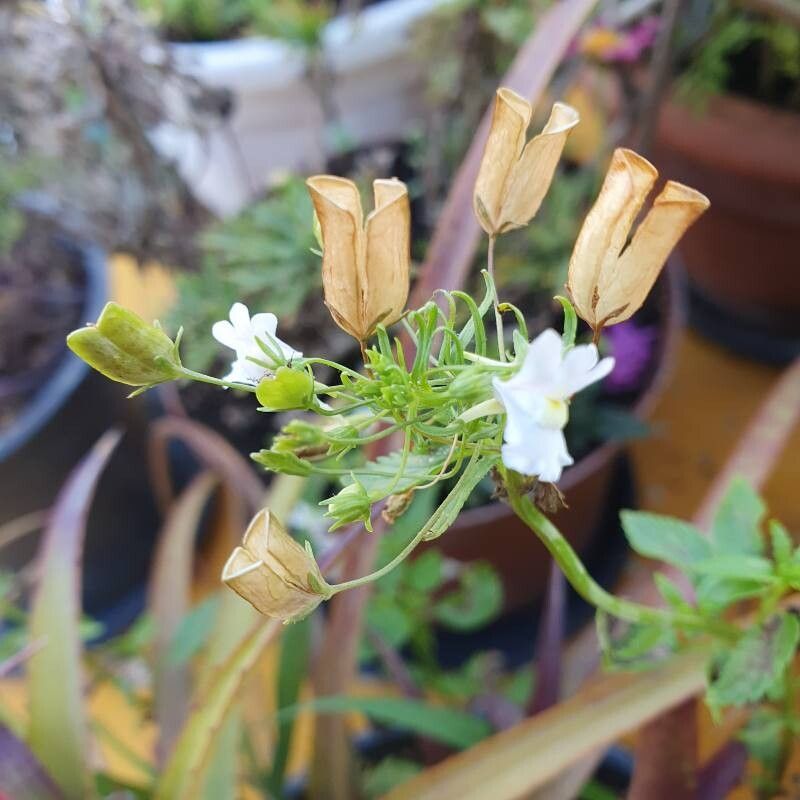
- Seed Collection: As your existing Nemesia floribunda plants begin to fade, keep an eye out for seed pods forming after the flowers wither. Once these pods turn brown and dry, carefully collect them.
- Seed Preparation: Gently crush the dried seed pods to release the tiny seeds within. Allow the seeds to air dry for a few days before storing them in a cool, dark place until you’re ready to sow.
- Sowing Time: You can start Nemesia floribunda seeds indoors 6-8 weeks before the last expected frost in your area.
- Sowing Process: Fill seed trays with a well-draining seed starting mix. Sprinkle the tiny seeds over the surface and lightly press them in, but avoid burying them deeply as they need light to germinate.
- Germination Stage: Keep the soil consistently moist but not waterlogged. Provide warmth and indirect sunlight, and your seeds should germinate within 10-14 days.
- Transplanting: Once the seedlings develop a few sets of true leaves, transplant them into individual pots or directly into your garden after the last frost has passed.
2. Propagation Through Cuttings: Cloning Your Favorites
If you have a specific Nemesia floribunda cultivar with unique colors or characteristics that you adore, taking cuttings is a great way to create genetically identical copies:
- Timing is Key: Choose healthy, non-flowering stems from your plant during the spring or early summer.
- Making the Cut: Using a clean, sharp knife or pair of pruning shears, take cuttings that are about 3-4 inches long. Remove the lower leaves from the cutting, leaving only a few at the top.
- Rooting Hormone (Optional): While not strictly necessary, dipping the cut end of your stems in rooting hormone can encourage faster and more successful rooting.
- Planting the Cuttings: Insert the cuttings into a pot filled with a well-draining potting mix, ensuring the nodes where the leaves were removed are buried within the soil.
- Creating a Humid Environment: Cover the pot with a clear plastic bag or use a propagator to create a humid environment that fosters root development.
- Patience is a Virtue: It typically takes 4-6 weeks for the cuttings to develop roots. Once the roots have established, you can transplant the new plants into larger pots or your garden.
Tips for Success
- Well-Draining Soil: Nemesia floribunda thrives in well-draining soil, so ensure your chosen medium prevents waterlogging.
- Sunlight Requirements: Provide your plants with at least 6 hours of sunlight per day for optimal growth and flowering.
- Deadheading Encourages Blooms: Regularly remove spent flowers to promote continuous blooming throughout the season.
Propagating Nemesia floribunda is a rewarding endeavor that allows you to expand your flower collection and ensure a beautiful display year after year. Whether you choose to start from seeds or take cuttings, following these steps will increase your chances of success.