Taming the Coastal Giant: Propagating Ochagavia litoralis
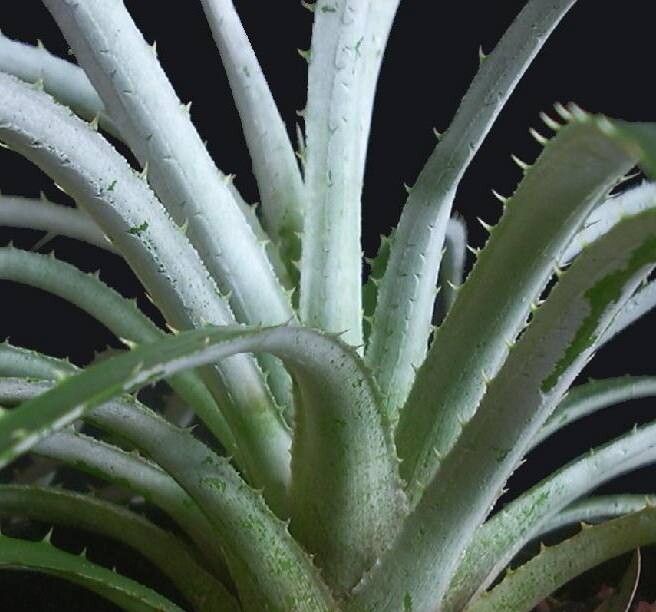
Ochagavia litoralis, also known as the Chilean coastal giant, is a truly captivating plant. With its striking rosette of spiky leaves and impressive size, this bromeliad commands attention in any garden. But did you know that beneath its tough exterior lies a surprisingly approachable nature? Propagating this magnificent plant is a rewarding experience, even for those new to the world of bromeliads.
Unlocking the Secrets of Propagation
Unlike many bromeliads that readily produce pups, Ochagavia litoralis propagates primarily through seeds. While this might sound daunting, fear not! With a little patience and the right approach, you can successfully cultivate these giants from scratch.
1. Gathering Seeds: Ochagavia litoralis blooms with stunning, tall flower spikes that eventually yield seed pods. If you’re lucky enough to have a mature plant, allow the pods to dry completely on the plant before collecting. Alternatively, you can acquire seeds from reputable nurseries or online suppliers.
2. Preparing for Sowing: Patience is key when working with Ochagavia litoralis seeds. They are notoriously slow to germinate, often taking several months. Choose a well-draining seed starting mix, ideally one designed for succulents or cacti. Moisten the mix before spreading the seeds on the surface, gently pressing them down without burying them.
3. Creating a Germination Station: Humidity and warmth are essential for germination. Cover the seed tray with a clear lid or plastic wrap to create a humid environment. Place the tray in a bright location, out of direct sunlight, with temperatures consistently around 70-75°F (21-24°C).
4. The Waiting Game (and Beyond): Now comes the hard part – waiting! Keep the seed starting mix consistently moist but not waterlogged. Don’t be discouraged if you don’t see sprouts immediately. With Ochagavia litoralis, patience is a virtue. Germination can take anywhere from a few months to a year. Once seedlings emerge, gradually acclimate them to lower humidity levels by opening the lid slightly each day.
5. Potting Up and Beyond: When the seedlings develop a few true leaves and a strong root system, they are ready for individual pots. Use a well-draining potting mix and choose pots slightly larger than the root ball. Water well after transplanting and provide bright, indirect light. With proper care, your Ochagavia litoralis will reward your patience, eventually maturing into the majestic centerpiece of your garden.
Patience is a Gardener’s Best Friend
Propagating Ochagavia litoralis is a labor of love, requiring dedication and a touch of green thumb magic. While the journey from seed to mature plant may be lengthy, the reward of witnessing this magnificent bromeliad thrive in your own space is truly fulfilling. So, embrace the challenge, summon your inner horticulturalist, and embark on the rewarding adventure of propagating your very own Chilean coastal giant!