Unlocking the Secrets to Propagating the Fragrant Osmanthus Suavis
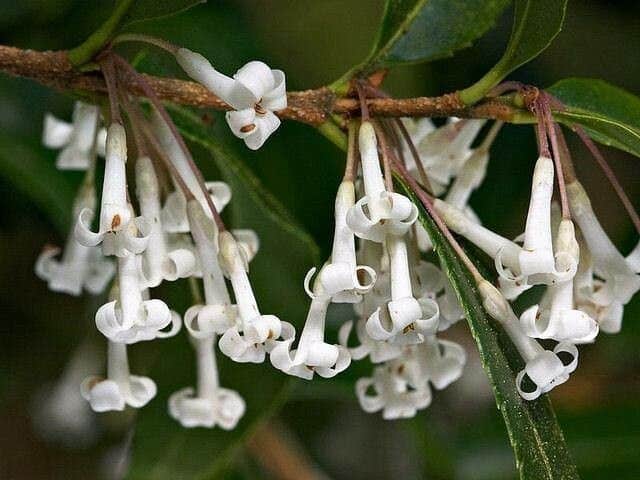
The Osmanthus suavis, with its glossy evergreen foliage and intoxicatingly sweet blossoms, is a treasured addition to any garden. But propagating this beauty can seem shrouded in mystery. Fear not, fellow plant enthusiasts! We’re here to demystify the process and equip you with the knowledge to grow new Osmanthus suavis and share its captivating fragrance far and wide.
Understanding the Propagation Options
While Osmanthus suavis can be grown from seed, germination can be unpredictable and incredibly slow. That’s why taking semi-hardwood cuttings is the most popular and successful method. Here’s a step-by-step guide to propagate your Osmanthus suavis like a seasoned gardener:
1. Timing is Everything:
The optimal time to take cuttings is late summer to early fall, when the plant’s growth is beginning to slow down. This allows the cutting to develop strong roots before winter sets in.
2. Gather Your Tools:
- Sharp pruning shears or a clean, sharp knife
- Rooting hormone powder (optional, but recommended)
- Seed starting mix or a well-draining potting mix
- Small pots or seed trays
- Water
- Plastic wrap or a humidity dome (optional)
3. Selecting the Perfect Cuttings:
- Look for healthy, non-flowering stems that are about 4-6 inches long.
- Make a clean cut just below a leaf node (the point where a leaf or branch grows from the stem).
- Remove the leaves from the bottom two inches of the cutting.
4. Preparing the Cuttings:
- Dip the bottom inch of the cutting in rooting hormone powder (this encourages root development).
- Gently tap off any excess powder.
5. Planting the Cuttings:
- Fill your pots or seed trays with the seed-starting mix, moistening it thoroughly.
- Create a hole in the center of each container with your finger or a pencil.
- Insert the cutting into the hole, burying the bottom two inches of the stem in the mix.
- Gently firm the soil around the cutting.
6. Creating a Humid Environment:
- To increase the chances of success, place the pots inside a humidity dome or cover them loosely with plastic wrap. This helps to retain moisture and create a warm, humid environment.
7. The Waiting Game:
- Place the cuttings in a bright location, but out of direct sunlight.
- Keep the soil consistently moist, but not soggy.
- After 4-6 weeks, gently tug on the cuttings. If you feel resistance, congratulations! Your cuttings have rooted.
8. Transplanting and Beyond:
- Once the cuttings have developed a strong root system, they can be transplanted into individual pots or directly into the garden.
- Choose a location with well-drained soil and partial shade to full sun exposure.
- Water regularly, especially during dry periods.
Patience is Key:
Propagating Osmanthus suavis from cuttings requires patience and a bit of TLC. Not every cutting will take, and that’s okay! Don’t get discouraged. With practice and persistence, you’ll soon be enjoying the sweet reward of new Osmanthus suavis gracing your garden with their beauty and captivating fragrance for years to come.