Unleashing the Cinnamon Fern: A Guide to Propagating Osmundastrum cinnamomeum
The Cinnamon Fern (Osmundastrum cinnamomeum) is a sight to behold. Its vibrant green fronds and striking cinnamon-colored fertile fronds make it a captivating addition to any shade garden. While acquiring one from a nursery is always an option, wouldn’t it be rewarding to multiply your own colony of these ancient beauties? This guide dives deep into the world of Osmundastrum cinnamomeum propagation, equipping you with the knowledge to grow this fern from spores or divisions.
Understanding the Fern Lifecycle: Spores vs. Divisions
Before embarking on your propagation journey, it’s essential to understand the fern life cycle. Unlike flowering plants that produce seeds, ferns reproduce through spores – tiny, dust-like particles found on the undersides of fertile fronds. Alternatively, you can propagate by division, separating mature plants to create new ones.
Method 1: Sporing the Difference
Propagating Osmundastrum cinnamomeum from spores requires patience but yields a truly rewarding experience. Here’s how:
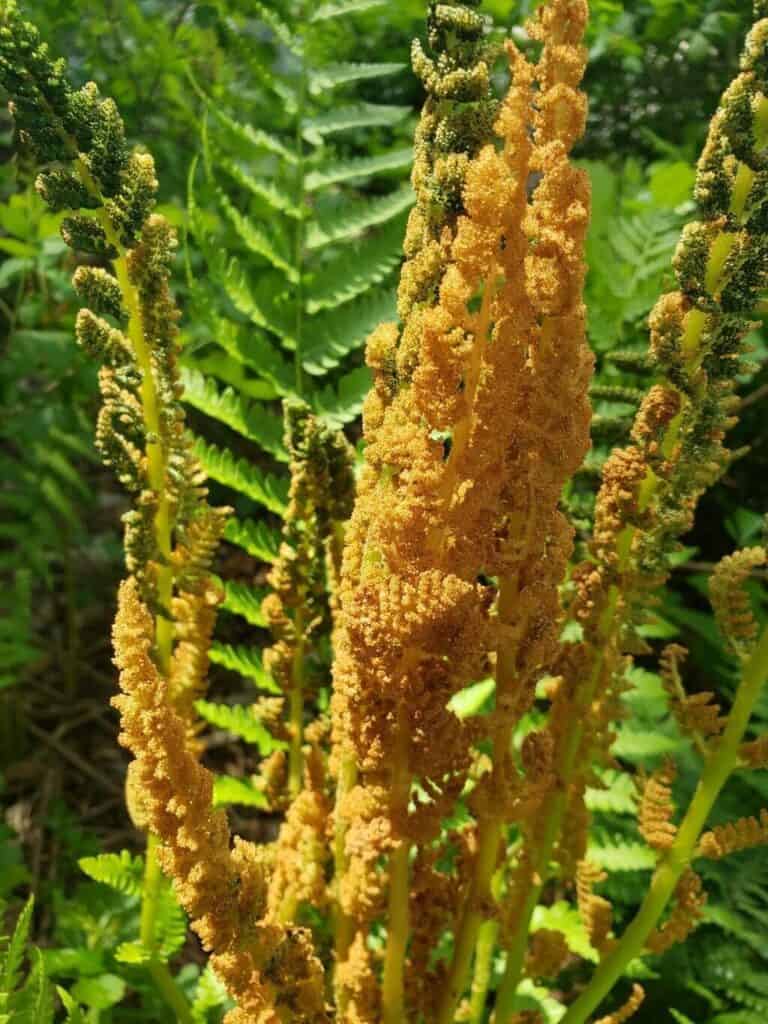
- Spore Collection: In late spring to early summer, identify the fertile, cinnamon-colored fronds. When the spore cases on the underside appear plump, carefully snip off a frond and place it in a paper bag.
- Spore Release: Store the bag in a cool, dry place for a few days, allowing the spores to naturally release onto the paper.
- Sowing the Spores: Prepare a seed starting mix by combining equal parts peat moss and perlite. Moisten the mix and fill small pots or trays. Sprinkle the spores lightly over the surface without covering them, as light is essential for germination.
- Creating a Humid Environment: Mist the surface with water and cover the pot or tray with a clear plastic wrap or humidity dome. Place it in a warm, brightly lit location out of direct sunlight.
- Germination and Growth: Spores can take several weeks to germinate. During this time, ensure consistent moisture and ventilation by misting regularly and briefly airing out the cover to prevent fungal growth. Once the gametophytes (small, heart-shaped growths) appear, continue misting and provide indirect light.
- Transplanting: After several months, small ferns will develop from the gametophytes. Once they are large enough to handle, carefully transplant them into individual pots filled with a peat-based potting mix. Keep them consistently moist and provide indirect light.
Method 2: Division for Faster Results
Division offers a quicker way to propagate Osmundastrum cinnamomeum, especially if you have an established plant. Here’s how:
- Timing is Key: Early spring, just as new growth emerges, is the optimal time for division.
- Dividing the Plant: Carefully dig up the entire fern clump and shake off any excess soil. Using a sharp, clean knife or garden shears, divide the fern into sections, ensuring each section has a good root system and several healthy fronds.
- Replanting: Choose a shady location with moist, well-drained soil. Plant each division at the same depth it was previously growing. Water thoroughly and add a layer of mulch to retain moisture.
Providing the Right Care
Whether you choose spores or divisions, providing the right care is crucial for success:
- Light: Osmundastrum cinnamomeum thrives in partial to full shade.
- Moisture: Consistent moisture is vital. Water regularly, especially during dry periods.
- Soil: These ferns prefer slightly acidic, well-drained soil rich in organic matter.
- Fertilizer: While not mandatory, applying a balanced, slow-release fertilizer in spring can promote healthy growth.
Propagating Osmundastrum cinnamomeum is an enriching experience for any plant enthusiast. With patience, care, and these techniques, you can enjoy these magnificent ferns for years to come, multiplying your own little piece of prehistoric beauty.