Unleashing the Golden Flame: Propagating the Spectacular Peltophorum pterocarpum
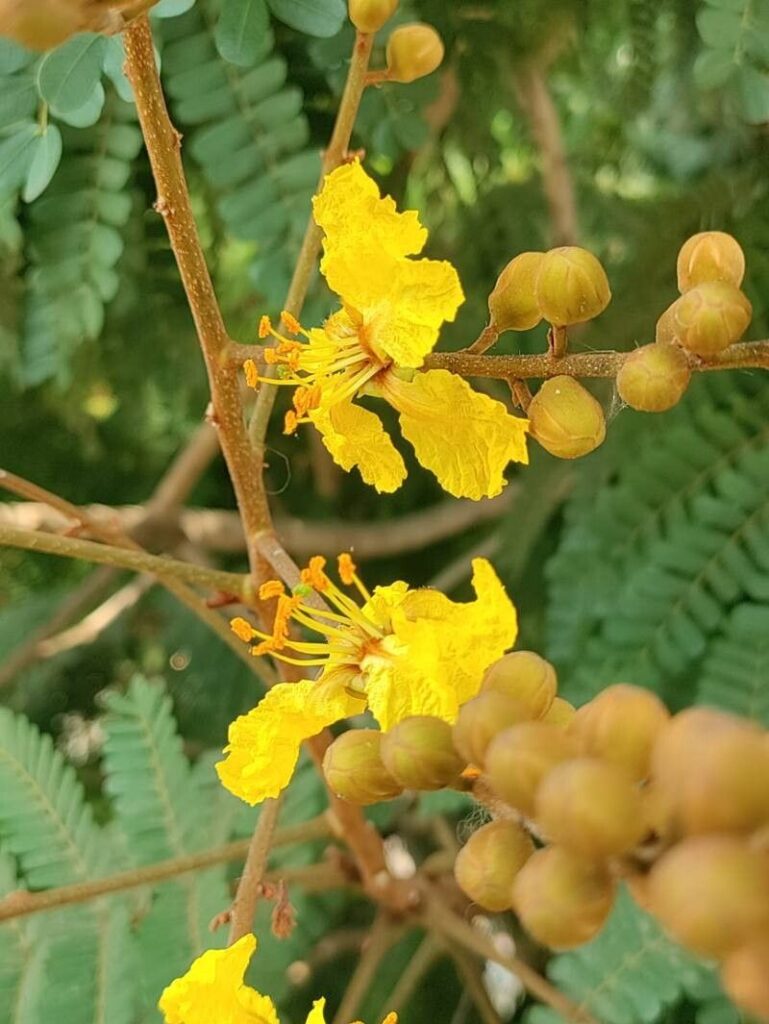
The Peltophorum pterocarpum, more commonly known as the Copperpod, Yellow Flame, or Yellow Poinciana, is a show-stopping tree cherished for its vibrant yellow blooms and feathery foliage. While admiring its beauty in parks and gardens is always a treat, imagine having this tropical marvel grace your own outdoor space! The good news is, propagating a Copperpod isn’t as daunting as you might think. This guide will delve into the two most effective methods:
1. Seed Propagation: Witnessing the Miracle of Growth
Propagating Copperpods from seed is a rewarding experience that allows you to witness the entire life cycle of this magnificent tree.
Materials You’ll Need:
- Ripe Copperpod Seed Pods: These pods turn brown and brittle when mature. Collect them directly from the tree or gather fallen ones.
- Small Container: A seed tray or small pots work best.
- Well-Draining Seed Starting Mix: Choose a mix specifically designed for seed starting.
- Water Spray Bottle: This ensures gentle watering without disturbing the seeds.
- Warm, Sunny Location: Copperpod seeds thrive in warmth and sunlight.
Step-by-Step Guide:
- Extract the Seeds: Crack open the dry seed pods to reveal the flat, brown seeds nestled inside.
- Scarify the Seeds (Optional): To improve germination rates, you can gently nick or scarify the tough outer layer of the seeds using a nail file or sandpaper.
- Soak the Seeds: Place the seeds in a bowl of warm water and let them soak for 24 hours. This helps soften the seed coat and encourages germination.
- Plant the Seeds: Fill your container with the seed starting mix and sow the seeds about an inch deep.
- Water Gently: Use the spray bottle to moisten the soil, ensuring it doesn’t become waterlogged.
- Provide Warmth and Light: Place the container in a warm, sunny location, ideally with temperatures around 75-85°F (24-29°C).
- Patience is Key: Germination can take anywhere from 1 to 4 weeks. Keep the soil consistently moist but not soggy.
2. Cutting Propagation: Cloning Your Favorite Tree
Propagating from cuttings offers a faster route to a mature tree and ensures the offspring retains the characteristics of the parent plant.
Materials You’ll Need:
- Healthy, Semi-Hardwood Cuttings: Select cuttings from the current year’s growth. These should be about 6-8 inches long and have a few nodes (small bumps where leaves emerge).
- Sharp Pruning Shears or Knife: Ensure your tools are clean and sterilized to prevent disease transmission.
- Rooting Hormone (Optional): While not mandatory, rooting hormone can significantly increase the success rate of cuttings.
- Potting Mix: Choose a well-draining potting mix that retains some moisture.
- Water: Keep the cuttings consistently moist.
Step-by-Step Guide:
- Take Cuttings in the Morning: Cuttings taken in the morning tend to have higher moisture content, which aids in rooting.
- Prepare the Cuttings: Remove the leaves from the bottom third of each cutting and make a clean cut just below a node.
- Apply Rooting Hormone (Optional): Dip the bottom inch of each cutting into rooting hormone powder, if using.
- Plant the Cuttings: Insert the cuttings into the potting mix, ensuring at least two nodes are buried.
- Water Thoroughly: Water the cuttings well to settle the soil around them.
- Provide Warmth, Humidity, and Indirect Light: Cover the pot with a clear plastic bag or use a propagation dome to create a humid environment. Place in a warm location with bright, indirect light.
- Monitor for Root Development: After about 4-6 weeks, gently tug on the cuttings to check for resistance, which indicates root development.
Transplanting and Care:
Once your Copperpod seedlings or cuttings have developed a strong root system, they are ready to be transplanted into larger containers or directly into the ground. Choose a sunny location with well-drained soil. Water regularly, especially during dry periods, and fertilize a few times a year to promote healthy growth.
With a little patience and effort, you’ll be rewarded with the awe-inspiring beauty of the Copperpod gracing your landscape for years to come!