Unlocking the Secrets of Picria Fel-Terrae: A Propagation Guide for Lush, Healthy Growth
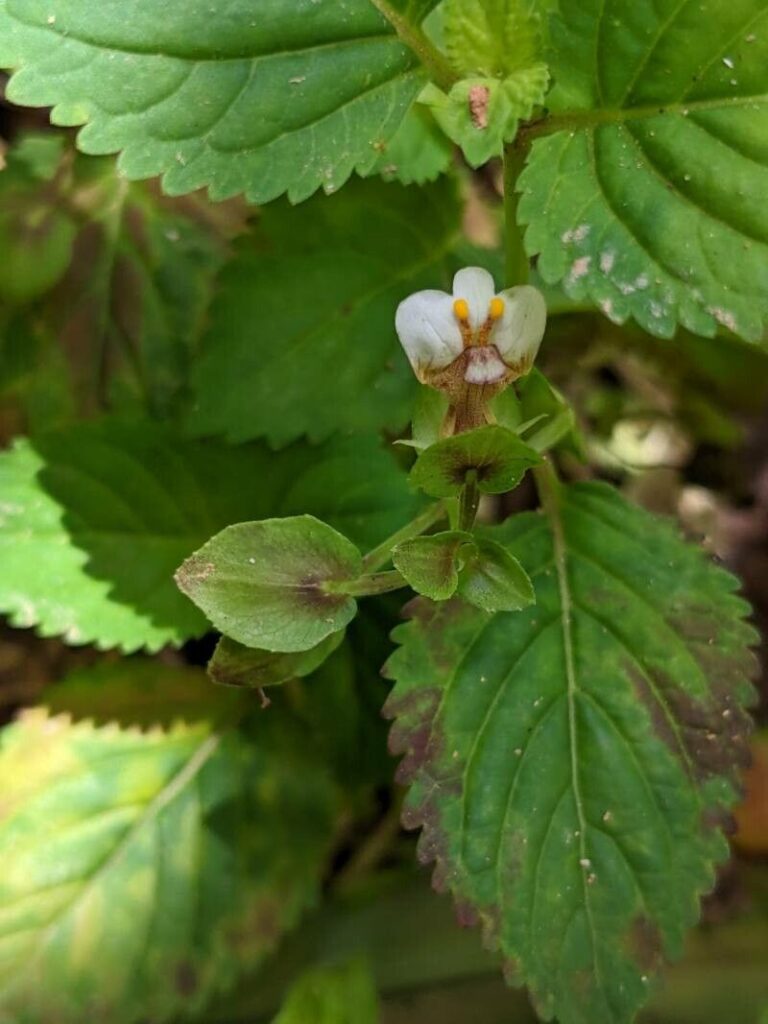
Picria fel-terrae, a lesser-known gem in the plant world, boasts vibrant green leaves and delicate purple flowers. This Southeast Asian native, also known as “karawila,” isn’t just a pretty face. It’s used in traditional medicine for its potential anti-inflammatory and wound-healing properties.
While sourcing Picria fel-terrae can be tricky, propagating this intriguing plant is surprisingly accessible. This comprehensive guide unveils the secrets to successfully multiplying your Picria fel-terrae, ensuring a flourishing collection of this versatile and valuable plant.
Decoding the Propagation Puzzle: Understanding Your Options
Picria fel-terrae can be propagated in two main ways:
1. Seed Propagation:
- The Adventure: This method, while requiring patience, offers the satisfaction of nurturing a plant from its very beginning.
- The Catch: Picria fel-terrae seeds can be challenging to find and germinate. Sourcing from reputable suppliers is crucial.
2. Stem Cuttings:
- The Shortcut: This method delivers faster results and is ideal for replicating the characteristics of a parent plant.
- The Advantage: Stem cuttings generally demonstrate higher success rates compared to seeds.
Seed Starting: A Step-by-Step Guide
- Source your Seeds: Purchase seeds from a trusted online vendor specializing in rare or medicinal plants.
- Prepare the Seedbed: Utilize a well-draining seed starting mix or blend equal parts peat moss, perlite, and vermicast. Moisten the mixture before sowing.
- Sow the Seeds: Scatter seeds sparsely over the surface, lightly pressing them into the medium without burying.
- Create a Humid Environment: Cover the seed tray with a humidity dome or clear plastic wrap to retain moisture.
- Provide Adequate Light: Place the tray in a bright location, avoiding direct sunlight. A grow light can be beneficial.
- Monitor and Maintain: Keep the soil consistently moist but not soggy. Germination may take several weeks or even months. Be patient!
- Transplanting Success: Once seedlings develop a couple of true leaves, gently transplant them into individual pots filled with well-draining soil.
Mastering Stem Cuttings: A Step-by-Step Guide
- Select Healthy Stems: Choose vigorous stems free from pests or diseases. Ideally, select sections with several nodes (small bumps on the stem where leaves emerge).
- Make the Cut: Using clean, sharp pruning shears, cut a 4-6 inch section of stem just below a node. Remove the lower leaves, leaving 2-3 pairs at the top.
- Optional: Rooting Hormone: While not mandatory, dipping the cut end in a rooting hormone can stimulate faster root development.
- Potting the Cuttings: Plant each cutting in individual pots filled with a well-draining potting mix, ensuring at least one node is buried.
- Create a Greenhouse Effect: Cover the pots with a clear plastic bag or humidity dome to maintain moisture.
- Patience is Key: Place the cuttings in a bright location but avoid direct sunlight. Keep the soil consistently moist. Rooting typically takes a few weeks.
- Signs of Success: New growth indicates successful rooting. Once cuttings show vigorous new growth, gradually acclimate them to outdoor conditions before transplanting to larger pots or the garden.
Nurturing Your Picria Fel-Terrae: From Propagation to Abundance
Whether you choose seeds or cuttings, understanding the basic needs of Picria fel-terrae is crucial for long-term success:
- Light: Provide bright, indirect light.
- Water: Keep the soil consistently moist but never soggy.
- Soil: Use well-draining soil.
- Humidity: This plant appreciates moderate to high humidity levels. Misting occasionally or using a pebble tray can be beneficial.
Propagating Picria fel-terrae is a rewarding experience, allowing you to expand your plant collection while learning valuable horticultural skills. By following these techniques and tips, you can unlock the secrets to cultivating healthy and vibrant Picria fel-terrae plants for years to come.