Unlocking the Secrets of Pycnophyllum Molle Propagation: A Cushion of Challenges and Rewards
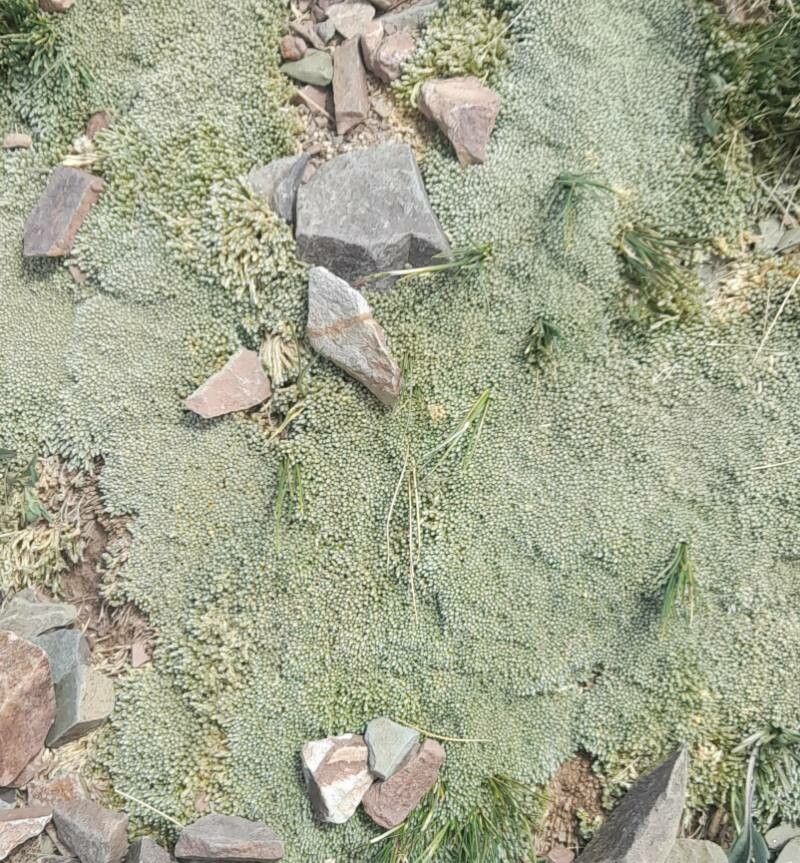
Pycnophyllum molle, with its charming mounds of silvery-green foliage resembling a plush cushion, is a sight to behold. This alpine plant, hailing from the high-altitude regions of the Andes, brings a unique texture and resilience to rock gardens and trough gardens alike. But if you’re hoping to expand your collection of this fascinating species, you might be wondering: how exactly do you propagate Pycnophyllum molle?
The truth is, propagating this Andean beauty can be a rewarding, albeit slightly challenging, endeavor. Unlike common garden plants that readily sprout from cuttings or seeds, Pycnophyllum molle requires a bit more finesse and patience. However, with the right knowledge and techniques, even novice gardeners can unlock the secrets of multiplying their collection.
Propagating through Seed: A Test of Patience
While not impossible, propagating Pycnophyllum molle through seeds is often considered the less reliable method for a few reasons. Firstly, the seeds themselves can be quite difficult to come by. Secondly, germination rates can be notoriously low and unpredictable.
If you do manage to get your hands on some seeds, here are a few tips:
- Cold Stratification: Mimic the natural environment of Pycnophyllum molle by cold-stratifying the seeds. Place them in a damp paper towel, seal them in a plastic bag, and store them in the refrigerator for 4-6 weeks.
- Well-Draining Soil: Use a well-draining seed starting mix to prevent damping off, a fungal disease that can quickly kill young seedlings.
- Patience is Key: Germination can take anywhere from a few weeks to several months. Maintain consistent moisture and a cool environment.
Cuttings: A More Reliable Approach
For many enthusiasts, taking cuttings proves to be the most successful way to propagate Pycnophyllum molle. This method involves taking a small section of the plant and encouraging it to develop roots.
Here’s how to proceed:
- Timing is Everything: The best time to take cuttings is in the late spring or early summer when the plant is actively growing.
- Sharp and Clean: Use a sharp, sterilized knife or pair of scissors to take a 2-3 inch cutting from a healthy stem.
- Remove Lower Leaves: Trim away the leaves from the bottom inch of the cutting to expose the nodes where roots will develop.
- Hormone Boost (Optional): While not strictly necessary, dipping the cut end in rooting hormone can increase the odds of success.
- Plant with Care: Plant the cutting in a well-draining potting mix, burying the node where the leaves were removed.
- Maintain Humidity: Cover the cutting with a plastic bag or humidity dome to create a warm, humid environment.
- Be Patient: Rooting can take several weeks. Check for root development by gently tugging on the cutting.
Beyond Propagation: Caring for your Pycnophyllum Molle
Once you’ve successfully propagated your Pycnophyllum molle, ensure its long-term health with these care tips:
- Well-Draining Soil is Paramount: This alpine plant thrives in well-draining soil that mimics its natural rocky habitat.
- Sunlight is Key: Provide your Pycnophyllum molle with plenty of sunlight to maintain its compact growth habit and vibrant color.
- Water Sparingly: Overwatering is a quick way to kill this drought-tolerant species. Allow the soil to dry out completely between waterings.
Propagating Pycnophyllum molle might require some extra effort compared to other plants, but the reward of watching new cushions flourish makes the journey well worth it. With the right techniques and a healthy dose of patience, you can enjoy the unique beauty of this Andean treasure for years to come.