From Seeds to Blooms: Propagating the Charming Stackhousia Monogyna
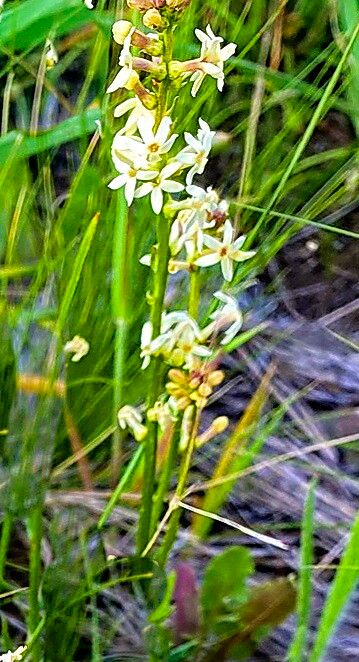
The Stackhousia monogyna, with its delicate, star-shaped flowers, is a plant that can add a touch of ethereal beauty to any garden. But what if you want to share this beauty with others, or simply expand your own collection? The good news is, this Australian native is surprisingly easy to propagate, even for novice gardeners.
Seed Propagation: The Natural Way
Stackhousia monogyna readily self-seeds, a testament to its resilient nature. This makes harvesting seeds a simple affair. Simply wait for the flower heads to dry and turn brown. The tiny, almost dust-like seeds will be contained within the dried pods. You can collect these pods and allow them to fully dry in a paper bag before extracting the seeds.
Sowing Your Seeds: A Simple Guide
Once you have your seeds, you can start the propagation process. Here’s a step-by-step guide:
-
Choose Your Medium: Opt for a seed-starting mix or a well-draining potting mix. For a more natural approach, you can even use a mix of potting soil and sand.
-
Prepare Your Containers: Small pots, seed trays, or even repurposed egg cartons are suitable for starting your seeds. Make sure they have drainage holes.
-
Sow the Seeds: Lightly sprinkle your seeds onto the surface of the prepared mix. Do not bury them deep, as they need light to germinate.
-
Mist Gently: Water the seeds gently using a spray bottle, ensuring the surface doesn’t get disturbed.
-
Maintain Moisture: Keep the soil consistently moist, but not soggy.
-
Provide Light: Give your seeds plenty of indirect sunlight. You can also use grow lights to accelerate germination.
- Germination Time: Depending on the temperature and light conditions, germination can take anywhere from a few weeks to a couple of months.
The Art of Cuttings: Another Propagation Option
While seed propagation is a favorite for Stackhousia monogyna, you can also use cuttings to create new plants.
-
Take Cuttings: Choose healthy, non-flowering stems. Cut a piece about 4-6 inches long, making a clean cut just below a node (where leaves grow from the stem).
-
Prepare the Cutting: Remove the leaves from the bottom inch or two of the stem.
-
Promote Rooting: Dip the cut end in rooting hormone powder to encourage rapid root development.
-
Potting Up: Plant the cuttings in a pot filled with a well-draining potting mix. Water gently and keep the pot in a bright, indirect light location.
-
Maintain Moisture: Keep the soil evenly moist, but not soggy.
- Patience is Key: Root development can take several weeks, so be patient! Once you see new growth, you know your cutting has taken root.
Key Considerations for Success:
- Drainage: Stackhousia monogyna thrives in well-draining soil. Good drainage prevents root rot.
- Sunlight: Provide bright but indirect light for optimal growth, especially during the germination and initial growth stages.
- Watering: Keep the soil moist but avoid overwatering. Allow the soil to dry slightly between waterings.
Rewarding Beauty:
Propagating Stackhousia monogyna is a rewarding endeavor that allows you to enjoy its delicate blooms year after year. Whether you choose the simplicity of seed propagation or the more hands-on approach of cuttings, this delightful plant will bring a touch of magic to any garden. With a little care, you can easily expand your collection and share the beauty of Stackhousia monogyna with others.