Unlocking the Secrets of Propagation: Growing Your Own Tanaecium Selloi
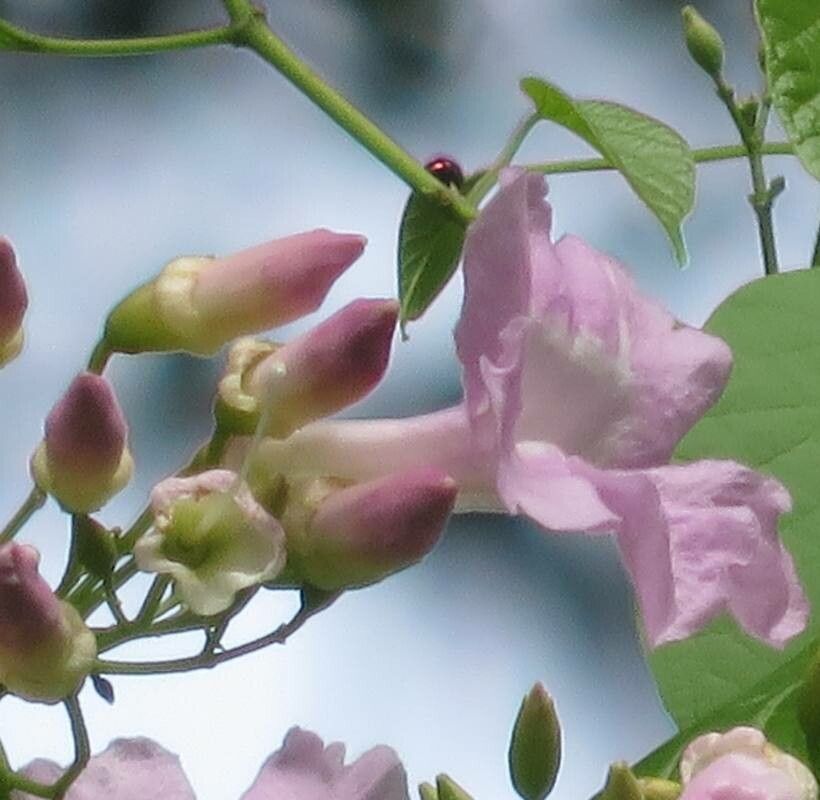
The Tanaecium selloi, with its cascading vines of vibrant green leaves and captivating clusters of bell-shaped flowers, is a true showstopper. Often called the “Brazilian Orchid Vine,” this tropical beauty is gaining popularity among plant enthusiasts. But what if you could share the beauty of your Tanaecium selloi with friends and family? The answer lies in propagation – the art of creating new plants from existing ones.
While it might seem daunting at first, propagating Tanaecium selloi is surprisingly easy. This guide will walk you through three simple techniques, empowering you to create new plants from your beloved vine.
1. The Power of Cuttings:
Taking cuttings is perhaps the most popular and accessible method of propagation for Tanaecium selloi. This involves taking a section of the vine, typically around 6-8 inches long, with at least two sets of leaves.
- Step 1: Preparation: Choose a healthy stem from your Tanaecium selloi and make a clean cut just below a node – the point where a leaf grows.
- Step 2: Stripping and Dipping: Remove the leaves from the bottom inch or two of the cutting. This helps prevent decay. Dip the cut end of the stem in rooting hormone powder. This optional step helps stimulate root growth.
- Step 3: Planting and Care: Fill a pot with a well-draining potting mix and insert the cutting. Water thoroughly and maintain a consistent humidity level. You can cover the pot with a plastic bag or a humidity dome to create a warm, humid environment. Place the pot in a bright location, but avoid direct sunlight.
- Step 4: Patience: Roots typically develop within 4-6 weeks. Once your cutting has established a root system, you can transplant it into a larger pot.
2. The Magic of Air Layering:
This technique allows you to root a new plant while the cutting is still attached to the parent vine. This method is particularly useful for Tanaecium selloi, as it ensures a larger, more established root system before separation.
- Step 1: Choose a Healthy Stem: Look for a mature, non-flowering stem on your Tanaecium selloi.
- Step 2: Girdling and Rooting: Gently scrape a section of bark around the stem, about 1-2 inches long. Make sure the wound is clean and free of debris. Wrap this area with damp sphagnum moss, secured with plastic wrap or aluminum foil.
- Step 3: Patience and Monitoring: Keep the moss moist and ensure the stem remains attached to the parent vine. Roots should develop within several weeks, often visible through the plastic.
- Step 4: Separation and Planting: Once roots have formed, cut the stem below the rooting area. Plant the new plant in fresh potting mix. Gently remove the plastic and moss.
3. The Delight of Seed Propagation:
While slightly more time-consuming, propagating from seed offers the unique experience of watching a Tanaecium selloi grow from its very beginning.
- Step 1: Collecting Seeds: Allow the flowers to mature and dry naturally. Once the seed pods develop, collect them and extract the seeds.
- Step 2: Preparing the Seeds: Seeds need stratification – a period of cold exposure – to break dormancy. Place the seeds in a sealed container with slightly moist vermiculite or peat moss and store them in the refrigerator for 6-8 weeks.
- Step 3: Planting and Care: Fill seed trays with a fine-textured seed-starting mix. Sow the seeds thinly and cover them lightly with soil. Water gently and keep the mix consistently moist. Place the tray in a warm, bright location, avoiding direct sunlight.
- Step 4: Thinning and Transplanting: Once the seedlings have developed a few true leaves, thin them out to allow sufficient space for growth. When the seedlings are large enough to handle, transplant them into individual pots.
Conclusion:
Propagation, whether through cuttings, air layering, or from seed, allows you to share the beauty of the Tanaecium selloi, expanding its presence in your home and beyond. With a little patience and care, you can enjoy the rewarding experience of nurturing new growth and witnessing the captivating charm of this exotic vine. Don’t hesitate to experiment and find the technique that best suits your needs and preferences. Happy propagating!